Dandelion Hills
  • Blog
  • Sales
    • Chickens
    • Ducks
    • Turkeys
    • Eggs
  • About Us
    • Our Story
    • Contact

Broodies, Bees, and More

5/10/2016

0 Comments

 
Picture
A lot has been happening during the past few weeks on our little farm! Here are the highlights:
​
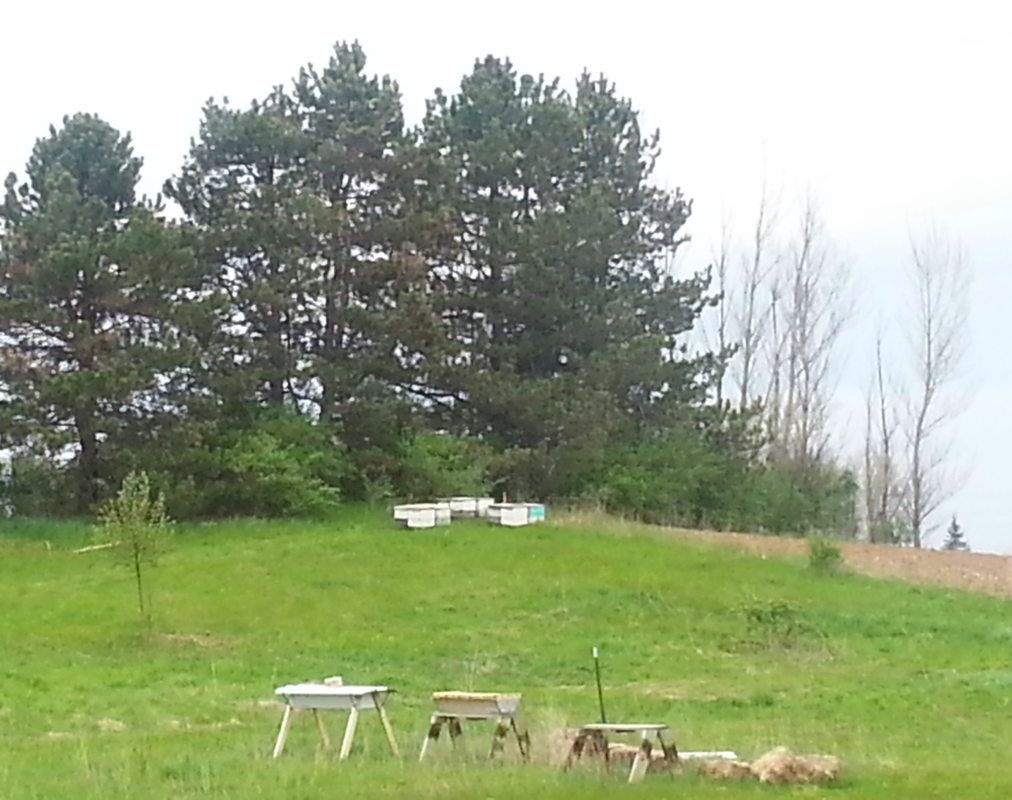
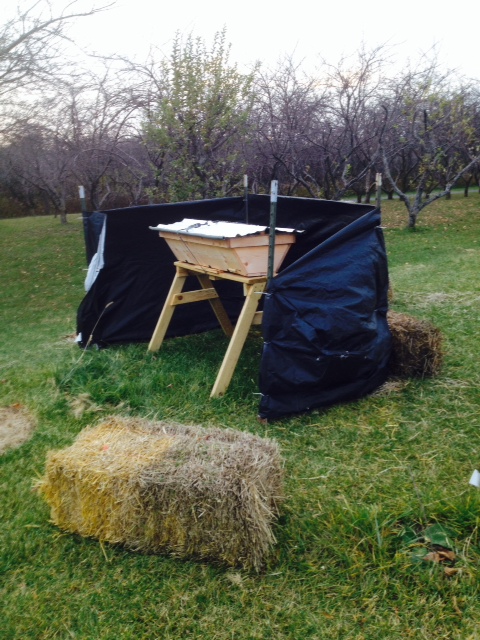
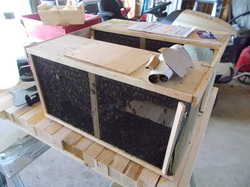
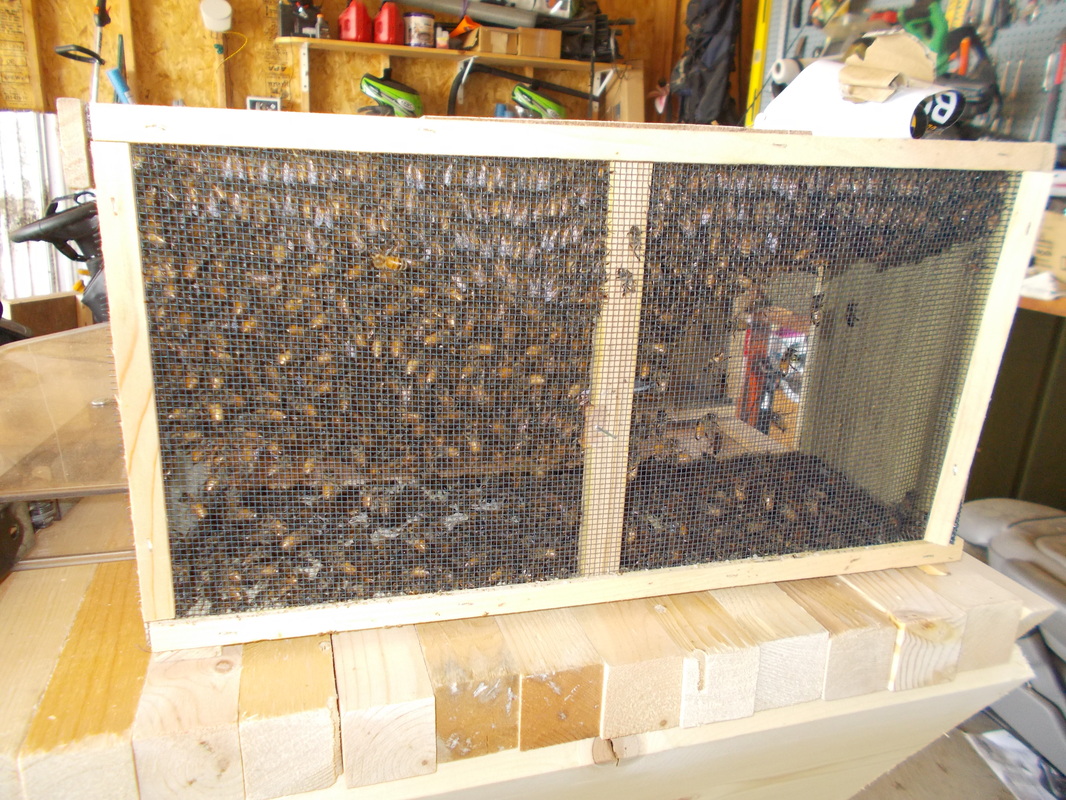
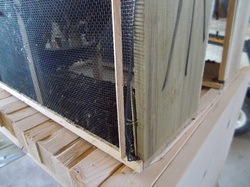
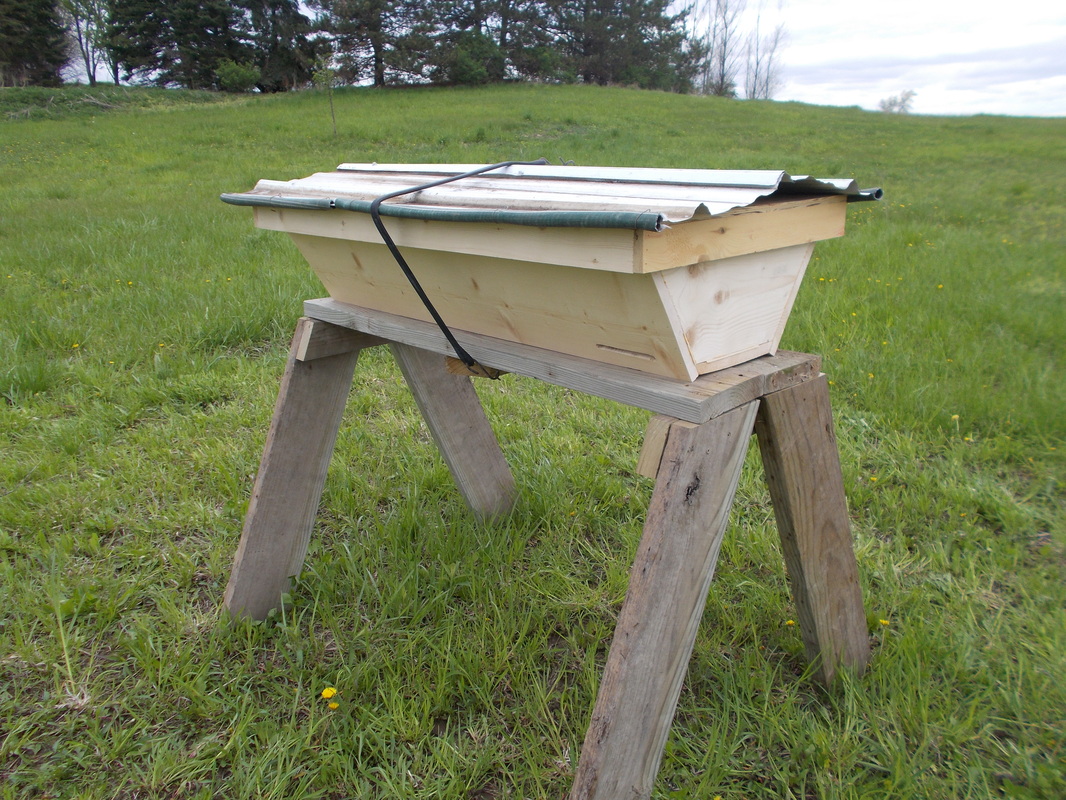
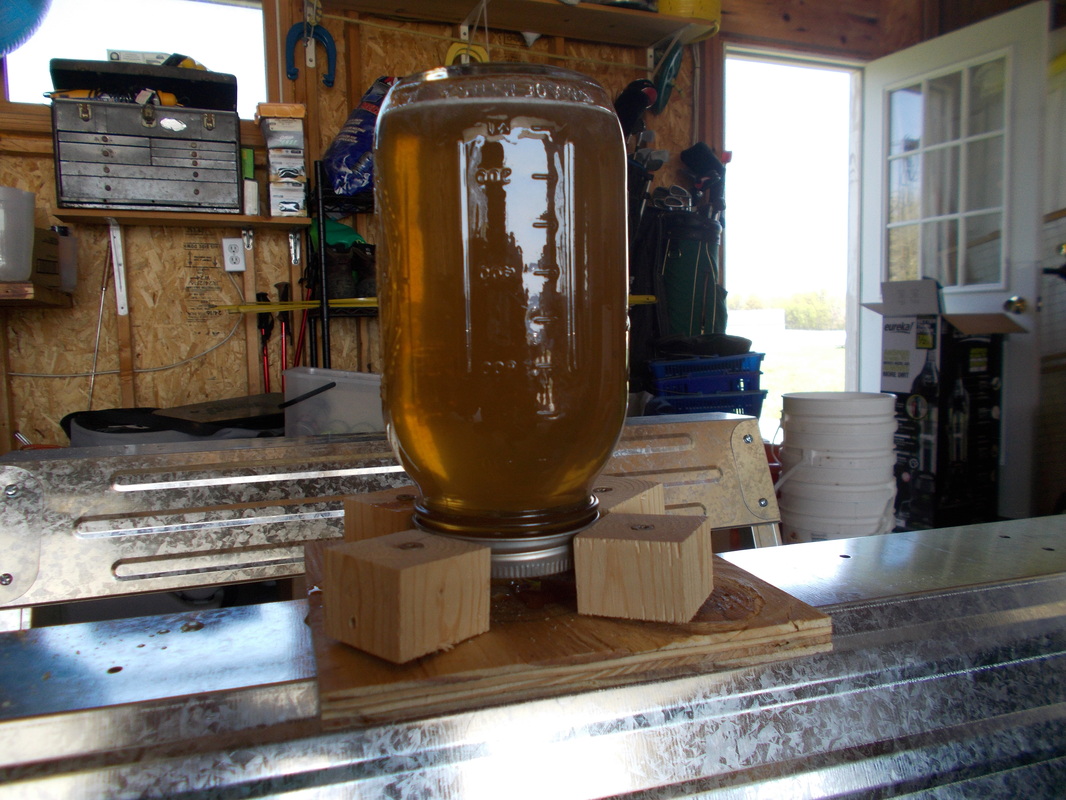
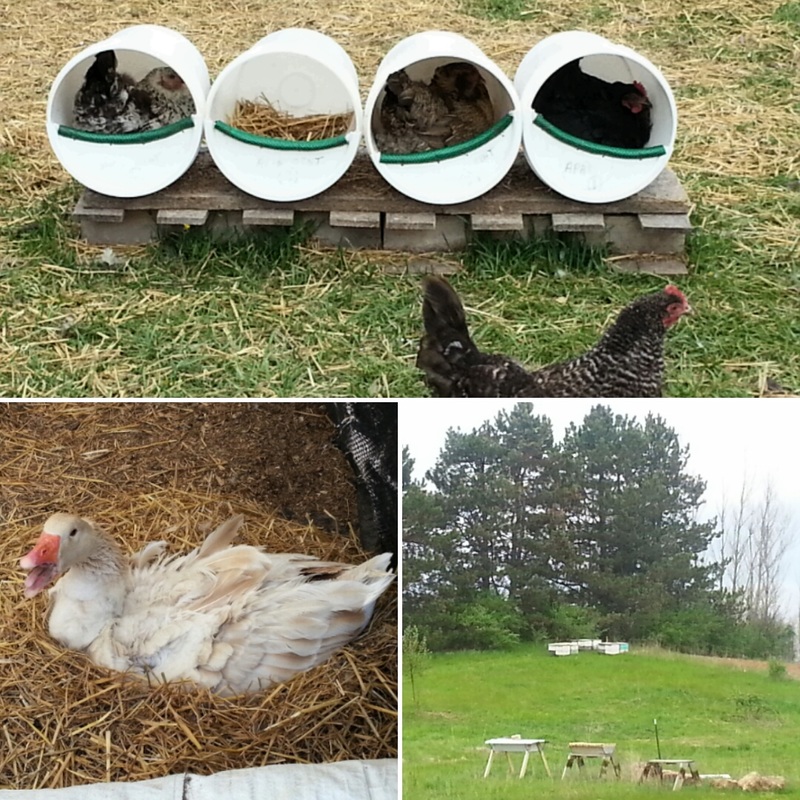
  • ​Bees. After our only top bar hive failed to survive the winter, we made a difficult decision to give beekeeping a break for the year. Then, we were pleasantly surprised when we were contacted by a local apiary to house some of their beehives on our property. The 24 NUCs were delivered today, and are nestled in the back corner of our property. Even though they aren't our bees, it is nice to know that we will still have plenty of honeybees pollinating our flowers and veggies this year, as well as the most local honey possible!
​
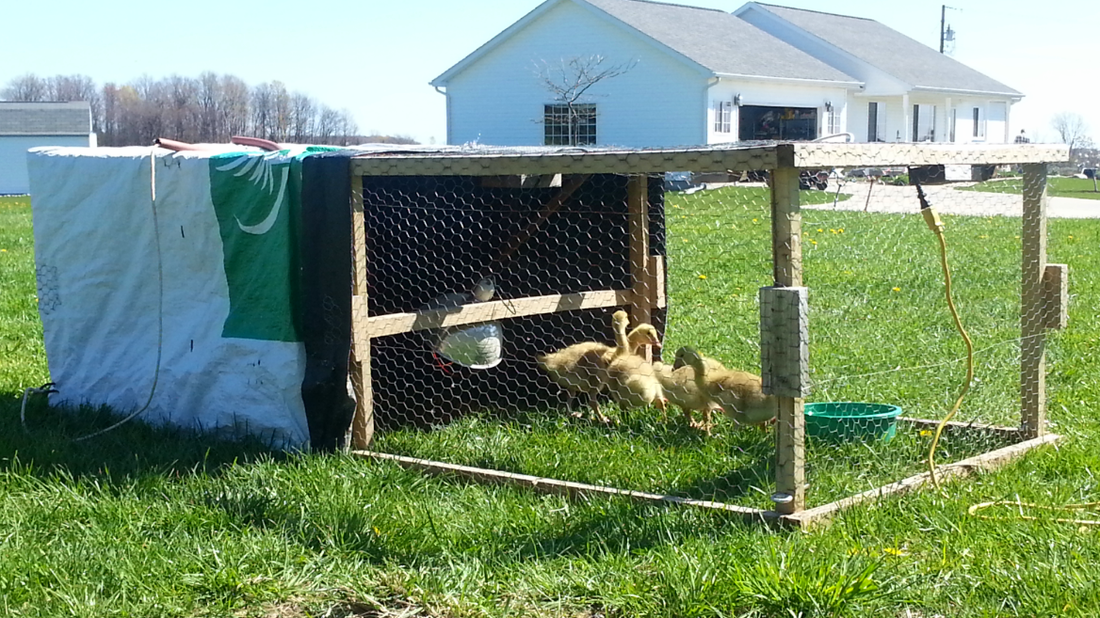
  • Ducks. The 8-week-old Pekin drakes were processed for meat last Friday. We decided to keep three female ducks as egg layers, but they won't actually start laying eggs until July or August. We are also brooding a handful of 2-week old female ducks to keep as layers.

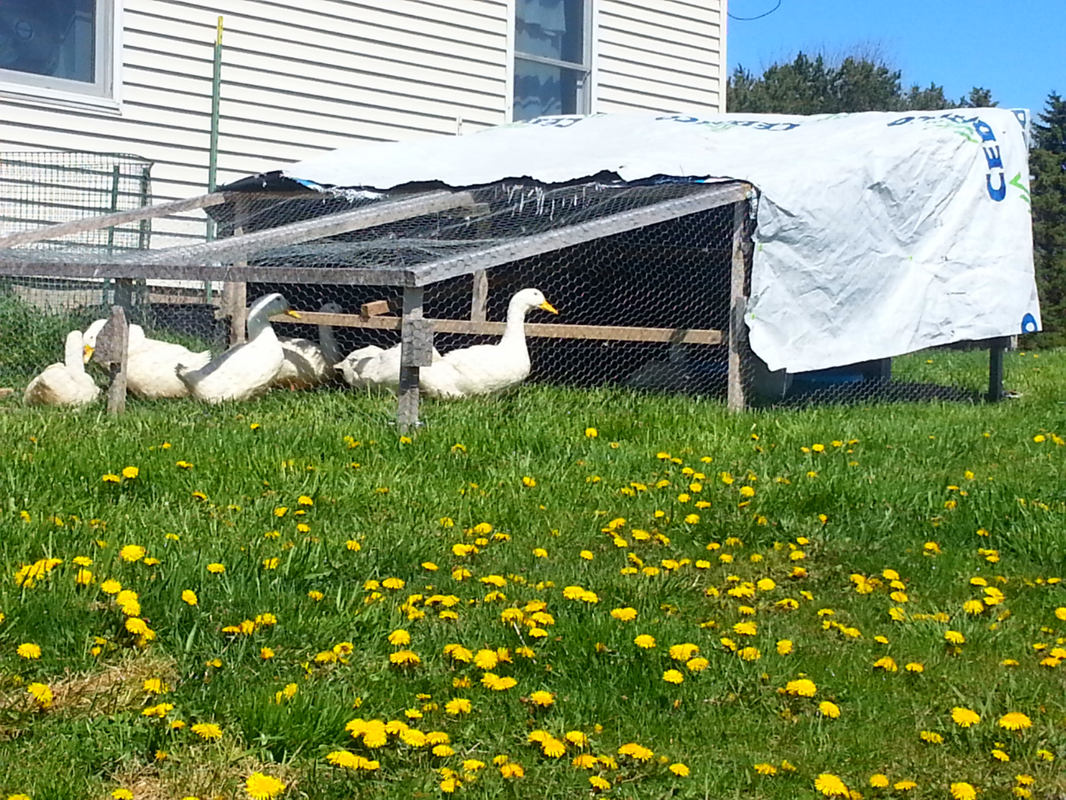
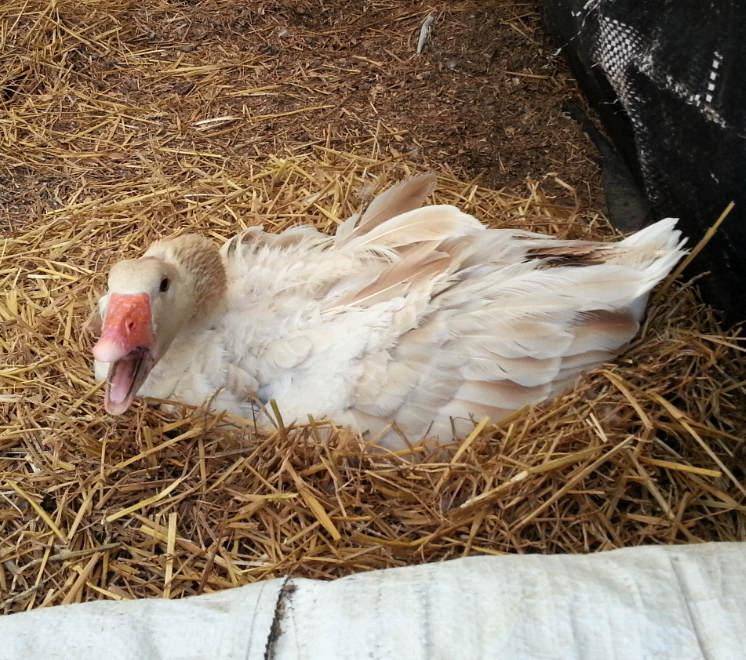
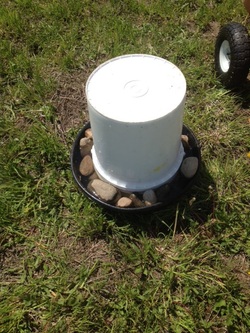
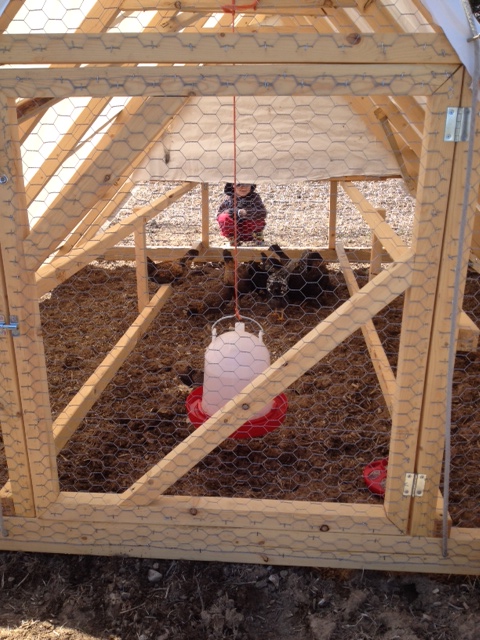
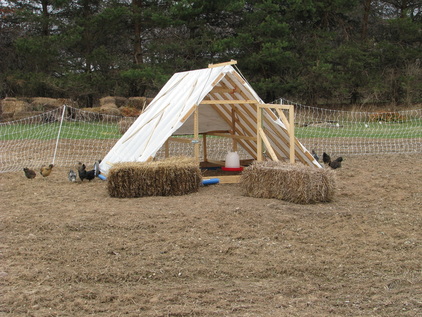
  • Geese. We successfully hatched 6 goslings from the incubator, and they are already 3 weeks old. We moved them out on pasture and they are happily mowing the lawn for us. The 4 goslings mow more grass in the same shelter as 25 chicks! We also have 2 more eggs in the incubator scheduled to hatch late next week. Also, Mama Goose FINALLY decided to go broody yesterday and she is setting on a clutch of eggs. We haven't checked, but there should be 6-7 eggs under her.

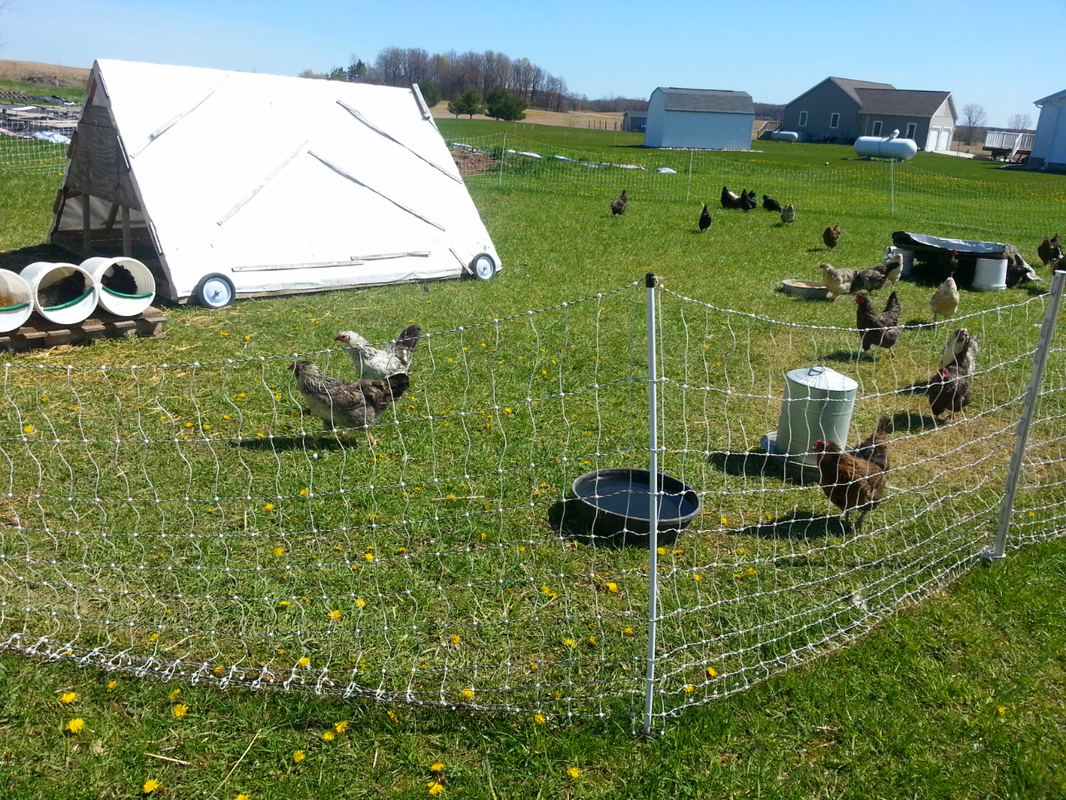
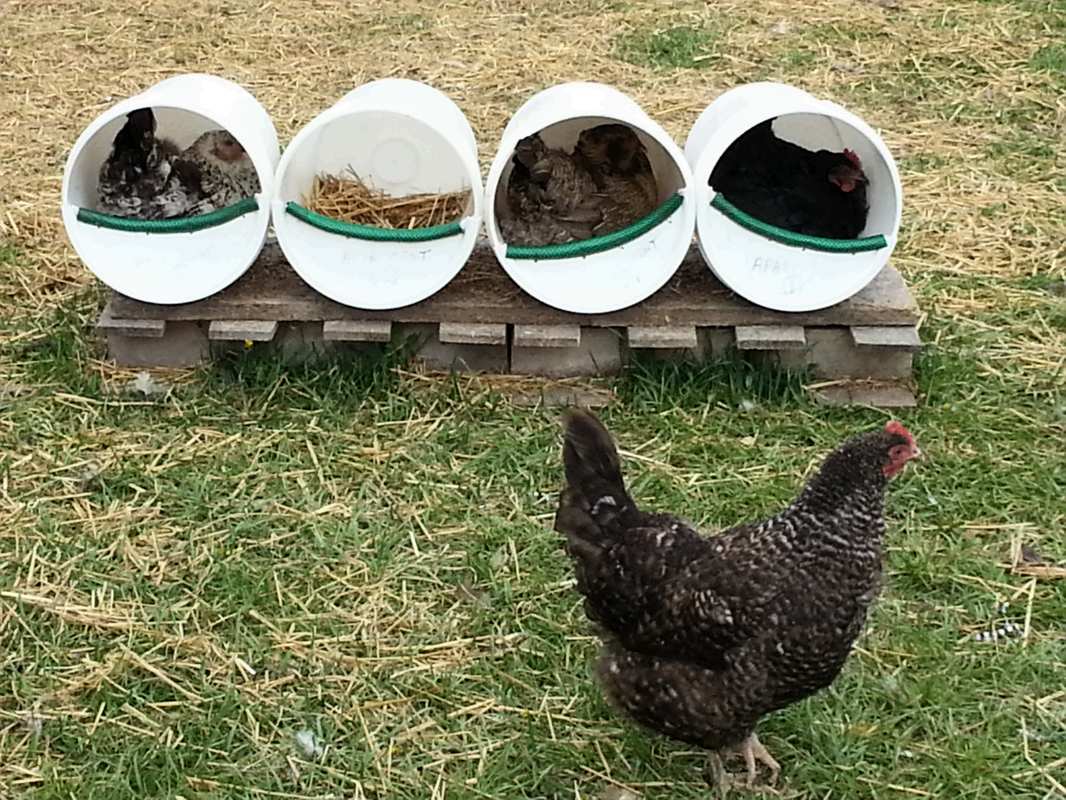
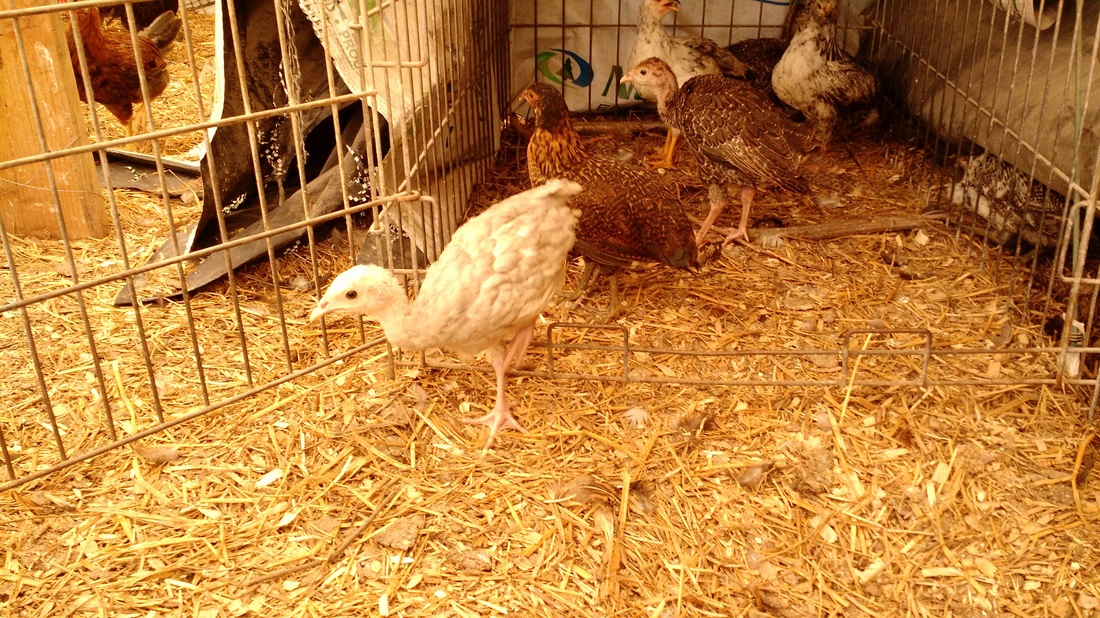
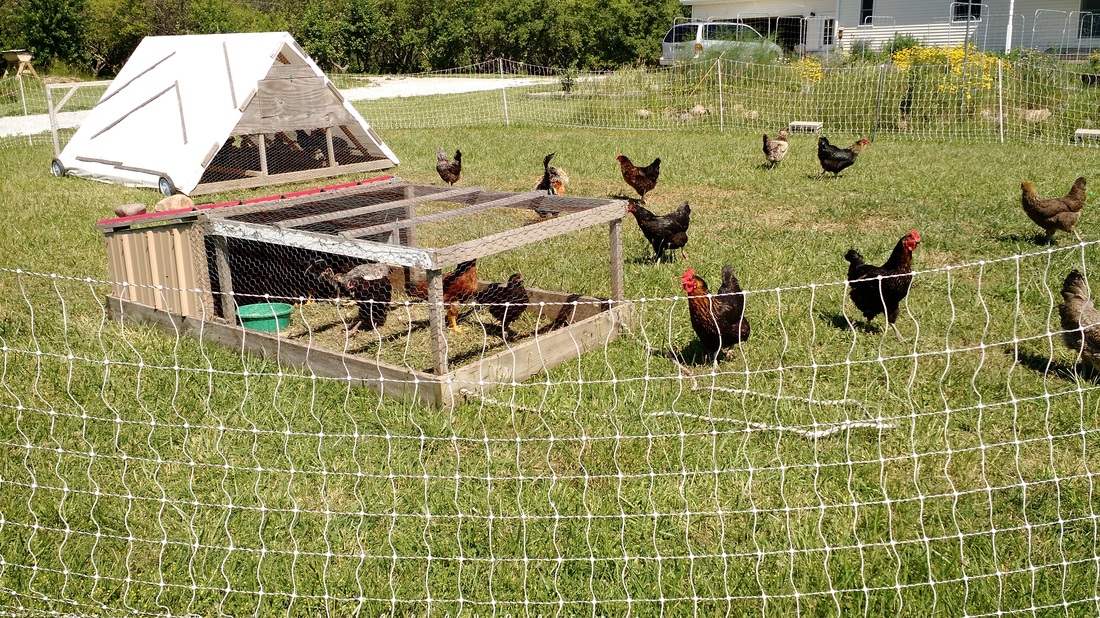
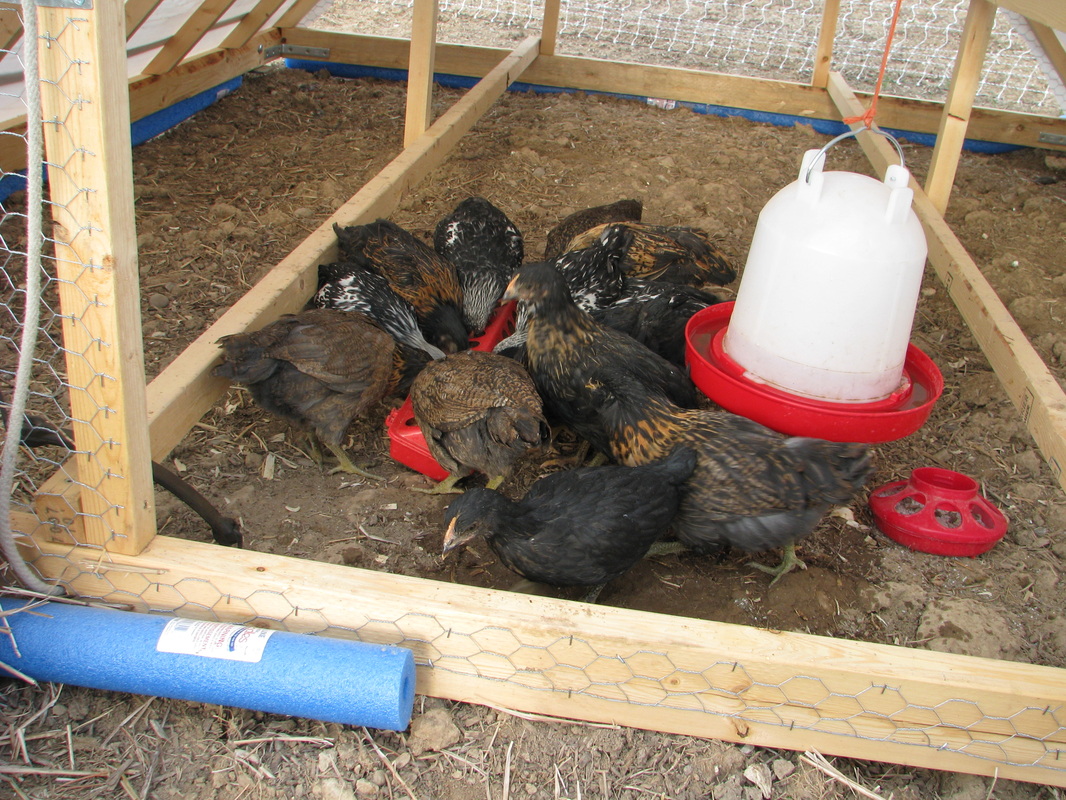
  • Layer Chickens. Due to the late winter this year, the layers had to spend a few extra weeks in their winter coop. But they have finally been moved outside and are happily munching on grass and weeds, digging up worms, and chasing bugs. Yesterday, we also had at least one chicken decide to go broody (on the same day Anastasia the Goose went broody). We should have lots of baby birds wandering around in 3-4 weeks!
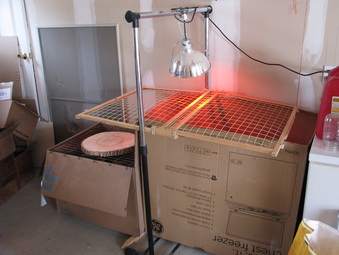
  • Meat ​Chickens. The meat chickens are in the brooder and should be ready to be moved outside on Monday. These birds will be ready to be processed in late June. This is the only batch of meat chickens we plan to raise this year.

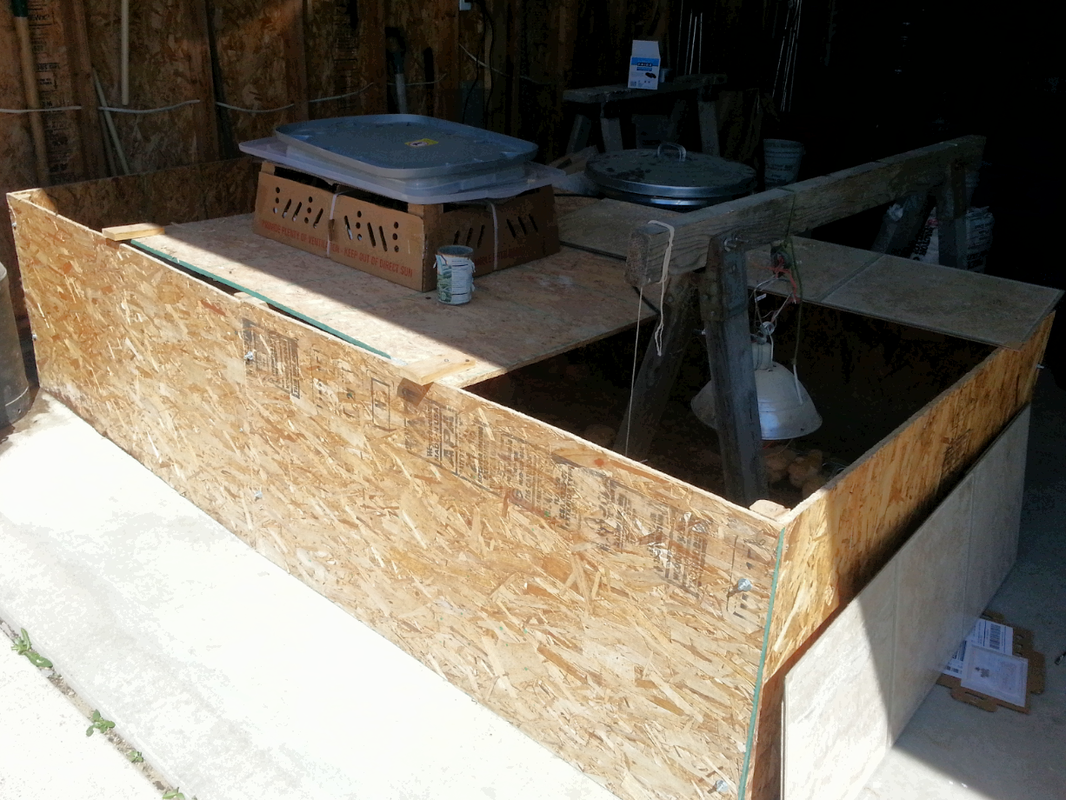
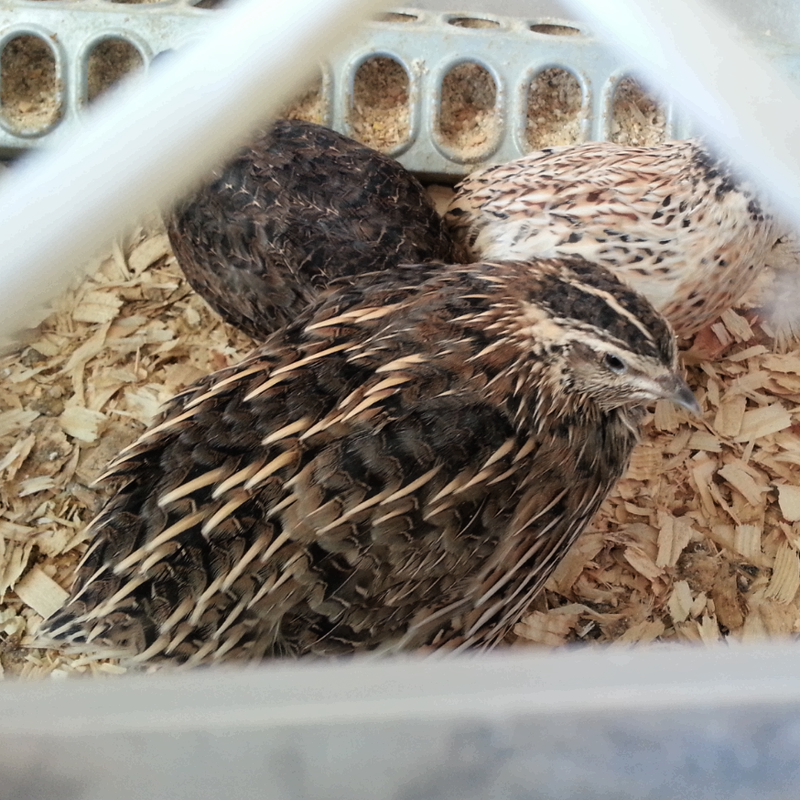
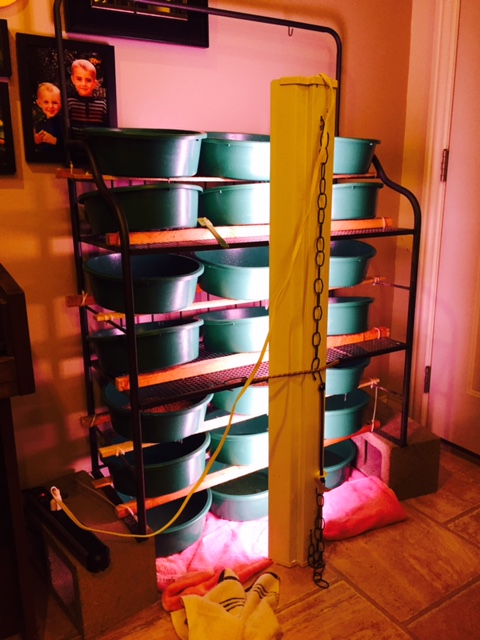
  • ​Quail. We added quail to our bird mix a few weeks ago. Right now we are just eating the eggs, but once we are able to move them out of the garage and house them on pasture, we will have eggs available for purchase. At some point we will also have quail available to purchase for meat.
​​
  • Turkeys. We will be raising traditional broad-breasted turkeys this year instead of heritage breeds (unless specifically requested). We will order the turkeys around Memorial Day, so there is still time to place an order.
0 Comments

So What's Been Going On?

6/11/2015

0 Comments

 
Picture
Bob, the lone Blue Slate turkey poult
Hello everyone, I know you all are still reeling from the Eggsperiment and its surprising findings. Okay, so maybe it was not that epic, but as we speak, egg prices continue to rise and backyard flocks continue to be protected (seemingly) from the flu epidemic. I say that is a success so far and our $4 a dozen eggs, which are the best around, don't seem so expensive now.

While we are lacking pictures on this one, I'll give you a little tour around the farm departments to see what is going on. UPDATE: PICTURES ADDED

Animals - well we bought three pigs - Mike, Todd and Emma - who are residing on a friend's farm. As a boarding agreement, they will get one of the pigs. We just could not put the infrastructure in place to make it work this year. They are doing well and doing what pigs do!  
Also, we are in the turkey business.  We have partnered with our oldest son, Xander, to raise turkeys. At this time we have six poults (i.e. turkey chicks) that are getting bigger every day. We got them out of the brooder and hope to get them on pasture soon. We had two casualties thus far, which is a learning lesson for all, especially Xander. Also, we are hoping we get a few to hatch out the of incubator as we took a gamble on some discounted eggs from a local hatchery. Fingers crossed.

On to chickens, the core of our operation. Egg production is down a bit, likely due to temperatures and feed restrictions. We are still getting 15+ eggs a day. We caught one egg eater and sent her to Stewpot University. We believe we still have another, but just have to catch her. We also had the flock turn on one of their own and beat her to submission. She is out of the flock and recovering, but will likely need another home after she recovers. There are thirteen birds waiting to graduate to the big leagues as they are getting acclimated to the flock in a temporary home in the fence. Eight of these are our first hatchlings, which we have an affinity to for sure. Blackbeard is a particularly handsome fella, but not sure how Charlie will like the competition. The other five are Cuckoo Maran pullets that we purchased to add some color to our egg rainbow. Of the thirteen, we have at least 3 cockerels and possibly 5. 
In the winter coop, we are growing out our second hatchlings. This group consists of 23 incubator chicks, 10 chicks from Momma Sally and 5 Welsummer chicks we purchased, again for color in the egg rainbow. They are still adjusting to the winter coop, but are loving getting out side to be chickens.

We are five weeks into our second batch of meat birds and are looking to have 80+ meat birds ready the second week of July. Hit the SALES button in the upper right corner to order. We sold out of our first batch, which left our freezer a bit bare. We had quite a bit of attrition in our first batch--from 60 to 43 birds--and we haven't quite figured out what occurred.  This batch is doing MUCH better--from 90 to 84 birds--and none lost since put on pasture. Rock on! We will be doing one more batch to finish the third week of September. Let us know if you want to fill up the freezer with delicious chicken before the snow flies.

Apiary
Lots of disappointment here, but also some hope. Really only one hive survived the winter and it is the feral swarm we caught last year. They are doing well and we actually gambled and split them last weekend to get back to two hives. Why only two? Well the two packages of bees we drove all the way to Jackson, MI to pick up did not work out. The first absconded after only a few days and due to illness in our house, we missed their swarm. The other packaged did not thrive and left that hive as well. It is possible the queen did not make it or they did not accept her. We did collect some honey following winter. We are really thinking of getting a mentor to assist us with this.
Front Square Foot Garden
Peas are getting picked, radishes are weird this year, garlic scapes have been plucked, asparagus was delicious, and strawberries are in full flush. Beans are growing and things are looking good overall. Diana just harvested some herbs and has them drying in the house in numerous bunches.

Back Garden (new addition!)
This one has been a work in progress. THE CLAY HERE IS RIDICULOUS! Last year we let it go, seeded it with cowpea, daikon radish, clover and various other things and ran the chickens on it. Afterward, we covered it in degraded hardwood mulch. We tarped it over winter (see the Mark Bernstein post) and it worked great! However, there was no significant change in soil structure. I got out the broadfork, A.K.A. The Wolverine, and went to town on the rows aerating them. This loosened the soil and we planted in the 30 inch rows, similar to Jean Martin Fortier, the Market Gardener.  

Thus far, weeds are coming up, but slowly. The plants are beginning to get over transplant shock and direct seedings are growing well.  A sprinkling of worm castings and drip irrigation line were the final touches. I am adding old paper feed bags in the rows and covering them with mulch to block weeds. This carbonaceous weedblock should break down and add to the garden structure. I plan to add some humic acid to get soil biology going and then play with other amendments (i.e. epsom salt, more mulch, etc.). We are taking a no-till approach to the back garden and will focus our soil structure adjustments on using The Wolverine.

As far as what we have planted you ask? Well we have too many tomatoes for sure, but they are in. Copious amounts of peppers, two types of zucchini, patty pan squash, two types of bush beans, cabbage, broccoli, cauliflower, eggplant, dill, basil and also fennel. I have went hot and heavy on the squash this year. The pumpkin/melon patch should provide great pumpkins for the kids to carve and possibly sell, as well as watermelon and two types of cantaloupes. Then comes the random plantings. I have winter squash and other "viney" things all over the place. Using some of the edges of our property, I have planted a number of varieties to try: butternut, acorn, Sibley squash, long pie pumpkins and some others that I cannot remember the names. I'm sure if there is a bounty of squash, you will see pics in the fall.

Finally, we tried some potato towers.  While I don't intend on building them up, I made three fenced in mounds with straw and some soil and am trying to see if this works to make a good harvest of potatoes. It is an experiment, but we shall see.

Quite a bit going on as you can see. More chicken processing is happening in the near future as batch two comes to a close. Yes, we do process our own chickens. That is another blog post. Let's just say that Diana plays a mean chicken carcass trombone. Until next time everybody!

Trevor
0 Comments

Around the Farm

1/2/2015

0 Comments

 
Here are some random things that have occurred around the farm since the fall update:
Picture
Picture
The eventual back garden, which we will use for most of our annual production, covered with tarps for the winter. Check back for a future post that explains why we are doing this!

The bees are tucked in for the winter. We have our fingers crossed that they will survive since we had so much fun with them this year. What you see is old lumber tarps from a local lumber yard wrapped around steel t-posts with the black side out. The hope is that the tarp will provide wind protection and the black will absorb heat and create a warm pocket for them. The open side is the south side, which is where the sun will be shining from . . . when it is shining.

Picture
Ya for eggs! Production has increased and despite lack of sun and cold temperatures, we will get up to ten or twelve eggs a day; however, this was only after we found their hiding spot. We thought five eggs a day was what we were going to get, until we determined the sneaky hens had a secret stash. We missed a grand total of 39 eggs before we caught on. Needless to say, the dog and new kitty are happy we missed them as we cook the eggs up and off them as a treat every other day or so.

Picture
The new shed was finally finished. Huge thanks to my father and father-in-law for their help. Look forward to a post on this shed where I breakdown why it looks like a baseball field press box and some of the materials we used. We still are missing the double doors, but it's tarped off for the winter . . . and already full!

Picture
The Winter Coop.  Another post will explain what we did here, but we had to have a winter housing option for the hens and this is the direction we went. It is actually a carport with a ventilation hole in the top. The future post will show you the inner confines of this hen sanctuary.

Picture
This is a fodder system for turning dry seed into sprouts for the chickens. In the winter they do not get much fresh food from foraging so we are setting out to make it for them. In doing so, we also hope to save on some feed costs as sprouting seeds can turn one pounds of seed into 5-6 pounds of feed. While still a work in progress, we have successfully increased the yield by at least double. More fine tuning should get us closer to the desirable mark of 4-5 times more feed. The fodder system also greatly increases the nutritional value (vs. feeding seeds) for the chickens. A future post will explain how this came together for ZERO DOLLARS!

More to Come!

Trevor
0 Comments

Update on Beehives and Ants

7/12/2014

0 Comments

 
Ants have started to take over the beehives. At first, we just left them alone because we had been told that bees could deal with ants on their own. Eventually, though, it appeared as if the ants had completely moved in to the west hive. There were ants completely covering a few of the top bars and you could see ant eggs everywhere as well, so we decided to do what we could to help.

First, we simply scraped out as many of the ants and eggs as we could.
Then, we sprinkled cinnamon between the top covers of the beehives and all over the table on which the hives are sitting. Apparently ants abhor cinnamon and will avoid it at all costs, yet it doesn't seem to bother the bees too much.

We also pulled away all the weeds around the hive so that any new ants are forced to enter the beehive by crawling up one of the table legs. We also sprinkled cinnamon on the ground around the legs of the hives and smeared petroleum jelly around each of the four legs of the beehives to trap the ants. Our hope is that we gave the honeybees enough of a head start to allow them to remove the rest (or at least most) of the ants on their own. 

UPDATE: I did not notice any ant activity during a cursory check of the outside of the hives a few days later. (We don't like to bother the bees by opening the hives any more than necessary.)

During the same hive inspection when we were removing ants, we confirmed that we did lose a swarm of bees from the east beehive. A week or so earlier we had seen swarm cells in that hive (capped queen cells that look like peanuts hanging off the edge of the comb). Even though we are still very new to this process, we knew that queen cells in the hive meant that the bees were preparing to swarm. The bees will start to raise a new queen, and before she hatches many bees will take off with the old queen in a swarm until they can find a new home. 

In order to allow the bees to follow their swarming instinct but still capture the bees, we needed to identify the existing queen bee and take her and several other bees to a new hive. Unfortunately, after several hours of searching, we were unable to locate the queen. 

Fast forward to the hive inspection where we removed ants, and it was very clear that the bees had swarmed. There were significantly fewer bees in the beehive and the queen cells were gone. We will give the new queen some time to mate and start laying new eggs before we bother that hive again to check on her progress.

In other news, we did happen to notice the queen bee while removing ants in the West hive, so it was very encouraging to know that we did have the ability to find a queen after all. Below is a picture of us pointing out the queen to our boys.

- Diana
Picture
0 Comments

If You Build It . . . It's Usually Cheaper!

6/8/2014

0 Comments

 
As we endeavored on this farm, one of our goals was to utilize scraps and repurpose random things into the items that we needed.  This hasn't always been the case as some things were needed "right now" and a trip to TSC worked better than trying to build chick feeders at that particular time.  However, looking around there are a number of interesting builds on the property that have come at almost no cost, minimal cost, or at a cost far less than what one could have purchased the originals.  Perhaps some of this post is pride, but also a chance to help others move past their commercial addictions and use their creativity to "MacGyver" things with the items one has at hand.  When you succeed, its quite a sense of accomplishment.
Bee projects were a combination of scrap and new melded together in a good way.  Hives built by myself and my dad this winter.  Bee feeder thrown together with scrap by me.  Tables by me.  Overall, not bad considering bee feeders are $25 and top bar bee hives are much much more!  We love Christy's bees, but we can build the rest!
The above pics are associated with the chicken tractor and the hens/pullets.  A lot of new, but a lot of repurposed and invented things.  Chicken tractor is mostly based upon the plans of Harvey Ussery.  With the brooder, we also repurposed a broken baby gate for a lid and the other lid was a divider from a dog kennel.  Not pictured, but I just made a chicken feeder with a "found" bucket that I drilled holes in the bottom and then glued that to the bottom of a cheap laundry basket with the top 3/4 cut off.  It looks similar to this, just without a garbage bucket, but a standard five gallon bucket.
More chicken stuff thrown together at the last minute . . . the best way!
Broiler pen and accessories.  Pen frame was all new, treated wood and new screws.  Some pics of construction.  Most of it was 1" 2x6s that were ripped.  Found some plans online for Salatin-style pens and made it 6' x 12' instead of 10' x 12'.  Framing was pretty much to plan.  Chicken wire was scraps and a roll found in under the work bench at my dads.  Steel was leftover from a building and was free!  Used leftover screws to connect it together, so that was good.  I have this pickle jar full of extra screws that finally came in handy.  Small changes is the framing under the door for stability and added another stabilizer beam on the back to make the steel sturdier.  Salatin-style pens sit flush on the ground and require a dolly to move.  These are often made of steel tubing like this.  While I'm sure his is very sturdy, why not repurpose a seed rack.  HUH?  Well, we took a leftover seed rack, cut off one set of legs on back, found a steel rod that went through some old lawnmower deck wheels and wired that on for now.  Then, we smashed the remaining feet flat for ease of sliding and added buffers to keep the pen off the wheels.  Frankly, we didn't think it would be sturdy enough.  WRONG!  It works like a charm.  This was definitely a Trent Grice creation.  The last pic is our broiler feeder.  We cut some scrap tile and nailed it to a leftover, weathered deck board, added scrap for a handle.  It needs stabilizer feet, which I was going to do before my foot exploded.  However, what do you use for end caps?  Why empty worm dishes of course.  They fit perfectly in the tile and slid nicely into the groove.  This a cool build for sure.
Picture
This looks like a pile of rocks, which it is.  However, I'm excited for this one.  This is the foundation for our future shed.  The stones are the limestone strippings from my father-in-law's driveway after he had it flattened in preparation for his asphalt driveway.  I also got three other loads on my driveway to help some trouble spots.  While this is cool, I'm more excited for the shed that will be built.  Walls are expected to be old plant display tables, siding will be leftover steel siding/roofing, base beams are treated 4x6's that are laying around my dad's place. We will try to use other "found" stuff as well as we search for leftover windows, doors, etc.  The plans are in my head, but hopefully on this foundation by the end of the year.  The shed in the back was just saved from my brother-in-law's place as he almost tore it apart for scrap.  Not sure what we'll do with it yet, but it's still good and sturdy.  I guess it's like 40 years old.  It was pretty easy getting it on the trailer.  I sat in the hammock and watched my dad and brother-in-law do it.  I had to keep my foot up.  What did it cost?  Sounds like it may cost us some chickens.

Picture
I have a post on the "hugel" mound, but this is also one of the cool builds on the property.  I was going to dig this by hand, so I'm glad I used the tractor when it was here.  The woody material is brush and tree branches we had for free.  Top soil was originally in the previous owner's raised bed garden that I forgot about and the mulch top layer is free wood chips from tree trimmers.

While this is a small breakdown of some of the stuff that we are doing on the farm, I also shared this to show that if you look around, most anybody can get started on projects.  We don't need to go and buy everything.  Sure, not everybody has a bunch of tools or woodworking know how, but the worst thing you can do is not try to build it.  You learn a lot during the process.  I look forward to "MacGyvering" more stuff as we go along

- Trevor
0 Comments

20,000 New Residents on the Farm

6/8/2014

0 Comments

 
Picture
Our bees arrived!  On May 19th our 20,000 new residents arrived to the Post Office.  Numbers looked good as there were less than an inch of dead bees on the bottom of the boxes, meaning they made it well. Some death is expected due to short life cycles of bees.  Our plan was to keep them in the garage and place them in the hives at the end of the day to help ensure that they will stay in their new homes, as opposed to swarming off.  

Picture
Note, we did place a trap hive on the roof of the house just in case they decided to leave and provide another place for them to go on the property.  Like I said, this was the plan.

Picture
Picture
Shipping led to a small opening on the one hive that became apparent in the car with three escapees. Considering this, we still decided to wait until the afternoon, but walking into the garage midday changed our mind. The increasing temperature increased their activity and hundreds of bees were loose, so it was go-time for putting them into the hive.  Below are our top bar hives.  My dad and I made them in the winter out of new pine boards for the frame and as much scrap wood as we could find for the top bars.  In the one picture, you can see the quarter round that we attached to the bars as recommended in the book Top Bar Beekeping by Les Crowder.  We think this was a good idea, as we will explain later.  The tables were made about a month or so ago out of old raised bed gardening boxes.  Once we switched from treated to untreated wood, some of these boxes became obsolete.  So I repurposed them into a beehive table.  Notice the bungee cord wrapped around, which holds on the lid and holds the hive to the table.  

I also made some sugar water feeders to place in the hives initially to provide a food source.  Just using some scraps I screwed some pieces of the same width on a scrap piece of plywood and just far enough apart to hold an upside-down mason jar.  Picture shows a quart jar, but that was too big and was replaced with a pint jar in each hive.  I just punched a few holes in the lid so the bees had access. Sugar water was 1-to-1 sugar and water and we filled them up again after two weeks.  After four weeks, we will remove them from the hives.
The above video portrays us opening the second shipment box of bees, taking out the metal sugar water can, removing the queen cage and taking out the cork holding the queen inside.  Had I done this correctly, there would have been some "candy" there between the bees and the queen to help get them acclimated to each other.  However, unbeknownst to me the queen cage had two ends so I just threw her to the wolves.  Thankfully, they were in shipment process for awhile so they already got acclimated to her, as evidenced by the status of our hives now.  At least we hope, because we have still yet to find the queens, but the hives are doing well.  After removing the cork I pinned the queen cage to one of the top bars.
Picture
The second video shows us "bonking" the bees to the bottom of the hive and then literally pouring them into the open space.  At this point, replace the top bars and roof and we were done.  To the left is the bee waterer I made.  Feed pan from TSC, bucket we used for getting maple syrup earlier in the year and rocks around it.  Bees need water and we do not have standing water on our site, so the waterer was essential.  We don't see them using it, but it's there if they need it.  The rocks are to provide a standing spot for them to drink.  Without a landing spot, the surface tension of the water could grab them and pull them in and drown them.  Below is a video of the hive entrance after we put the lid on.

The above pics are shots from our first hive check after about 6-7 days and then a second check a week after that.  The video below is during our first hive check.  Very stoked to see the bees making A LOT of comb, looking good and going straight.  This is the supposed benefit of the guides on the top bars with the quarter round and it looks like it works!  The second hive check showed capped comb, which is very good.  Not sure what they are capping yet as we are still novices, but we hope its brood - eggs and growing bee larvae.

- Trevor
0 Comments

Spring is finally here

4/23/2014

0 Comments

 
Picture


The asparagus spears made an appearance last weekend.

Man was it nice to have the chicks in the house, plus it helped keep them warm.  Well, that was until we introduced their dust bath. This led to a room in the house that was literally uninhabitable for two weeks.  At four weeks we moved the chicks to the garage and were left with the following devastation.  Notice the layer of dust on our exhaust fan. Now, imagine that on everything in the room.  Gross!  What did we learn, chicks in house = okay.  Chicks in house with dust bath = NO GOOD!
Picture
Picture
Picture

Here is the brooder in the garage. The chicks were not happy with this transition, but they did adjust to the colder temperatures. However, the thing we think made them the most unhappy was the ever-increasing size of fifteen pullets and the static size of the brooder duplex.

Picture
Picture
Picture
Picture
Following Harvey Ussery's plans for his chicken tractor the above contraption was constructed and covered with old greenhouse plastic. It rolls well and moved rather easily to the back garden. Here, we started the chicks outside so that they can help to prepare the beds for planting by eating up bugs and weed seeds. We kept them in the tractor for two days to establish this as their home. Now, they roam free for most of the day in their "pasture."  

Picture


The "pasture" for the chicks is established by 160 feet of electronet fencing from Premier 1. It is charged by a Patriot fence charger connected to an old lawn mower battery. While initially left outside, we decided to put it in a battery box to protect from the elements. We used some scrap wood to create a brace for the solar charger. This charger is a 1.5 Watt solar charger from Harbor Freight. The hope is that this will charge the battery in line with usage for the fence to create a continuous use system.

After a field trip to Battel's Sugar Bush farm, we were inspired to tap a few maple trees on family property for the first time ever. We used a total of 7 taps on 3 Silver Maples, and in just a few days got roughly 30 gallons of sap, boiling down to almost one gallon of syrup. We started with a rough attempt with old tubing and Hawaiian Punch bottles, then upgraded to multiple taps into buckets, which worked fairly well. However, next year we are planning on using more flexible tubing with appropriate fittings and doing more trees. Also, figuring out how to boil the sap down by open fire would help save on using propane and be more sustainable.
Picture
Picture
Picture
Picture
Picture
Most of the below damage was done on purpose and not some freak spring tornado. Our neighbor graciously agreed to allow us to "adopt" some apple trees from her retired apple orchard, so we heavily cut back several branches and are currently working on raking up all the leaves and apples to compost for our gardens.  
Picture
Picture
We have been behind schedule with planting already, thanks to the cold and/or rainy weather and waiting on soil amendments, but we have begun planting peas, broccoli, carrots, onions, cauliflower, spinach, and several varieties of flowers. We prefer to direct sow whenever possible, and will be experimenting with direct sowing luffa gourd, tomatoes, peppers, and other plants traditionally grown from transplants. More on this later. 

We also received our first plants in the mail this weekend--hardy kiwis,  We put those in pots for the time being and placed them into the greenhouse until we determine their exact location on the property.  This is a pretty cool plant as it is hardy in our planting zone and creates smaller, but more tasty fruit than its fuzzy cousins that are sold in the produce section.  If it does well, one plant can yield over 10 pounds of kiwi fruits.
Picture


Pictured are catalpa, sugar maple, and locust seedlings in the greenhouse.

Picture
Our beehives have been done for some time and are awaiting the bees, which should be here around May 15 or 16. We have three hives for 2 nucs of bees. The hope is to catch a swarm this year for the third one. However, we should already have our two trap hives out and baited with lemongrass oil if we want a good chance of this. Just not enough time it seems.  Nonetheless, these will be out soon and we will begin our adventure as amateur apiarists. We are putting them to use though as the above pic shows us using the hives as a makeshift potting table.

Overall, things are progressing. More apple tree shrapnel to pick up and move, more seeds to plant, more plants coming in the mail and the fact that bees are almost three weeks away. Not to mention baseball is starting for our boys and soccer will be right around the corner. It's been busy, but we all have noticed less time inside, less screen time and more productive time outside. In some ways, this was the plan all along.

- Diana + Trevor
0 Comments
    Picture

    ABOUT

    Dandelion Hills is a family-owned farm in Caro, Michigan, established to provide beyond-organic food to its owners and the local community while improving the soil quality.

    Categories

    All
    Bees
    Chickens
    Continuing Ed.
    DIY
    Ducks
    Food
    Gardening
    Geese
    Homesteading Tips
    Maple Syrup
    Our Stories
    Preserving Food
    Quail
    Trees
    Turkeys
    Weeds

    Dandelion Hills

    Archives

    May 2016
    February 2016
    January 2016
    July 2015
    June 2015
    May 2015
    February 2015
    January 2015
    December 2014
    September 2014
    July 2014
    June 2014
    May 2014
    April 2014
    March 2014

    TAGS

    Dandelions Hills Farm Caro Michigan Local Permaculture Sustainable Ecological Natural Beyond Organic Biodiiversity Regenerative Family Farm Mini-farm Farmstead Homestead Pastured Eggs Chicks Chickens Poultry Gardening Honey Bees Flowers Herbs Ducks Turkeys Geese Quail Market Garden
Powered by Create your own unique website with customizable templates.