Who wouldn't want to watch baby chicks fighting over meal worm treats? If you were a chick who found the cache of meal worms, wouldn't you quietly eat them all up instead of alarming the rest of them?
- Trevor
- Trevor
|
Who wouldn't want to watch baby chicks fighting over meal worm treats? If you were a chick who found the cache of meal worms, wouldn't you quietly eat them all up instead of alarming the rest of them?
- Trevor
0 Comments
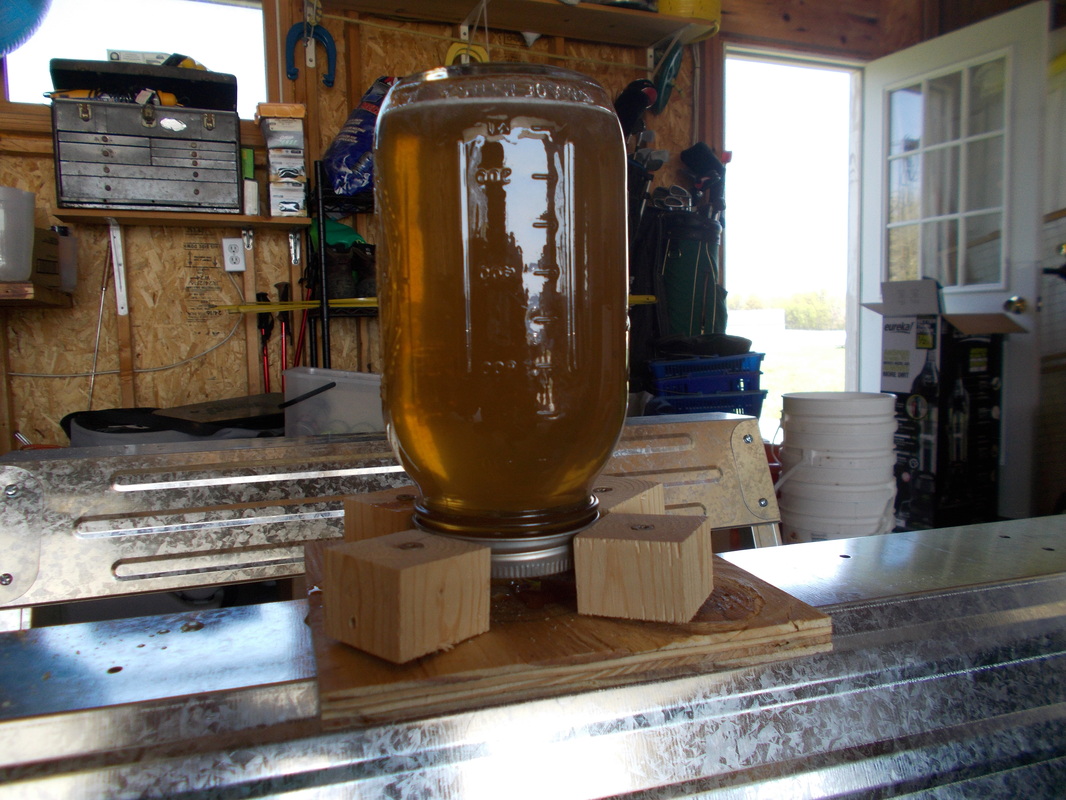
As we endeavored on this farm, one of our goals was to utilize scraps and repurpose random things into the items that we needed. This hasn't always been the case as some things were needed "right now" and a trip to TSC worked better than trying to build chick feeders at that particular time. However, looking around there are a number of interesting builds on the property that have come at almost no cost, minimal cost, or at a cost far less than what one could have purchased the originals. Perhaps some of this post is pride, but also a chance to help others move past their commercial addictions and use their creativity to "MacGyver" things with the items one has at hand. When you succeed, its quite a sense of accomplishment. Bee projects were a combination of scrap and new melded together in a good way. Hives built by myself and my dad this winter. Bee feeder thrown together with scrap by me. Tables by me. Overall, not bad considering bee feeders are $25 and top bar bee hives are much much more! We love Christy's bees, but we can build the rest! The above pics are associated with the chicken tractor and the hens/pullets. A lot of new, but a lot of repurposed and invented things. Chicken tractor is mostly based upon the plans of Harvey Ussery. With the brooder, we also repurposed a broken baby gate for a lid and the other lid was a divider from a dog kennel. Not pictured, but I just made a chicken feeder with a "found" bucket that I drilled holes in the bottom and then glued that to the bottom of a cheap laundry basket with the top 3/4 cut off. It looks similar to this, just without a garbage bucket, but a standard five gallon bucket. More chicken stuff thrown together at the last minute . . . the best way! Broiler pen and accessories. Pen frame was all new, treated wood and new screws. Some pics of construction. Most of it was 1" 2x6s that were ripped. Found some plans online for Salatin-style pens and made it 6' x 12' instead of 10' x 12'. Framing was pretty much to plan. Chicken wire was scraps and a roll found in under the work bench at my dads. Steel was leftover from a building and was free! Used leftover screws to connect it together, so that was good. I have this pickle jar full of extra screws that finally came in handy. Small changes is the framing under the door for stability and added another stabilizer beam on the back to make the steel sturdier. Salatin-style pens sit flush on the ground and require a dolly to move. These are often made of steel tubing like this. While I'm sure his is very sturdy, why not repurpose a seed rack. HUH? Well, we took a leftover seed rack, cut off one set of legs on back, found a steel rod that went through some old lawnmower deck wheels and wired that on for now. Then, we smashed the remaining feet flat for ease of sliding and added buffers to keep the pen off the wheels. Frankly, we didn't think it would be sturdy enough. WRONG! It works like a charm. This was definitely a Trent Grice creation. The last pic is our broiler feeder. We cut some scrap tile and nailed it to a leftover, weathered deck board, added scrap for a handle. It needs stabilizer feet, which I was going to do before my foot exploded. However, what do you use for end caps? Why empty worm dishes of course. They fit perfectly in the tile and slid nicely into the groove. This a cool build for sure. 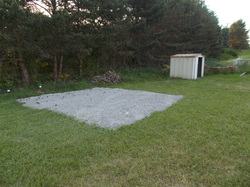 This looks like a pile of rocks, which it is. However, I'm excited for this one. This is the foundation for our future shed. The stones are the limestone strippings from my father-in-law's driveway after he had it flattened in preparation for his asphalt driveway. I also got three other loads on my driveway to help some trouble spots. While this is cool, I'm more excited for the shed that will be built. Walls are expected to be old plant display tables, siding will be leftover steel siding/roofing, base beams are treated 4x6's that are laying around my dad's place. We will try to use other "found" stuff as well as we search for leftover windows, doors, etc. The plans are in my head, but hopefully on this foundation by the end of the year. The shed in the back was just saved from my brother-in-law's place as he almost tore it apart for scrap. Not sure what we'll do with it yet, but it's still good and sturdy. I guess it's like 40 years old. It was pretty easy getting it on the trailer. I sat in the hammock and watched my dad and brother-in-law do it. I had to keep my foot up. What did it cost? Sounds like it may cost us some chickens. 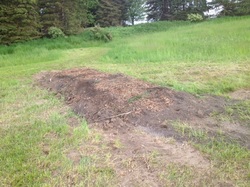 I have a post on the "hugel" mound, but this is also one of the cool builds on the property. I was going to dig this by hand, so I'm glad I used the tractor when it was here. The woody material is brush and tree branches we had for free. Top soil was originally in the previous owner's raised bed garden that I forgot about and the mulch top layer is free wood chips from tree trimmers. While this is a small breakdown of some of the stuff that we are doing on the farm, I also shared this to show that if you look around, most anybody can get started on projects. We don't need to go and buy everything. Sure, not everybody has a bunch of tools or woodworking know how, but the worst thing you can do is not try to build it. You learn a lot during the process. I look forward to "MacGyvering" more stuff as we go along
- Trevor 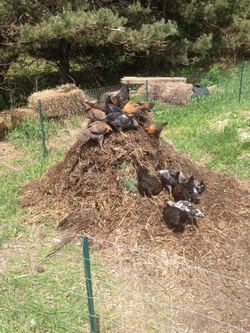 Most of you have been introduced to our first fifteen egg-laying ladies. No eggs yet and not expected for another 6 weeks or so. They are enjoying their time out on pasture, enjoying their chicken tractor and love being in the compost area. We do throw some food on the pile, but they will spend a lot of their time on this pile getting bugs and other delicacies. We will be putting them to work soon as we have decided not to utilize our second garden spot as the soil was too low in nitrogen and rock hard clay. We sowed a number of seeds on the plot (i.e. buckwheat, mangles, clover, field peas, "soil buster" radishes and others) to work on breaking up the soil and adding nitrogen. We then covered it in mulch, which will hopefully break down a bit and add some topsoil to the mix. In a couple of weeks, the pullets will be in paddocks on the garden and they will get to work eating the seeds and greens and dropping their own nitrogen all over the place. If all goes well, we will have much better soil ready to go for next year. Because we are crazy, we felt this was not enough. The chicken tractor has enough roost space for over thirty, so why not? We decided that in addition to getting 50 or so meat birds, let's get a few more pullets. So we have added fifteen more ladies to the bunch for a total of thirty. They were already 5 weeks old, so we saved on brooder time and feed and only kept them in for a week before we tested them out in Baxter's dog kennel. We then moved that kennel in with the original fifteen pullets to help with them getting acclimated before letting them out. They were small and they would go in and out of the electronet fencing. Not to mention, they continuously get bullied by the older pullets. That's what they call it a "pecking order." Due to age differences, we only got Black Star/Black Sex Links and Araucanas/Easter Egg Layers. The Silver-Laced Wyandottes at the hatchery were much younger than the other two breeds. Like I said before, we also got 55 meat or broiler chicks. The hope was to get 50+ Cornish Cross birds, but Duck 'N' Coop Hatchery, where we get them from, did not have enough. So some of these chicks are also Freedom Rangers (they are the more brown looking chicks). We have lost four of these chicks through the process of brooding. Expected losses should have been more like two, so we are analyzing what we may have been doing wrong. One thing that has helped is Diana found an excellent organic feed from Raub-Rae Farms in Brown City, MI. This feed just smells good and the chicks loved it when we gave it to them. Prior to this, we were feeding them Nutrena feed from TSC. It was the best we could find that did not have antibiotics in it. We will be raising these chicks in a Salatin-style manner following their brood time. Joel Salatin has revolutionized pastured poultry by putting his meat birds on pasture, with food supplements, and raising them up to butcher weight in only 6-8 weeks. His process calls for 80-90 birds in a 10' x 12' pen. 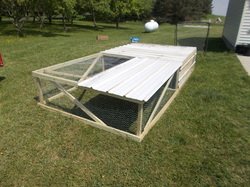 We decided to do a "half-size" Salatin pen of 6' x 12' to start off. We got the chicks in there yesterday and despite their initial fear of sunshine, they eventually wandered over to their food and water. Check out the forthcoming "builds" blog post as I go through the construction of this pen and how it works. We placed the pen on our front lawn as the lawn there is good for now, but will burn up as the summer heat commences. By that time these guys will be in the freezer, or pretty close and we will put the next batch on a better stretch of lawn. If you would like to snatch up some of these birds, just give us a call. We are not keeping all fifty and would be happy to bring in our first dividends for the farm. Final total, 15 older pullets, 15 younger pullets (all thirty out on pasture) and 52 broiler/meat chicks means chickens chickens everywhere!
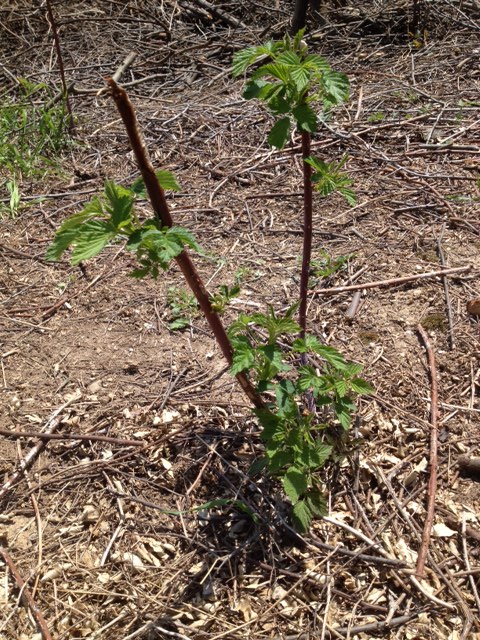
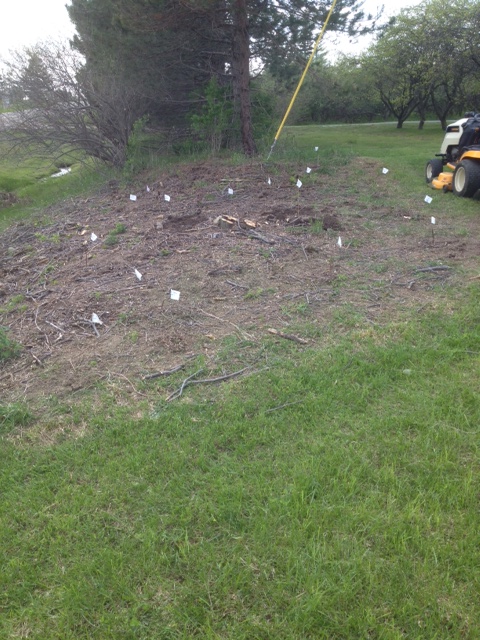
- Trevor I just had a salad for dinner today. It was delicious and it had everything to do with the fresh greens from the garden. Lettuce and spinach are doing well and we are harvesting whenever possible. Here is a pic of our front raised bed garden, which was established last year. 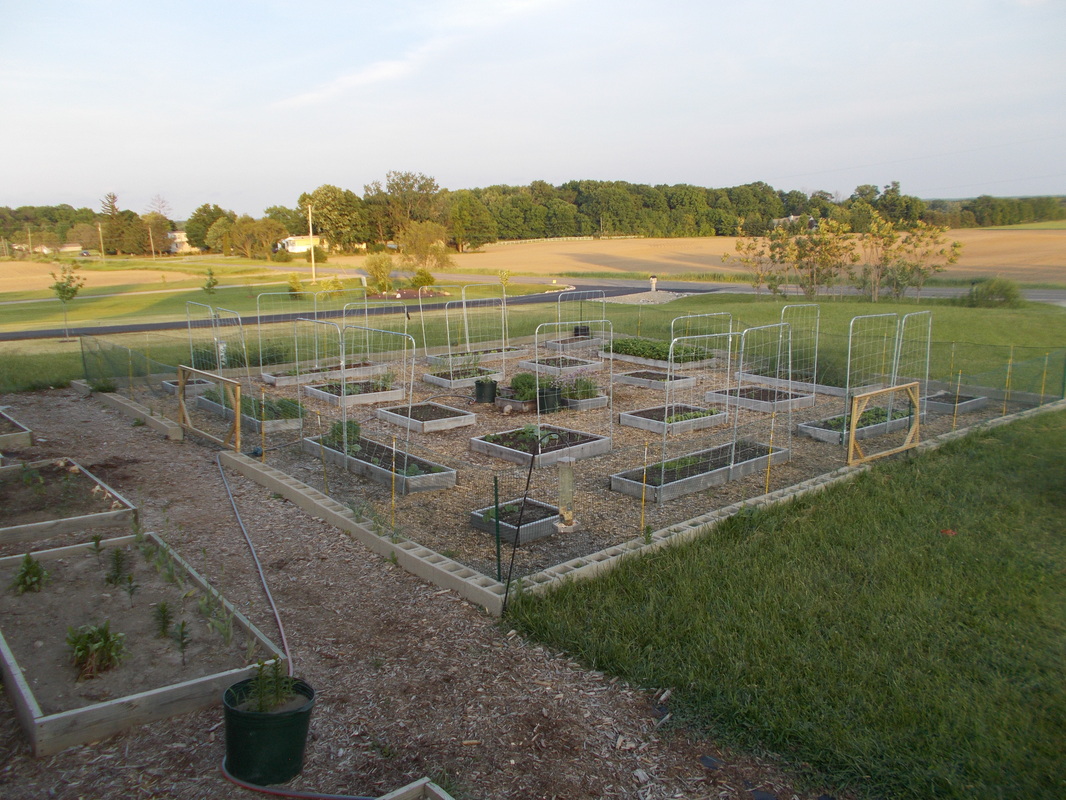 This was our second raised bed garden as the first one was constructed with leftover treated wood and was on the site of what we are now calling the "back garden." We are reworking this area for next year. I built these boxes last spring with untreated wood and followed the methods of "Square Foot Gardening" by Mel Bartholomew. We did make some "Mel's Mix," from amendments purchased from Will's Greenhouse in Vassar, MI. One-third compost, one-third vermiculite, one-third peat moss. We had a good year last year and "freshened up" the boxes this spring. The silver trellises are electrical conduit I bent and connected together. Diana tied on the nylon trellis netting and they stand with the help of half buried reinforcement bars (rebar) that fit perfectly in the conduit. Cinder blocks were used to make a usable boundary, but this has not been overly successful as we had hoped to grow onions and garlic in them. We are still trying and won't give up on it yet. Some flowers have done well in them. The boxes to the left are leftover treated boxes from the back garden. They have normal soil in them and will only be used for flowers. Changes this year include a three foot polyfence as the rabbits ate our beets last year and had already started on some of our greens. Corners are secured on four foot medium grade fence posts and the yellow poles are fiberglass driveway markers that are woven through the fence for stability. I made the gates out of ripped 2x4s that were left over from the chicken tractor. No hinges, just attached with some wire that was repurposed from the old garden boxes. The gates sit on the cinder blocks and have polyfence hanging down to keep out the rascally rabbits. One problem: the entire garden sits on weed block. Not a problem last year and did work as it was a lush front lawn that we killed with vinegar and dish soap. However, if we were to do it again, we would use the "lasagna" method. I have seen people use soaked cardboard and newspaper, which I think would have worked and created a natural, organic solution to the weed block. Oh well, I'm not going to rip it out until those boxes rot out. Below are more pics of the plants, most of which have been either direct sown right into the soil, or started briefly indoors and in our small greenhouse. This made a huge difference this year with our starters as they did not get leggy, as they have the past two years when starting them in front of a window. 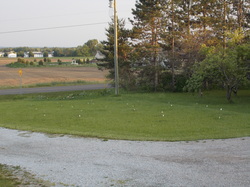 In this picture you can see white flags in the middle of a lawn (well, it was a lawn and hopefully will morph into something more in the coming years). Each flag is a small fruit or nut tree. Peaches, nectarines, plums, plumcots, apricots, chestnuts, hazelnuts, and walnuts are there, just to name a few. Some currants and elderberries are in there as well. We will be continuing to add more to this "food forest" as we go and transition this from an annoying yard to mow, to a low upkeep production area. As the trees grow, we will guild other plants with them so they will grow in symbiosis. Until then, mowing this annoying lawn actually got a whole lot harder . . . for now. As we ventured around and learned about the plants on the property, we found a number of rogue volunteer plants that ended up becoming surprises. After clearing the front overgrown area, we found wild raspberries growing in there. I guess this makes it a good place to plant berries, so that is what we did. We cleared the back property of all scrub brush/autumn olives so we could pasture chickens and almost pulled out a hidden apple tree. Thankfully we noticed and it got to live and was trimmed this spring to start growing in a beneficial manner. 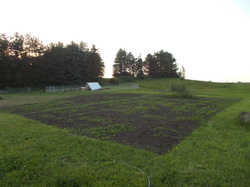 Finally, we have this year's project--next year's garden. As noted in another post, we had hoped to plant this area for our market garden. Upon further investigation, we decided to wait and improve it. It was low in nitrogen and high in hardpan clay. So we sowed seeds to break up the soil and add nitrogen and also plants that chickens love. In a few weeks they will be on sections of this garden adding their "nitrogen" to the mix. Asparagus in the middle has been doing very well and the black color is actually organic hardwood mulch from Grice's Tree Farm and Nursery. Here is to next year and all the bounty this garden may produce. Our plan is to approach this garden in a format similar to Jean-Martin Fortier, who wrote "The Market Gardener." There is a lot going on regarding gardens, not to mention the "hugel" mound. Perhaps we have bit off more than we can chew at times, but it's all getting done and for sure we are avoiding the moniker "analysis paralysis" as we are "doing" a lot and are willing to learn (make mistakes) along the way.
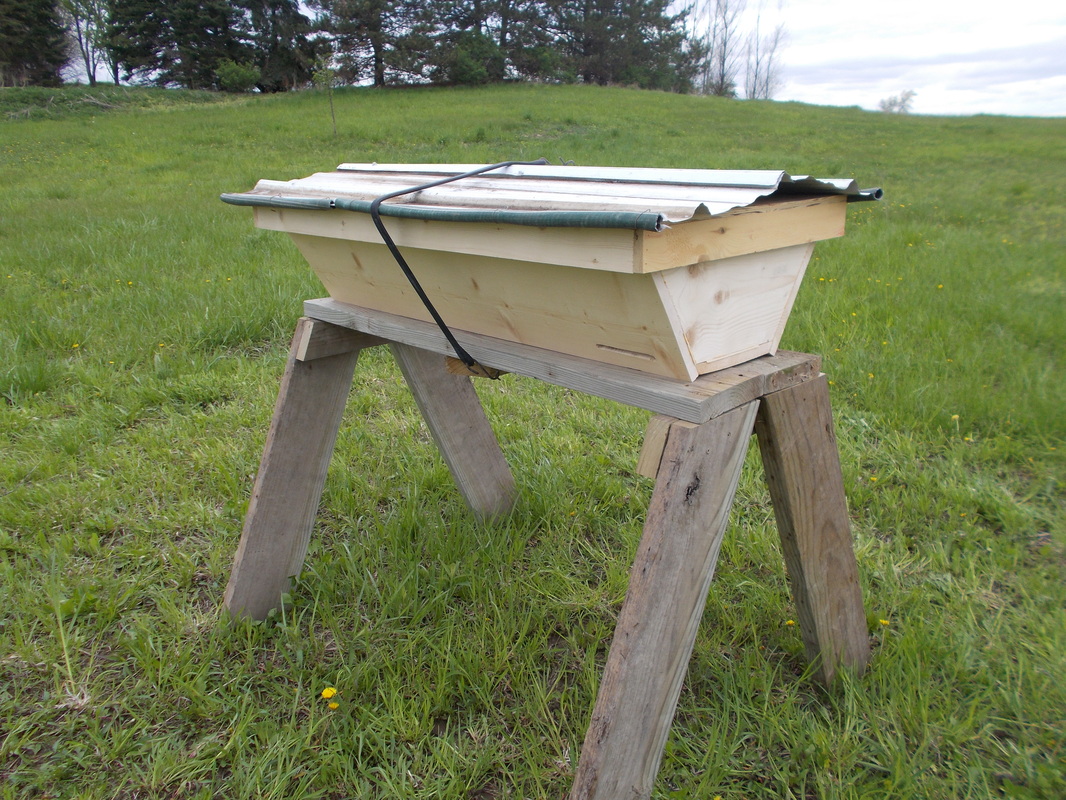
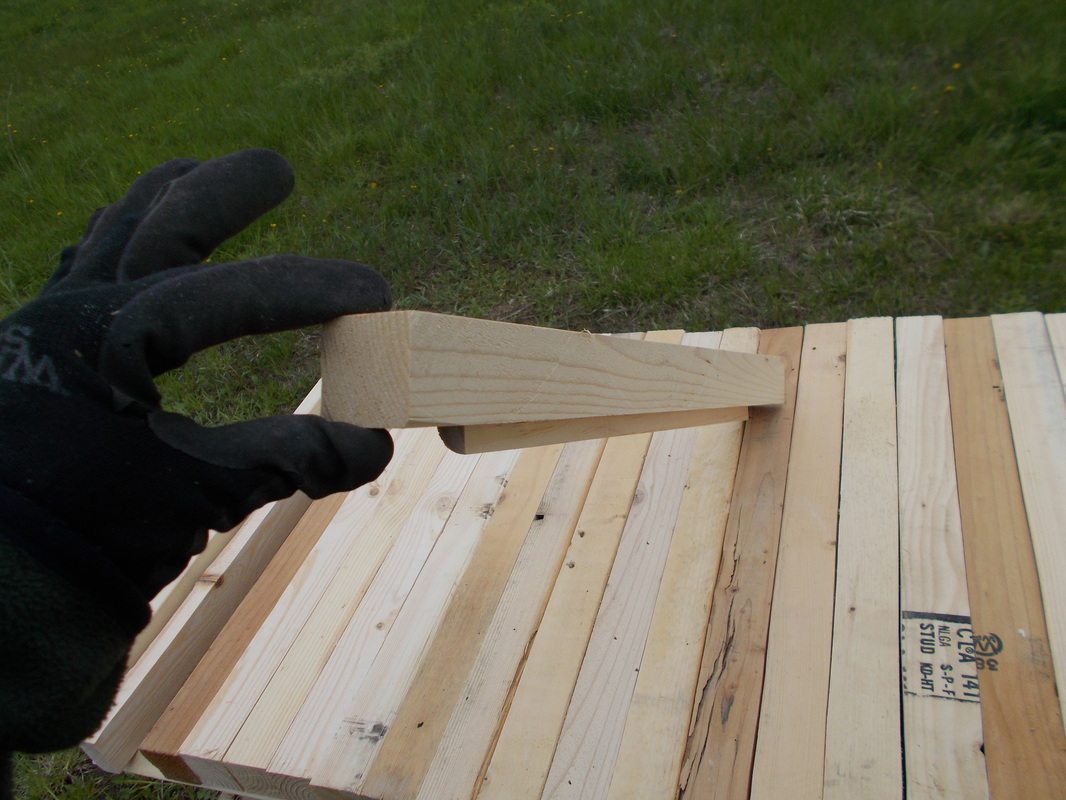
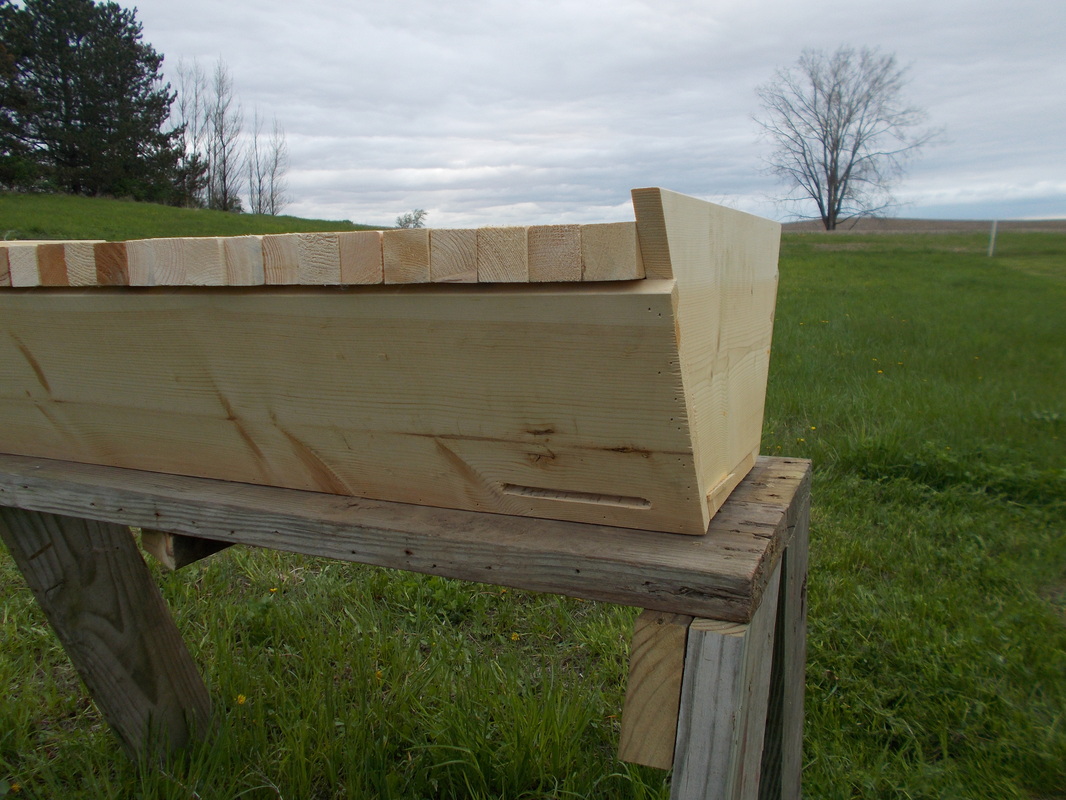
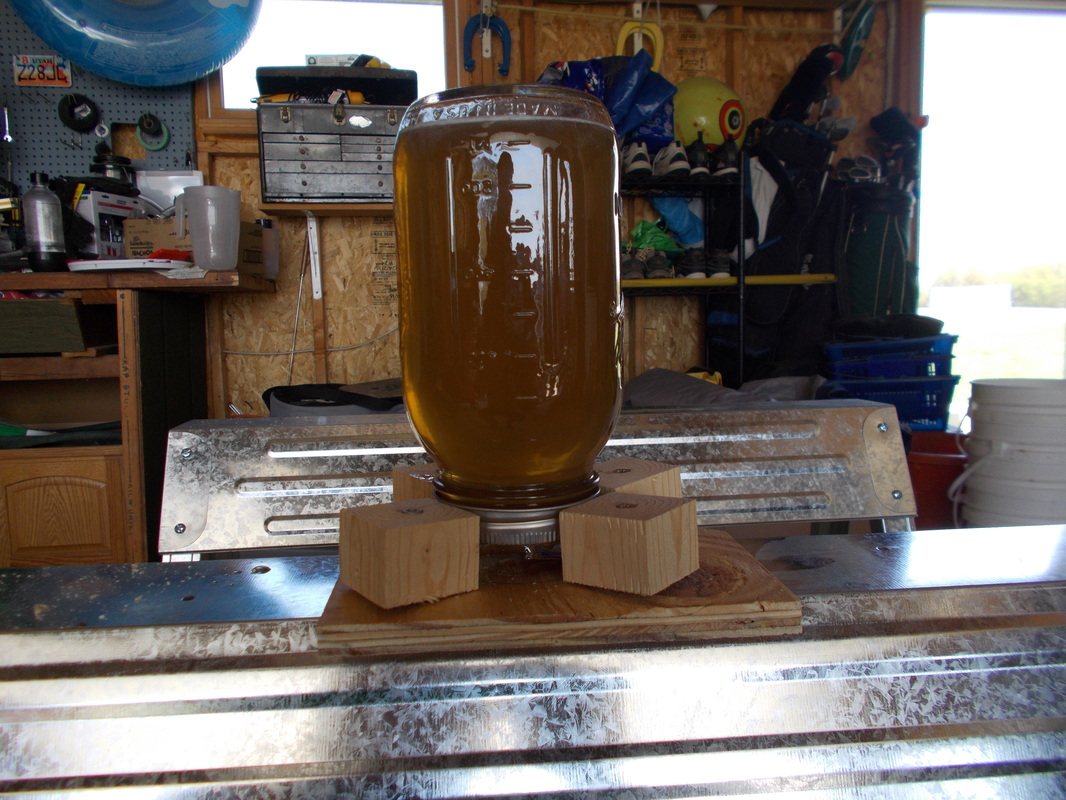
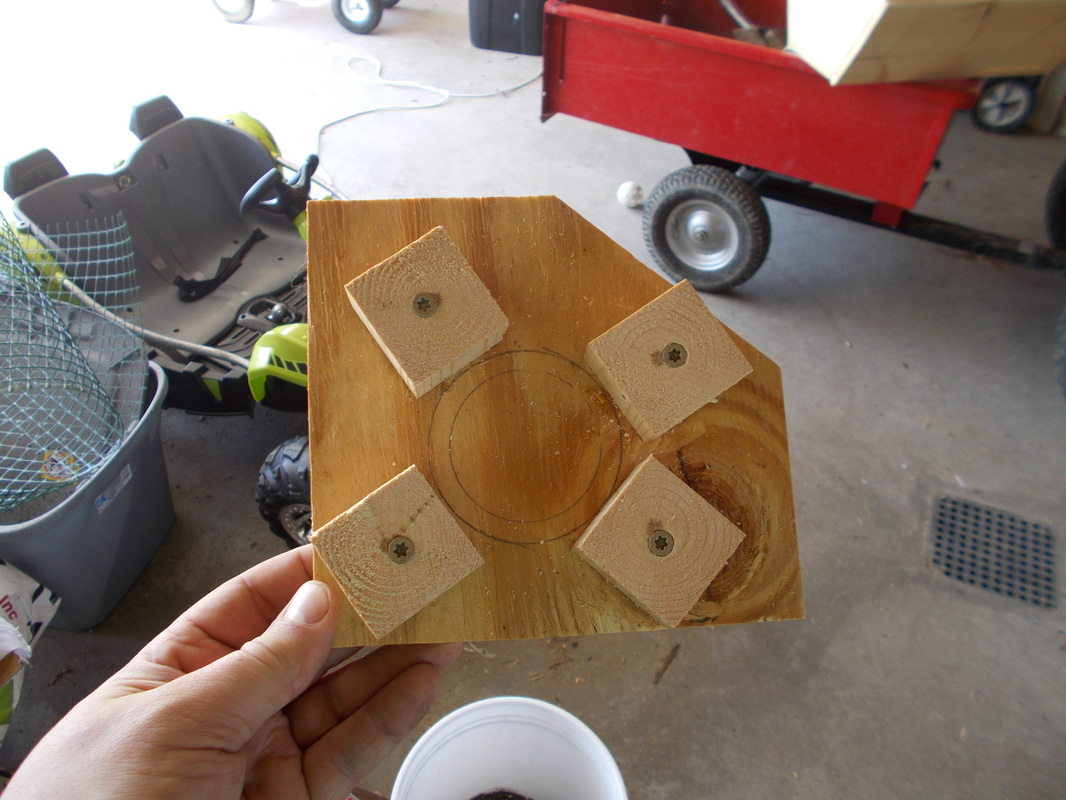
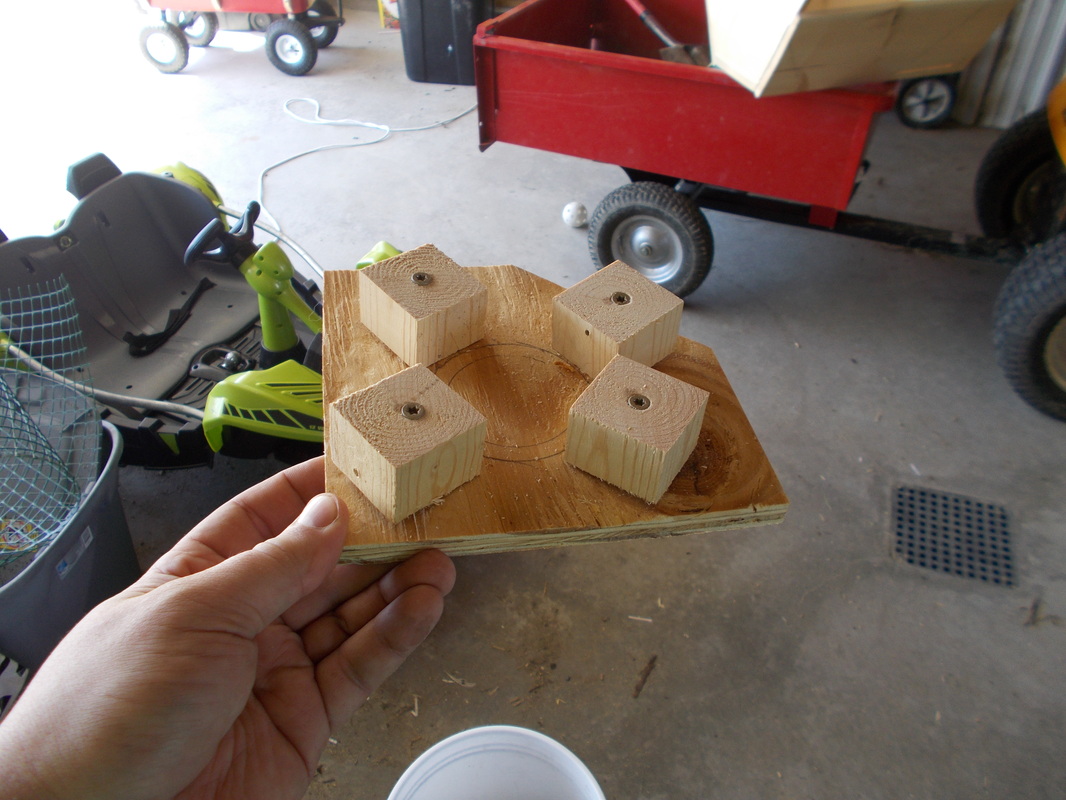
- Trevor 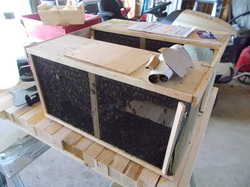 Our bees arrived! On May 19th our 20,000 new residents arrived to the Post Office. Numbers looked good as there were less than an inch of dead bees on the bottom of the boxes, meaning they made it well. Some death is expected due to short life cycles of bees. Our plan was to keep them in the garage and place them in the hives at the end of the day to help ensure that they will stay in their new homes, as opposed to swarming off. 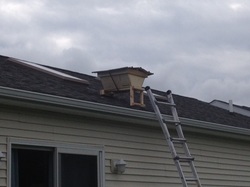 Note, we did place a trap hive on the roof of the house just in case they decided to leave and provide another place for them to go on the property. Like I said, this was the plan. 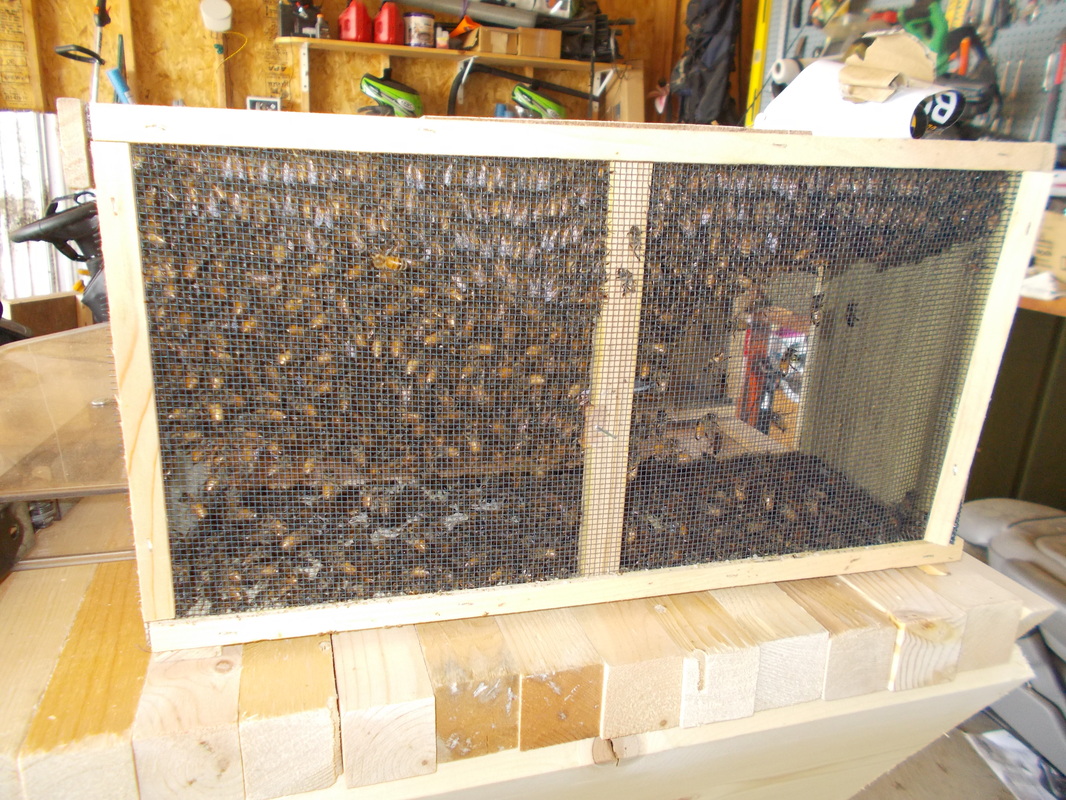 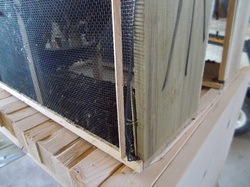 Shipping led to a small opening on the one hive that became apparent in the car with three escapees. Considering this, we still decided to wait until the afternoon, but walking into the garage midday changed our mind. The increasing temperature increased their activity and hundreds of bees were loose, so it was go-time for putting them into the hive. Below are our top bar hives. My dad and I made them in the winter out of new pine boards for the frame and as much scrap wood as we could find for the top bars. In the one picture, you can see the quarter round that we attached to the bars as recommended in the book Top Bar Beekeping by Les Crowder. We think this was a good idea, as we will explain later. The tables were made about a month or so ago out of old raised bed gardening boxes. Once we switched from treated to untreated wood, some of these boxes became obsolete. So I repurposed them into a beehive table. Notice the bungee cord wrapped around, which holds on the lid and holds the hive to the table. I also made some sugar water feeders to place in the hives initially to provide a food source. Just using some scraps I screwed some pieces of the same width on a scrap piece of plywood and just far enough apart to hold an upside-down mason jar. Picture shows a quart jar, but that was too big and was replaced with a pint jar in each hive. I just punched a few holes in the lid so the bees had access. Sugar water was 1-to-1 sugar and water and we filled them up again after two weeks. After four weeks, we will remove them from the hives. The above video portrays us opening the second shipment box of bees, taking out the metal sugar water can, removing the queen cage and taking out the cork holding the queen inside. Had I done this correctly, there would have been some "candy" there between the bees and the queen to help get them acclimated to each other. However, unbeknownst to me the queen cage had two ends so I just threw her to the wolves. Thankfully, they were in shipment process for awhile so they already got acclimated to her, as evidenced by the status of our hives now. At least we hope, because we have still yet to find the queens, but the hives are doing well. After removing the cork I pinned the queen cage to one of the top bars. 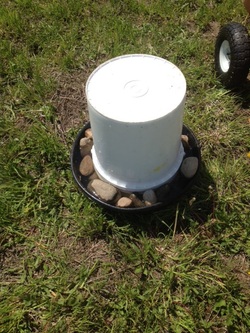 The second video shows us "bonking" the bees to the bottom of the hive and then literally pouring them into the open space. At this point, replace the top bars and roof and we were done. To the left is the bee waterer I made. Feed pan from TSC, bucket we used for getting maple syrup earlier in the year and rocks around it. Bees need water and we do not have standing water on our site, so the waterer was essential. We don't see them using it, but it's there if they need it. The rocks are to provide a standing spot for them to drink. Without a landing spot, the surface tension of the water could grab them and pull them in and drown them. Below is a video of the hive entrance after we put the lid on. The above pics are shots from our first hive check after about 6-7 days and then a second check a week after that. The video below is during our first hive check. Very stoked to see the bees making A LOT of comb, looking good and going straight. This is the supposed benefit of the guides on the top bars with the quarter round and it looks like it works! The second hive check showed capped comb, which is very good. Not sure what they are capping yet as we are still novices, but we hope its brood - eggs and growing bee larvae. - Trevor On a day in which my dad was here with his tractor, I had the impulse to have him dig a hole. Now the hole had a purpose, but it was going to save me a lot of work as I wanted to try my hand at "hugelkultur." Short version, dig a hole, fill with woody material, mound dirt back on top and plant. The wood base will work as a water sponge and hold water in place. We had the woody material from trimming the neighbor's apple trees and ripping out all the grapevine and autumn olive in the front berry garden area. My dad used the forks on his tractor to "grab" the woody material and place in the hole. I was in the trench with the chainsaw cutting it down to fit better in the trench. My dad then used the bucket on the tractor to put a couple of scoops of mulch from tree trimmers in there, put on the old soil and then put some old garden soil from the previous owners of the home (sorry to the rabbits who had taken up residence in the pile). We had some leftover mulch and sprinkled that on top. Afterward, we soaked it with water to let the wood get wet. Wish we would have done that first. Our extra seedlings have been planted on this, as well as a giant bag of old seeds that may or may not germinate. Ideally, a hugelkultur bed would have logs and large pieces of wood, but we used what we had and this will be a good experiment. My guess is that next year it will be even better as it captures that spring snow melt and early rains for the remainder of the year.
- Trevor Apologies from Dandelion Hills as we have been working our tails off out here with all of our projects. Thankfully, we took pictures, but we have not had time to post it on the blog. Unfortunately, one of us now has a lot more down time. We had a non-farm casualty which occurred in between youth soccer games as I was showing off my mad soccer skills to my two boys. I was successfully keeping the ball from the boys until I landed on said ball, rolled over it and seriously messed up my foot. There was snapping and popping sounds that occurred, major swelling and and hopefully a diagnosis on Monday. Nonetheless, now there is time to do more blogs so get ready as here they come. The plans calls for a bee post, chicken post/update, garden updates, pics of all the builds we have done to get ready and possibly an update of what our summer has in store for us . . . that is as long as one us can get mobile again. By the way, crutches suck! UPDATE: Today is Monday and I officially have a broken foot. Walking cast for eight weeks, which for those of you calculating temperatures are two of the three hottest months! ARGH! Anyway, nothing I can do about it, but take it easy for a few more days and then get back at it.
- Trevor |

ABOUT
Dandelion Hills is a family-owned farm in Caro, Michigan, established to provide beyond-organic food to its owners and the local community while improving the soil quality. Categories
All
Archives
May 2016
TAGSDandelions Hills Farm Caro Michigan Local Permaculture Sustainable Ecological Natural Beyond Organic Biodiiversity Regenerative Family Farm Mini-farm Farmstead Homestead Pastured Eggs Chicks Chickens Poultry Gardening Honey Bees Flowers Herbs Ducks Turkeys Geese Quail Market Garden
|