Dandelion Hills
  • Blog
  • Sales
    • Chickens
    • Ducks
    • Turkeys
    • Eggs
  • About Us
    • Our Story
    • Contact

Caro's Only "Press Box" Shaped Farm Shed (Not Yet a Registered Trademark).

2/15/2015

0 Comments

 
Picture
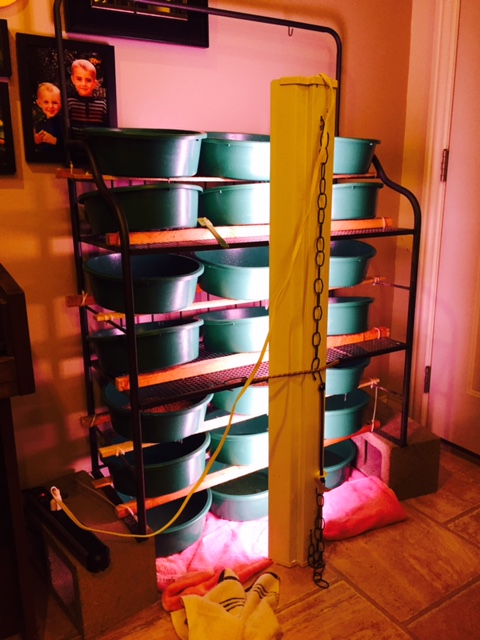
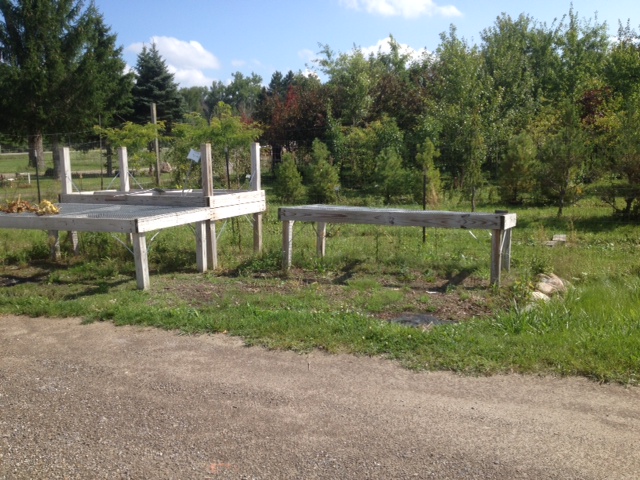
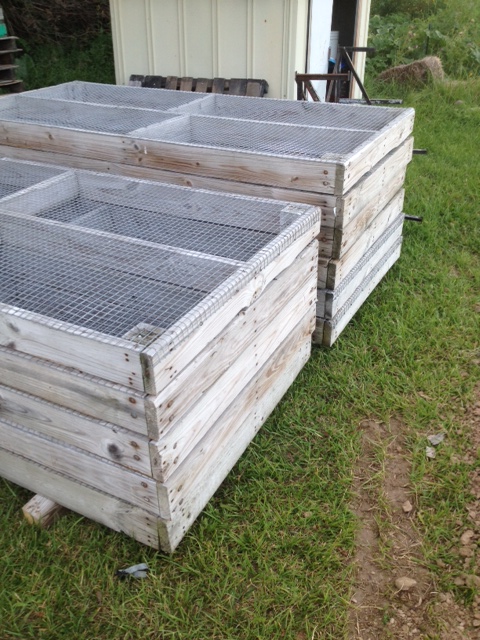
I'm sure that when you look at these tables you think, "Hey, those would make a great shed!" Okay, so I didn't either, initially, but that is what occurred. This guy began the shed escapade by identifying a bunch of leftover steel roofing/siding from his building last summer. Our garage was getting quite full, so a shed had become a common discussion. Since we thought the roofing was covered with the steel, we needed to come up with the rest of the shed. 

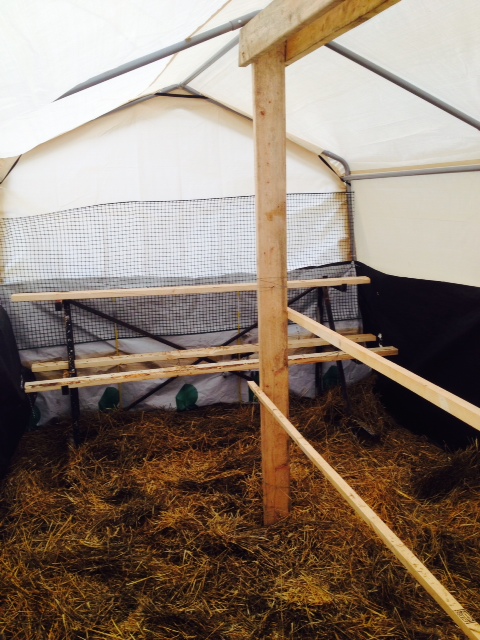
Well, like all great plans, the shed grew and other ideas popped up. One of these was the tables. My dad had been trying to sell these as he was no longer using them as plant tables for selling perennials. We knew they were four feet by eight feet and made with treated 2x6s, so we thought of them as wall panels and decided that was going to be the plan. 
Picture
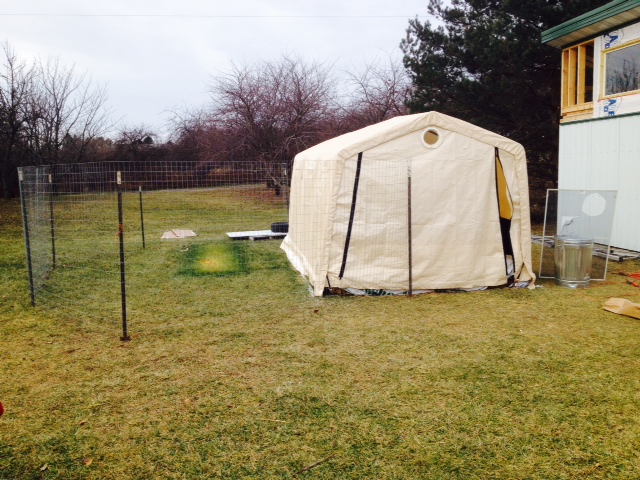
The metal shed on the right was Diana's brother's old shed that we traded for broiler chickens. Notice the trench in front of the tables. We ran water and electrical wire to the area where the shed was going.
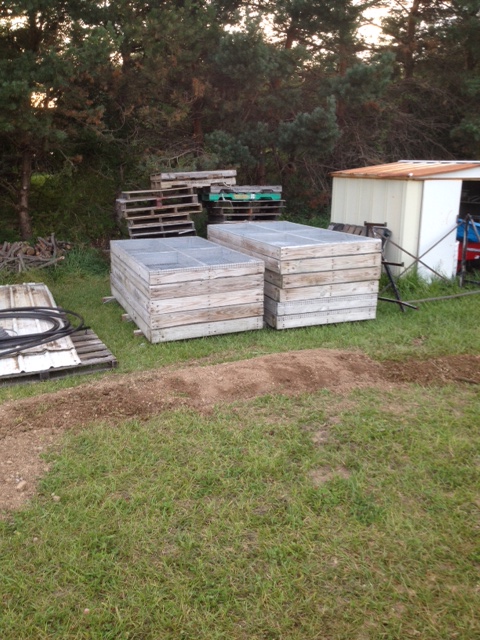
So we cut off the legs and stacked up the tables.  Three of them for the back and four for each side --eleven in total. We knew we were going to frame in the front of the shed due to a $6 garage sale window and the double doors. At 4 feet by 8 feet a piece, this shed was going to be 12 feet by 16 feet with at least eight foot high walls as we stood up these "panels."  
Picture
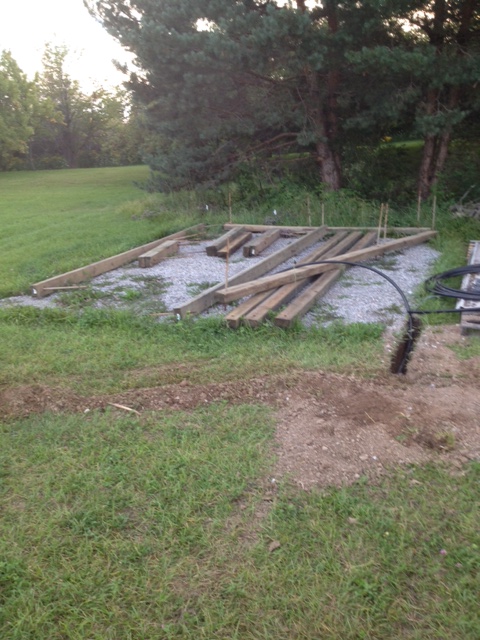
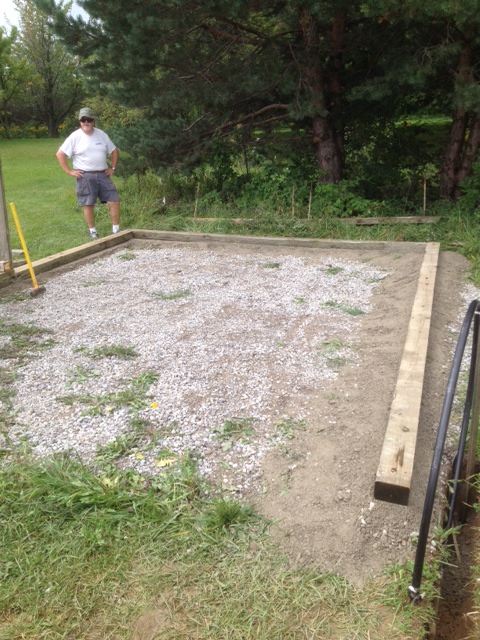
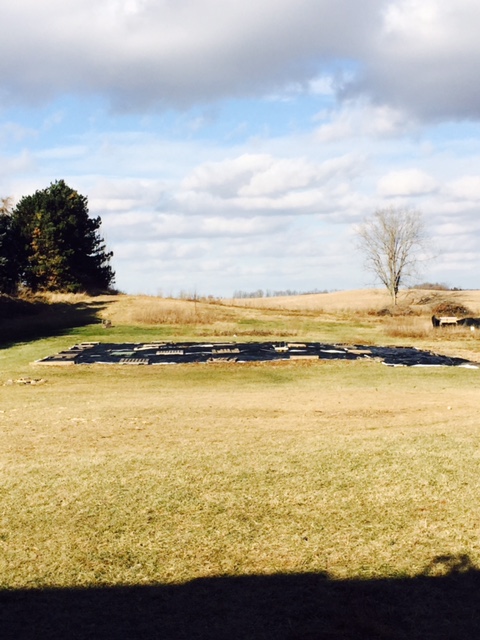
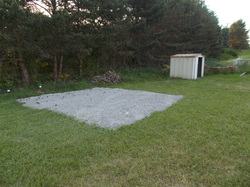
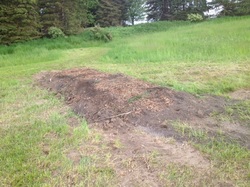
For the foundation of the shed, we salvaged some old driveway limestone from the neighbor. Diana's dad finally installed his dream asphalt driveway, so we took some of the limestone scrapings from the asphalt company. We then got some 4x6 beams that lined an old driveway that my dad tore out, which came with pre-drilled holes and re-rod. The picture on the right shows the leveled beam foundation with rods pounded in.

Picture
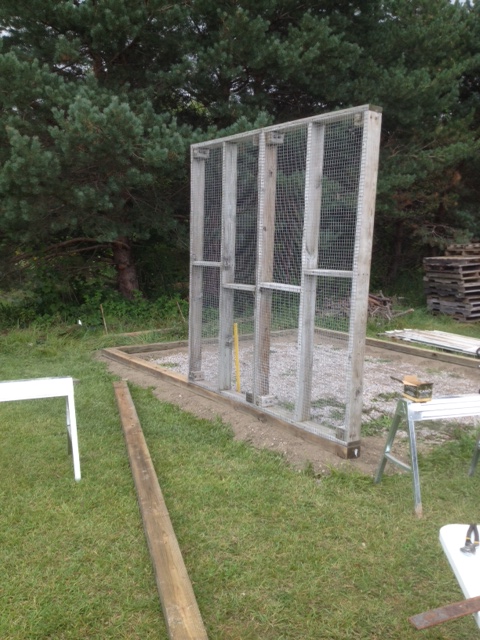
The first day ended with getting some of the walls up. A benefit of these tables was that they came with pre-installed shelves. Structurally, we ended up adding 4x6 beams every four feet on the walls when we put the panels next to each other. That made us feel good about adding the roof weight later.

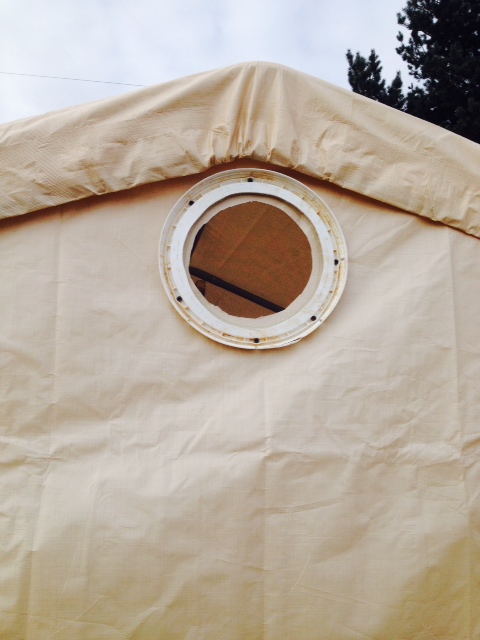
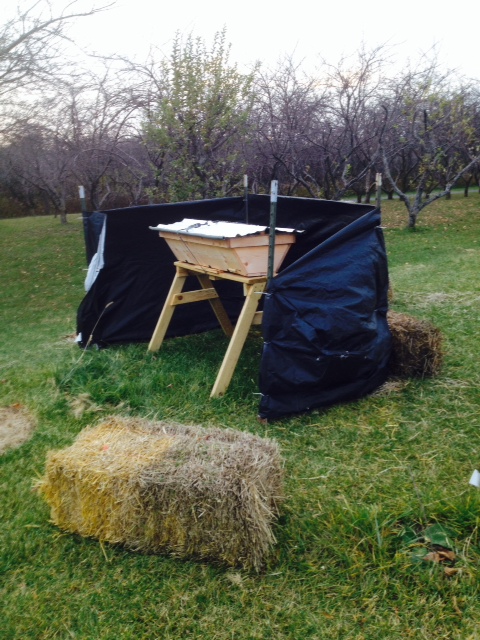
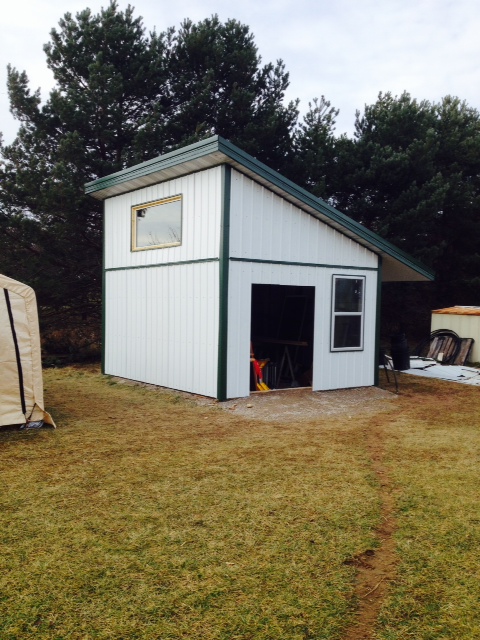
So as not to bore you, the slideshow above goes through the project a bit quicker. The four foot wall extension was to add slope to the single slope roof and provide a place for our roadside pickup of a sliding glass door. We framed that in as a window--giving us that "press box" look. The opening on the door faces east and the large upper window faces south. This allows the prevailing winds from the north to slide right up the slope of the roof. There is a six foot lean-to on the north side for some overhead protection.
Picture
Picture
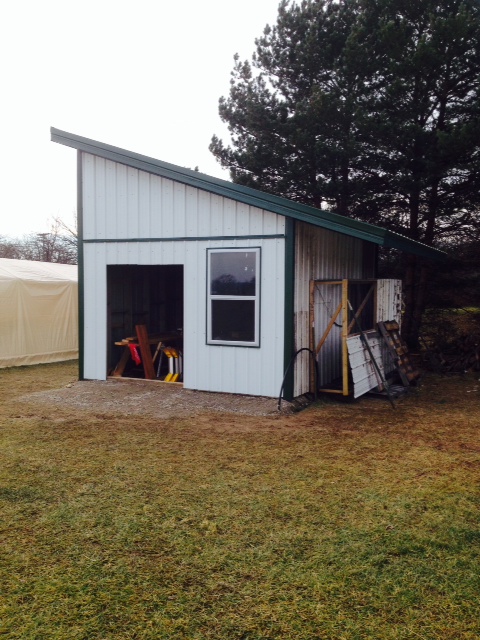
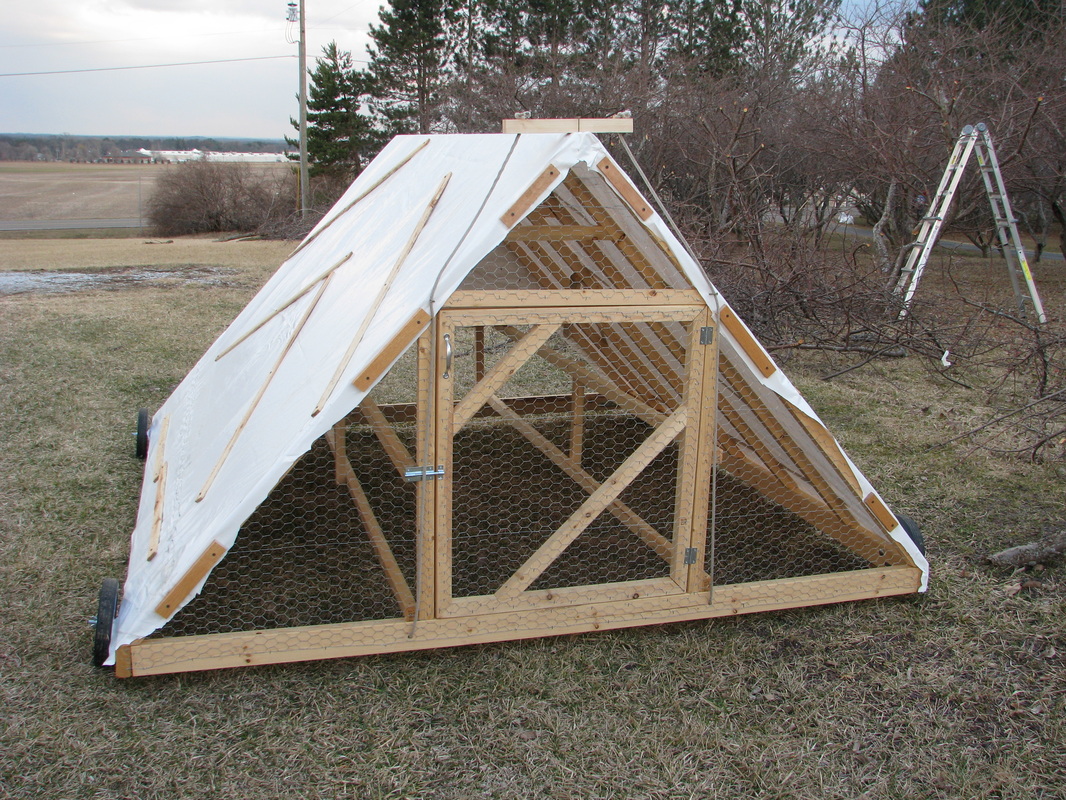
Shows the slope of the roof, trim work and the lean-to with our broiler pen stored away for the winter. Notice the "dirty" steel on the back, this was the scrap that my dad had lying out back of his place for 10+ years.
The final pictures were taken right before the snow flew. We filled it up fast. The doors are tarped off for the winter as we will figure out a permanent solution in the spring. Final score for the press box in regards to salvaged or reused materials is: salvaged limestone, salvaged foundation beams, salvaged table panels for walls, salvaged sliding glass "window," cheap garage sale window, and salvaged steel paneling for the north and west side walls. All-in-all, pretty good and a good savings. With that said, this was not cheap! Nonetheless, it should stand for many years. If not, I'll sell it to a local baseball field so it can be repurposed for announcers and scorekeepers.

-Trevor
0 Comments

The Winter Salad Bar: Sprouts and Fodder

1/23/2015

0 Comments

 
Winter provides a multitude of problems with livestock, and the process of "over-wintering" animals requires the expectation that they will "earn their keep" after the winter season has passed. With egg-laying chickens, this is expected, which is why we chose to over-winter. However, they lose their ability to forage for fresh greens and bugs, which leads them to be totally reliant on what we bring to them in the winter coop.
While we love our feed (locally grown and organic), we like to include variety and offering green options will help to keep the nutritional value of the eggs up in the stratosphere of goodness. Therefore, one has to grow the greens for them. (Editor's Obvious Note: Michigan winters are not a good time to grow greens outside for a variety of reasons.  Unless you have a cold frame - FUTURE PROJECT!).  

The best way to grow greens quickly is with a sprouting fodder system; however, we are just shy from being able to afford one of these. In case you were wondering, "just shy" means we are nowhere close to be able or willing to buy this.

As usual, just add good ole' fashion ingenuity--and a father who has a bunch of junk lying around.

The main factors for a fodder system are to have something that holds seeds, is slanted to direct water, and has holes to release water, as well as options to have multiple days of growth (5-8 days depending on what quality of fodder you desire).
My materials included the following: salvaged Christmas tree bowls (don't ask), a permanent marker, an awl, and an old shelf that was originally used to hold merchandise in a store and was provided by the distributor--so we didn't directly pay for it!  Other materials included my stove, tin snips, and 1" x 1" pieces of wood and pine strapping (about 1/2" in thickness).

I heated the awl and used that to put in three holes in one side of the bowl.  I marked this area with the marker to keep track of the drip zone. I then added the strips of wood in order to have a "Rube Goldberg" type of water path system. Side view below.

Picture
It's more visible in the pic below, but I used the tin snips to cut out part of the metal shelf to help encourage pure dripping to the bowl below.
Picture
Then I just alternated the flow down the shelf for a total of six days worth of growth. There were five days on the shelf as the bottom bowls are catchment bowls for the system water. The sixth day is actually the first day of the process--soaking the dry seeds to help induce germination. The last picture shows the current status of this project. I put the shelf up on cinder blocks to get a seventh day of growth (one day soak, six days growing) and have added a fluorescent light in front to get the sprouts green. Without this light, the sprouts and fodder did not photosynthesize. While still nutritious, they lacked some nutrition (chlorophyll) that helps turn our farm-fresh egg yolks that deep orange color.

We started off with rye seed, red and white wheat, barley, and sunflower seeds. The rye and sunflower seeds did pretty well, but I think the sunflower seeds needed another day. Wheat was not good--poor germination, which led to a stinky mess.  Barley is the champ!  
This is great since it is one of the most preferred fodders for livestock. Unfortunately, though, we have been unable to find a source for organic barley seed, but we are happy to know that barley is not grown with genetically-modified seeds. Future test trials will be done using organic black beans and organic spelt from Findlay Organics.

So what are the benefits?
1. Chickens love it!
2. We love the eggs!  They are noticeably different and those yolks have regained  their "orangeness."
3. We are taking 12 oz. of feed every day and turning it into 48 oz. of fodder, with our best day producing six times more feed than we initially started.  Obviously, this can save money in feed costs.
4. It is much healthier for the chickens.
5. It keeps me busy and is nice to grow things in the winter.

What are the problems?
1. Ideally we should be multiplying food by six times, not four.  There is still more work to do to fine tune the system.
2. The seeds may not be getting watered often enough.
3. Humidity is important and it is low in our furnace-heated house.
4. Some of the levels are off on the shelves. If you look at the picture the shelves with 1" x 1" transitioning to the pine strapping have a better angle than the 1" x 1" to shelf angle. I think this may be causing water to go too fast through those.
5. This will not produce enough fodder for future animals.

So while we reap the benefits, it is back to the drawing board to try to increase the scale and efficiency.

We will likely implement the system below in the summer due to its simplicity. Give it a look, it's pretty simple.
Total Cost: Donated shelf, donated bowls, donated wood, zip strips (already had), cinder blocks (already had).  While I can't say free, I didn't spend anything to make it.

Trevor
0 Comments

So How Are The Chickens Doing?

1/18/2015

1 Comment

 
Great question, thanks for asking. Recently we had some very chilly nights, but all of our research said to stay away from heat lamps to decrease dependency of the hens on that added heat. As you may remember, the hens spent the summer in the pen shown below. We had an electronet fence around this rolling coop all summer to keep them from roaming. A few clipped wings and getting into the habit of letting the hens out about 60-90 minutes before dusk to roam and forage helped them stay put throughout the day as well.

Picture
However, this was not going to be the winter option and as the shed was being built, it was necessary to come up with a winter coop solution.  I wanted to build one out of pallets, but other building projects took time away from that option.  So we decided to go with a carport from Harbor Freight.

Picture
We staked it down really well with additional stakes so that it could handle a bit more wind. It is of note, that the carport was not recommended for high winds and snow. So we did our best and hoped for the best. It was placed in front of the new shed to help block the direct north wind. We put a fifty foot roll of six-foot fence from the middle of the front to the back left corner to provide a run. After this, we dumped all of our garden waste in there for them to pick through until freeze. Now, the stainless steel feed cans are near the front middle of the door blocking that area so the hens cannot get out. The right zipper is how we get in and the left zipper is the entrance into the run. We keep that open during the day and clamp it on the fence. In the upper middle of the carport is what looks like a port hole on a boat.

Picture
Chickens need ventilation in their coop so we cut a hole in the tarp and placed a piece of old screen there. The rim is a bucket top with the center cut out.  There is another inside and we screwed those together to sandwich the screen in place. We only did one and it was pretty good. We are ready to add another if the ventilation is not good enough, which would be apparent by the fumes in the coop, condensation on the inside of the tarp and/or or frost.

Picture
This is the inside looking toward the back. Since the carport is not snow rated, we have a handy broom in there, but also built some braces just in case. These doubled as a place to put extra roosts. These are the primary roosts and have about 16-17 of the hens and Charlie the rooster on them each night. The back is a steel frame that my dad gave us and is used to hold some 2x4s for back roosts. We have a healthy amount of straw as a base and keep adding more straw or pine shavings to it every week or so. The black tarp on the sides, and white tarp on the back is discarded lumber tarp I salvaged from the dumpster at a lumber yard. This is relatively windproof and was used to block drafts from under the carport. The netting on the back is actually poly-fence and is just there to stop chickens from falling behind and getting trapped between the two levels.

Picture
This is the back looking forward. These were our bucket nesting boxes, which they don't use. They did initially, but they found a better place and so we let them lay there instead. Occasionally, there is an egg in these. We think it is when "Mama" the black sex-link hen is sitting on eggs and won't let anyone else in the nesting spot. We aren't letting her go broody just yet, but we will let her in the spring if she is still interested. That could be really cool. There are straw bales in front of the door for draft protection too. We covered them in lumber tarps to stop the chickens from tearing them apart.

Overall, we are very happy with our winter coop solution. It gets cold in there, but we haven't lost any hens yet and have not added any additional heating. It warms up during the day (earlier today it was at 43 degrees) and then cools off at night. They don't go in the run much anymore so we have moved their food and water into the coop. There is generally no odor, and if there is, we add more litter and it improves right away. The extra carbon from the wood shavings and straw help to mediate the odor. We lose a few eggs to freezing, but "Mama" is our savior there as she is often keeping them warm for us until we collect them. We can't complain, as we are getting 10-15 eggs a day still from 26 hens in the middle of winter--with no supplemental heat or lighting. Not too shabby!.

If you are interested in eggs, just give us a call or contact us via email.  We sell our "beyond-organic" eggs for $4 a dozen and if you prebuy five dozen ($20) we'll throw in an extra half dozen or so.  If you do this, just let us know when you want some and we'll get them ready for you.

Picture
Look forward to a future post in which I demonstrate how our hens are getting fresh green sprouts in the dead of winter. Let's say that it instantly made a huge difference in the egg quality.

Trevor
1 Comment

Around the Farm

1/2/2015

0 Comments

 
Here are some random things that have occurred around the farm since the fall update:
Picture
Picture
The eventual back garden, which we will use for most of our annual production, covered with tarps for the winter. Check back for a future post that explains why we are doing this!

The bees are tucked in for the winter. We have our fingers crossed that they will survive since we had so much fun with them this year. What you see is old lumber tarps from a local lumber yard wrapped around steel t-posts with the black side out. The hope is that the tarp will provide wind protection and the black will absorb heat and create a warm pocket for them. The open side is the south side, which is where the sun will be shining from . . . when it is shining.

Picture
Ya for eggs! Production has increased and despite lack of sun and cold temperatures, we will get up to ten or twelve eggs a day; however, this was only after we found their hiding spot. We thought five eggs a day was what we were going to get, until we determined the sneaky hens had a secret stash. We missed a grand total of 39 eggs before we caught on. Needless to say, the dog and new kitty are happy we missed them as we cook the eggs up and off them as a treat every other day or so.

Picture
The new shed was finally finished. Huge thanks to my father and father-in-law for their help. Look forward to a post on this shed where I breakdown why it looks like a baseball field press box and some of the materials we used. We still are missing the double doors, but it's tarped off for the winter . . . and already full!

Picture
The Winter Coop.  Another post will explain what we did here, but we had to have a winter housing option for the hens and this is the direction we went. It is actually a carport with a ventilation hole in the top. The future post will show you the inner confines of this hen sanctuary.

Picture
This is a fodder system for turning dry seed into sprouts for the chickens. In the winter they do not get much fresh food from foraging so we are setting out to make it for them. In doing so, we also hope to save on some feed costs as sprouting seeds can turn one pounds of seed into 5-6 pounds of feed. While still a work in progress, we have successfully increased the yield by at least double. More fine tuning should get us closer to the desirable mark of 4-5 times more feed. The fodder system also greatly increases the nutritional value (vs. feeding seeds) for the chickens. A future post will explain how this came together for ZERO DOLLARS!

More to Come!

Trevor
0 Comments

If You Build It . . . It's Usually Cheaper!

6/8/2014

0 Comments

 
As we endeavored on this farm, one of our goals was to utilize scraps and repurpose random things into the items that we needed.  This hasn't always been the case as some things were needed "right now" and a trip to TSC worked better than trying to build chick feeders at that particular time.  However, looking around there are a number of interesting builds on the property that have come at almost no cost, minimal cost, or at a cost far less than what one could have purchased the originals.  Perhaps some of this post is pride, but also a chance to help others move past their commercial addictions and use their creativity to "MacGyver" things with the items one has at hand.  When you succeed, its quite a sense of accomplishment.
Bee projects were a combination of scrap and new melded together in a good way.  Hives built by myself and my dad this winter.  Bee feeder thrown together with scrap by me.  Tables by me.  Overall, not bad considering bee feeders are $25 and top bar bee hives are much much more!  We love Christy's bees, but we can build the rest!
The above pics are associated with the chicken tractor and the hens/pullets.  A lot of new, but a lot of repurposed and invented things.  Chicken tractor is mostly based upon the plans of Harvey Ussery.  With the brooder, we also repurposed a broken baby gate for a lid and the other lid was a divider from a dog kennel.  Not pictured, but I just made a chicken feeder with a "found" bucket that I drilled holes in the bottom and then glued that to the bottom of a cheap laundry basket with the top 3/4 cut off.  It looks similar to this, just without a garbage bucket, but a standard five gallon bucket.
More chicken stuff thrown together at the last minute . . . the best way!
Broiler pen and accessories.  Pen frame was all new, treated wood and new screws.  Some pics of construction.  Most of it was 1" 2x6s that were ripped.  Found some plans online for Salatin-style pens and made it 6' x 12' instead of 10' x 12'.  Framing was pretty much to plan.  Chicken wire was scraps and a roll found in under the work bench at my dads.  Steel was leftover from a building and was free!  Used leftover screws to connect it together, so that was good.  I have this pickle jar full of extra screws that finally came in handy.  Small changes is the framing under the door for stability and added another stabilizer beam on the back to make the steel sturdier.  Salatin-style pens sit flush on the ground and require a dolly to move.  These are often made of steel tubing like this.  While I'm sure his is very sturdy, why not repurpose a seed rack.  HUH?  Well, we took a leftover seed rack, cut off one set of legs on back, found a steel rod that went through some old lawnmower deck wheels and wired that on for now.  Then, we smashed the remaining feet flat for ease of sliding and added buffers to keep the pen off the wheels.  Frankly, we didn't think it would be sturdy enough.  WRONG!  It works like a charm.  This was definitely a Trent Grice creation.  The last pic is our broiler feeder.  We cut some scrap tile and nailed it to a leftover, weathered deck board, added scrap for a handle.  It needs stabilizer feet, which I was going to do before my foot exploded.  However, what do you use for end caps?  Why empty worm dishes of course.  They fit perfectly in the tile and slid nicely into the groove.  This a cool build for sure.
Picture
This looks like a pile of rocks, which it is.  However, I'm excited for this one.  This is the foundation for our future shed.  The stones are the limestone strippings from my father-in-law's driveway after he had it flattened in preparation for his asphalt driveway.  I also got three other loads on my driveway to help some trouble spots.  While this is cool, I'm more excited for the shed that will be built.  Walls are expected to be old plant display tables, siding will be leftover steel siding/roofing, base beams are treated 4x6's that are laying around my dad's place. We will try to use other "found" stuff as well as we search for leftover windows, doors, etc.  The plans are in my head, but hopefully on this foundation by the end of the year.  The shed in the back was just saved from my brother-in-law's place as he almost tore it apart for scrap.  Not sure what we'll do with it yet, but it's still good and sturdy.  I guess it's like 40 years old.  It was pretty easy getting it on the trailer.  I sat in the hammock and watched my dad and brother-in-law do it.  I had to keep my foot up.  What did it cost?  Sounds like it may cost us some chickens.

Picture
I have a post on the "hugel" mound, but this is also one of the cool builds on the property.  I was going to dig this by hand, so I'm glad I used the tractor when it was here.  The woody material is brush and tree branches we had for free.  Top soil was originally in the previous owner's raised bed garden that I forgot about and the mulch top layer is free wood chips from tree trimmers.

While this is a small breakdown of some of the stuff that we are doing on the farm, I also shared this to show that if you look around, most anybody can get started on projects.  We don't need to go and buy everything.  Sure, not everybody has a bunch of tools or woodworking know how, but the worst thing you can do is not try to build it.  You learn a lot during the process.  I look forward to "MacGyvering" more stuff as we go along

- Trevor
0 Comments
    Picture

    ABOUT

    Dandelion Hills is a family-owned farm in Caro, Michigan, established to provide beyond-organic food to its owners and the local community while improving the soil quality.

    Categories

    All
    Bees
    Chickens
    Continuing Ed.
    DIY
    Ducks
    Food
    Gardening
    Geese
    Homesteading Tips
    Maple Syrup
    Our Stories
    Preserving Food
    Quail
    Trees
    Turkeys
    Weeds

    Dandelion Hills

    Archives

    May 2016
    February 2016
    January 2016
    July 2015
    June 2015
    May 2015
    February 2015
    January 2015
    December 2014
    September 2014
    July 2014
    June 2014
    May 2014
    April 2014
    March 2014

    TAGS

    Dandelions Hills Farm Caro Michigan Local Permaculture Sustainable Ecological Natural Beyond Organic Biodiiversity Regenerative Family Farm Mini-farm Farmstead Homestead Pastured Eggs Chicks Chickens Poultry Gardening Honey Bees Flowers Herbs Ducks Turkeys Geese Quail Market Garden
Powered by Create your own unique website with customizable templates.