Dandelion Hills
  • Blog
  • Sales
    • Chickens
    • Ducks
    • Turkeys
    • Eggs
  • About Us
    • Our Story
    • Contact

Polyface Farms Field Day: Part 2

7/28/2014

4 Comments

 
Picture
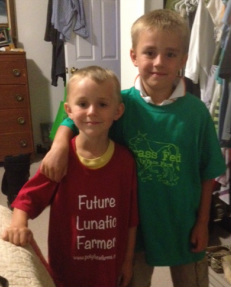
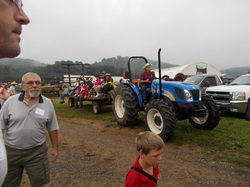
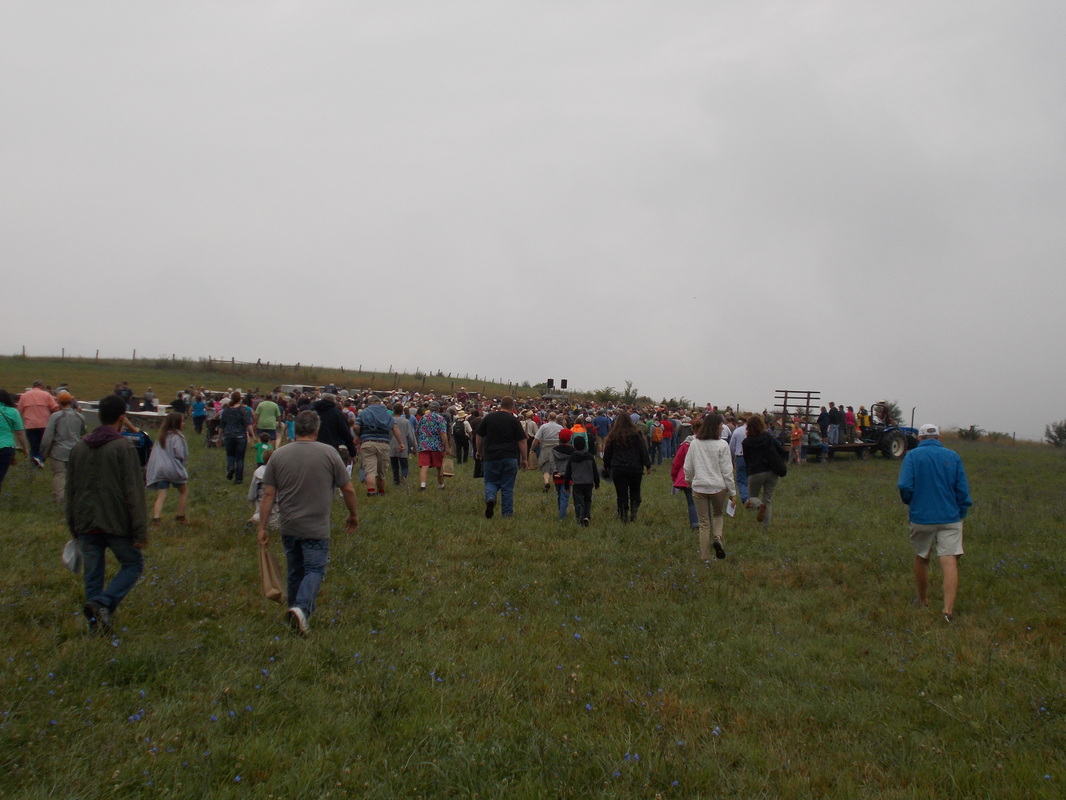
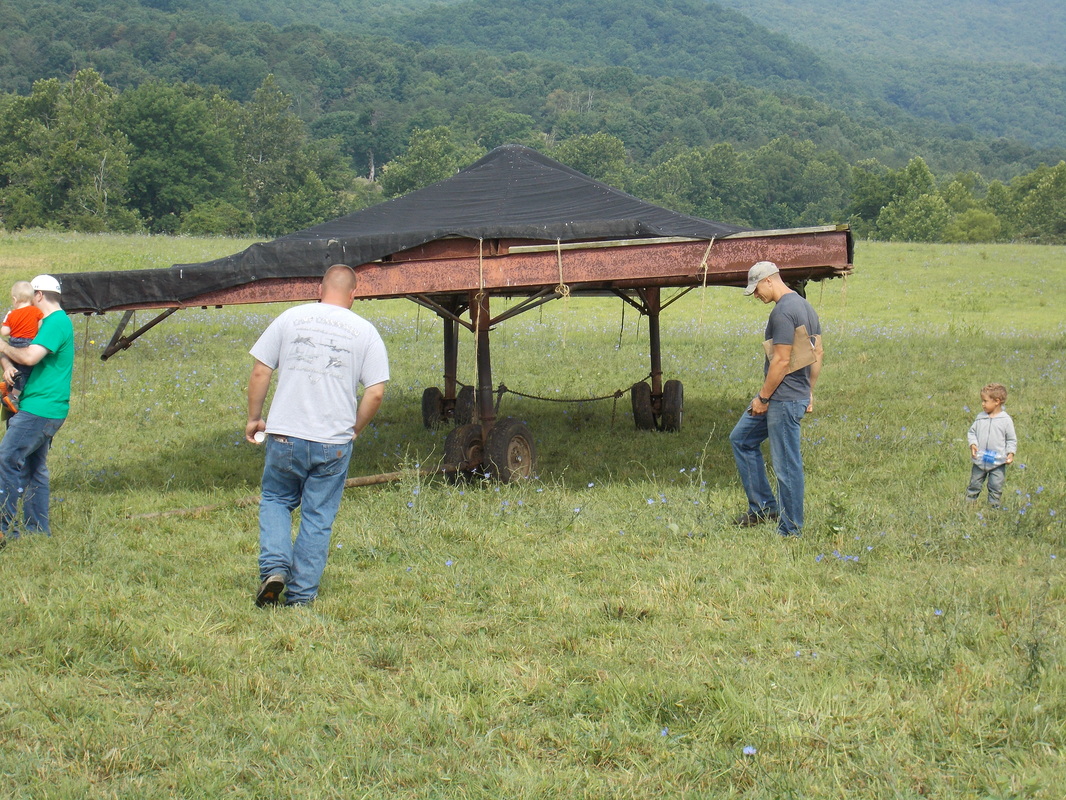
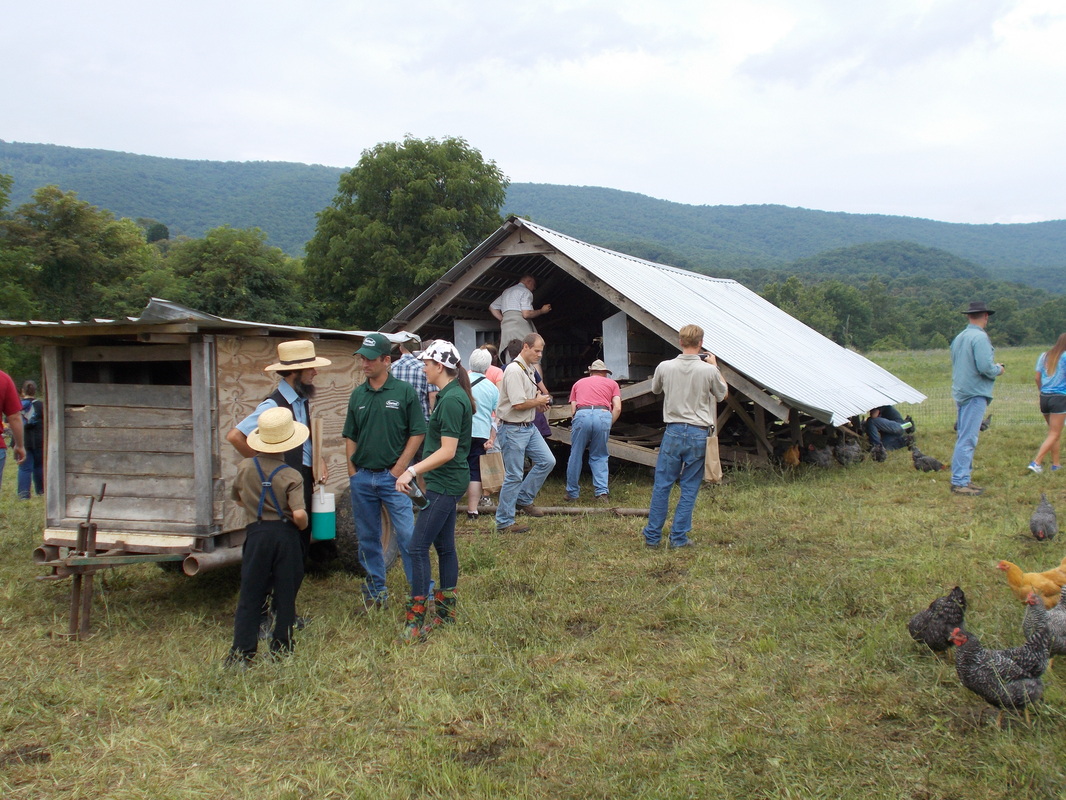
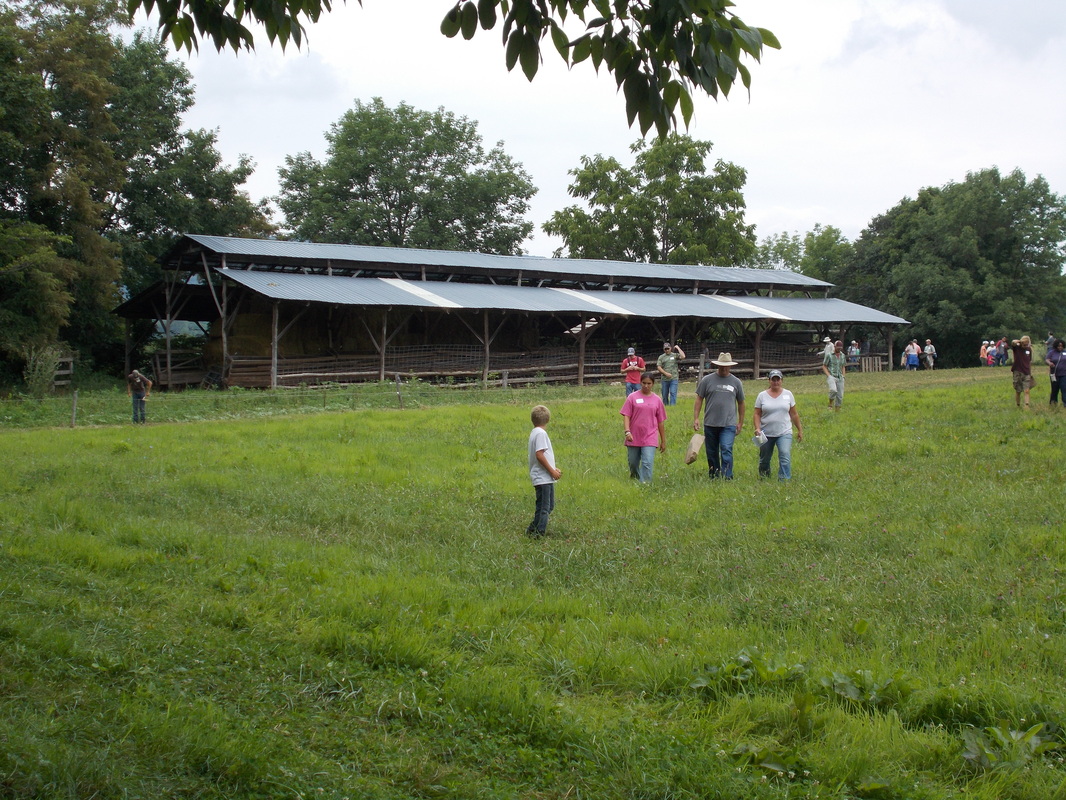
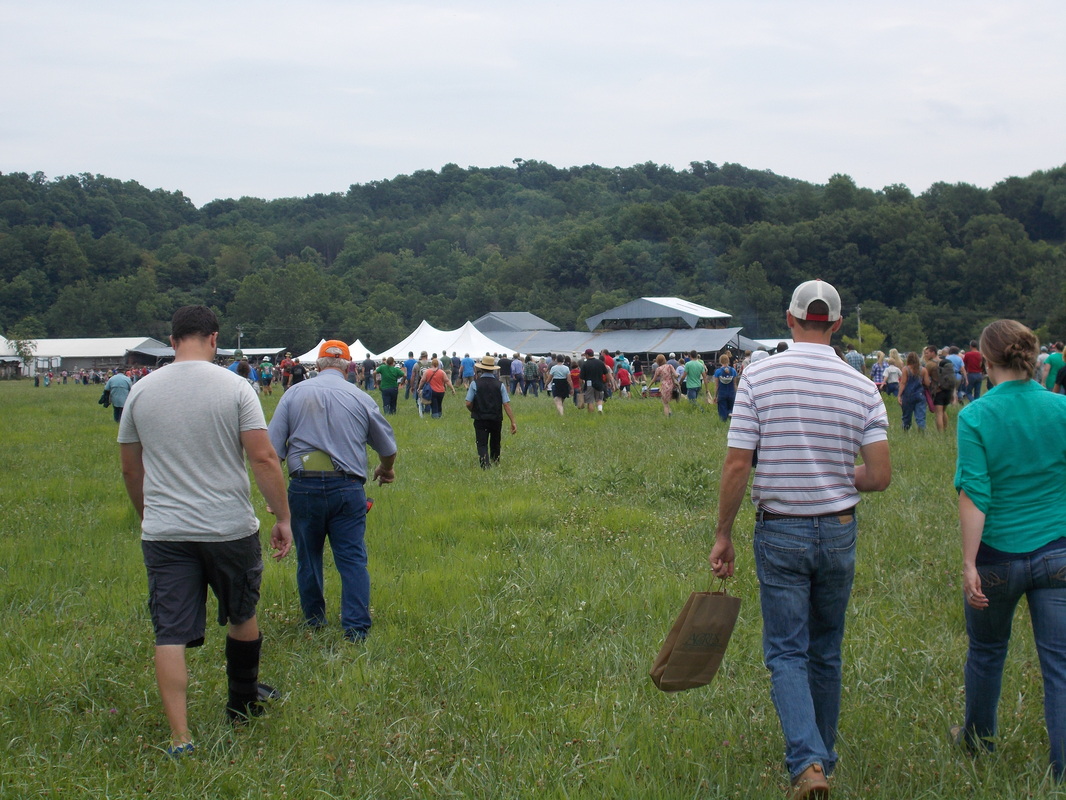
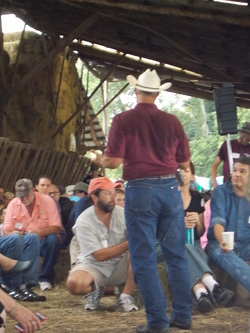
Like most of you, I was anxiously awaiting the epic conclusion of the Polyface Farms Field Day saga. Unfortunately for me, I was tasked with writing it rather than just waiting to read it. Nonetheless, I believe Diana left off on our quest toward lunch. The picture above demonstrates this as we finished our tour with Joel and headed with the crowd. As you can see, I am on the left side of the picture still in a walking boot. This definitely added to the complexity of the field day. I got good with the boot in the previous six weeks, when on flat ground. However, rolling pasture is a different story. Because of this, we were one of the last to get food. That was not a problem as there was plenty to go around for everyone, but was a problem for us as the two farm-fresh eggs that were consumed at 6 a.m. that morning had been absorbed hours before this picture. 
NOTE: The older gentleman in the orange hat just in front of me is packing an iPad. I thought that was pretty cool!
Picture
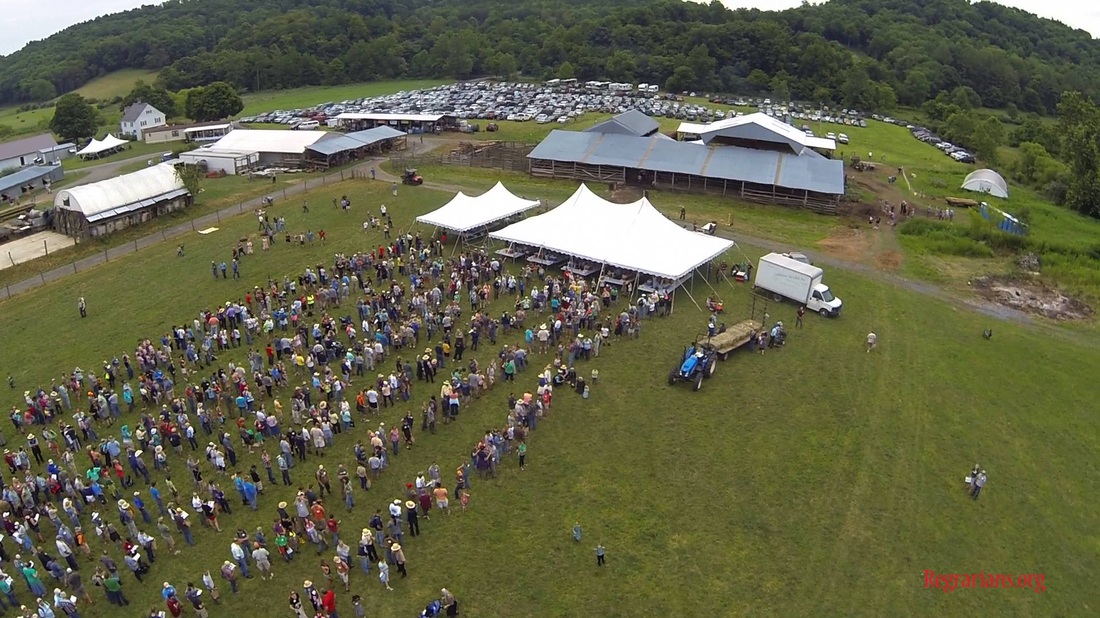
An overhead view of Polyface Farms Field Day at lunch time. Notice the orderly rows of people anxiously awaiting delicious barbecued chicken, smoked pork and beef and buttermilk chocolate cake. Photo was taken by world renowned permaculture expert Darren Doherty of www.regrarians.org with a drone camera. BTW, we aren't in here because we are still hobbling to the back of the line.
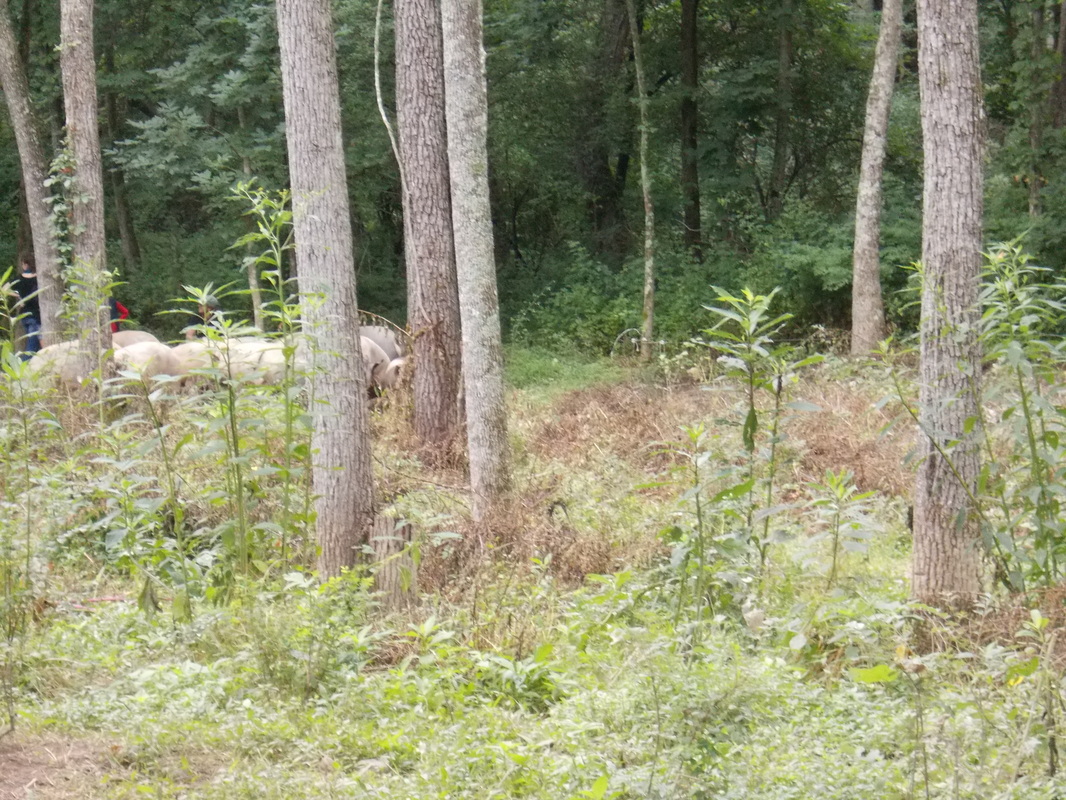
More drone pics of the Field Day from Darren Doherty.  The first two are of the last stop on the morning tour at the pig glen and the last one is a high overhead view of the lunch lines.
Picture
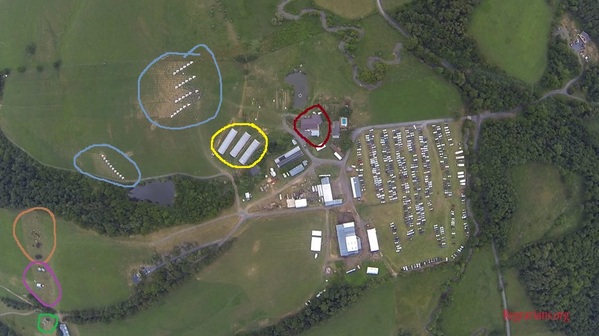
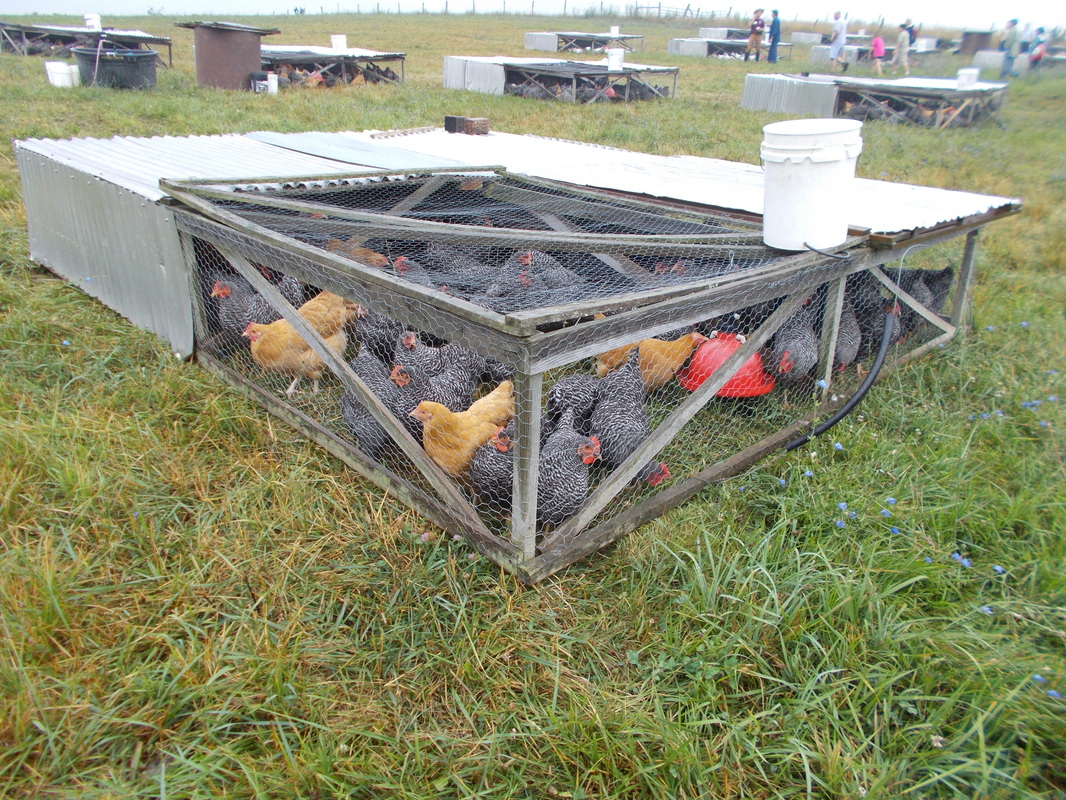
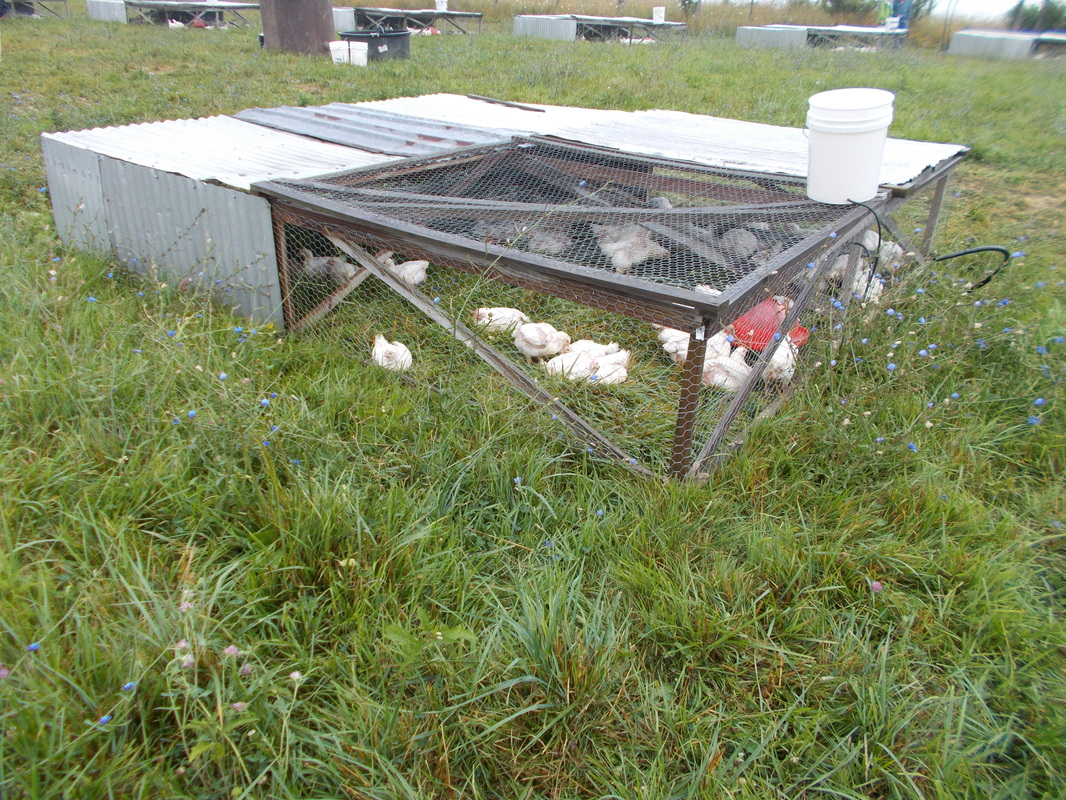
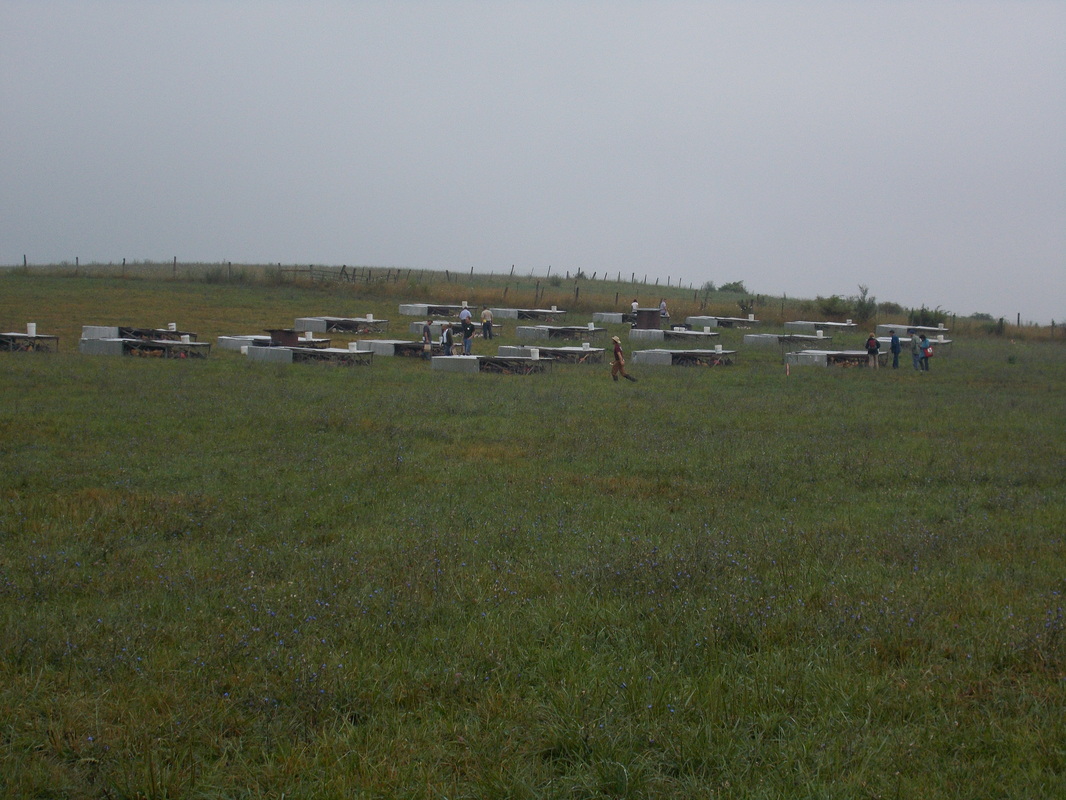
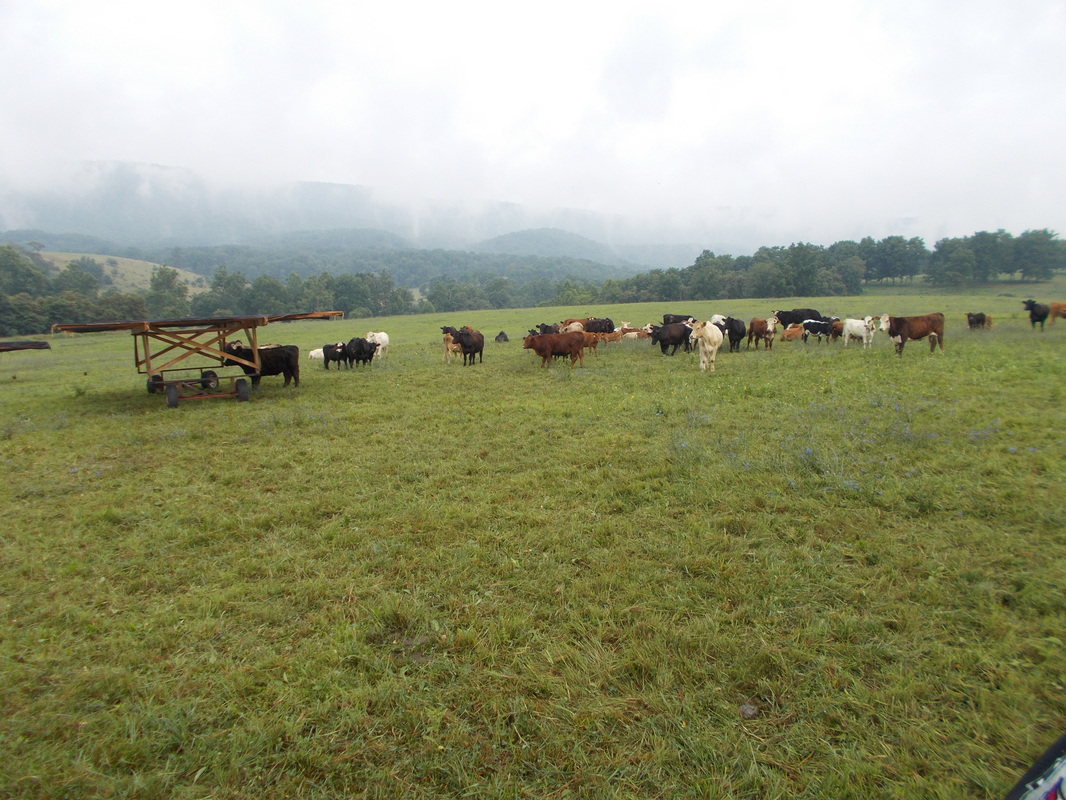
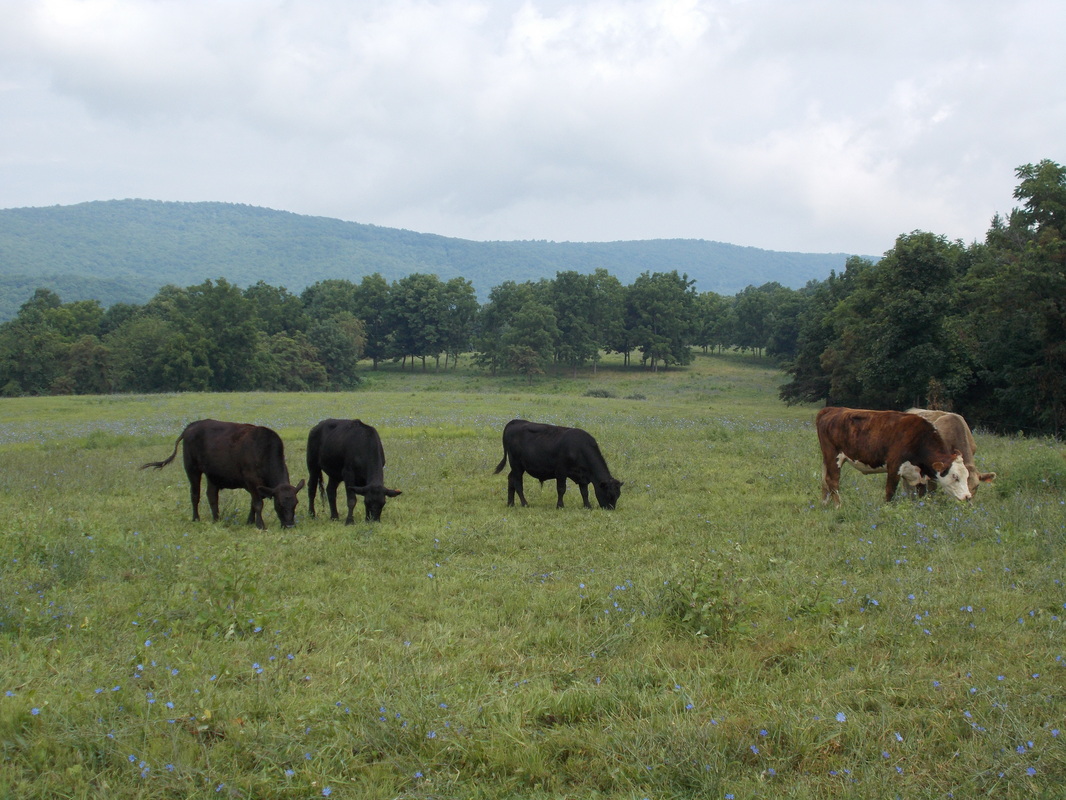
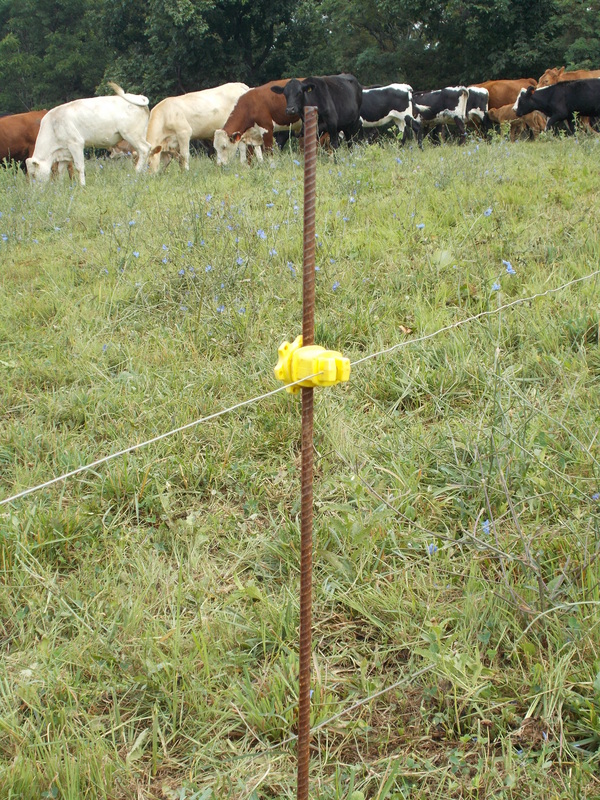
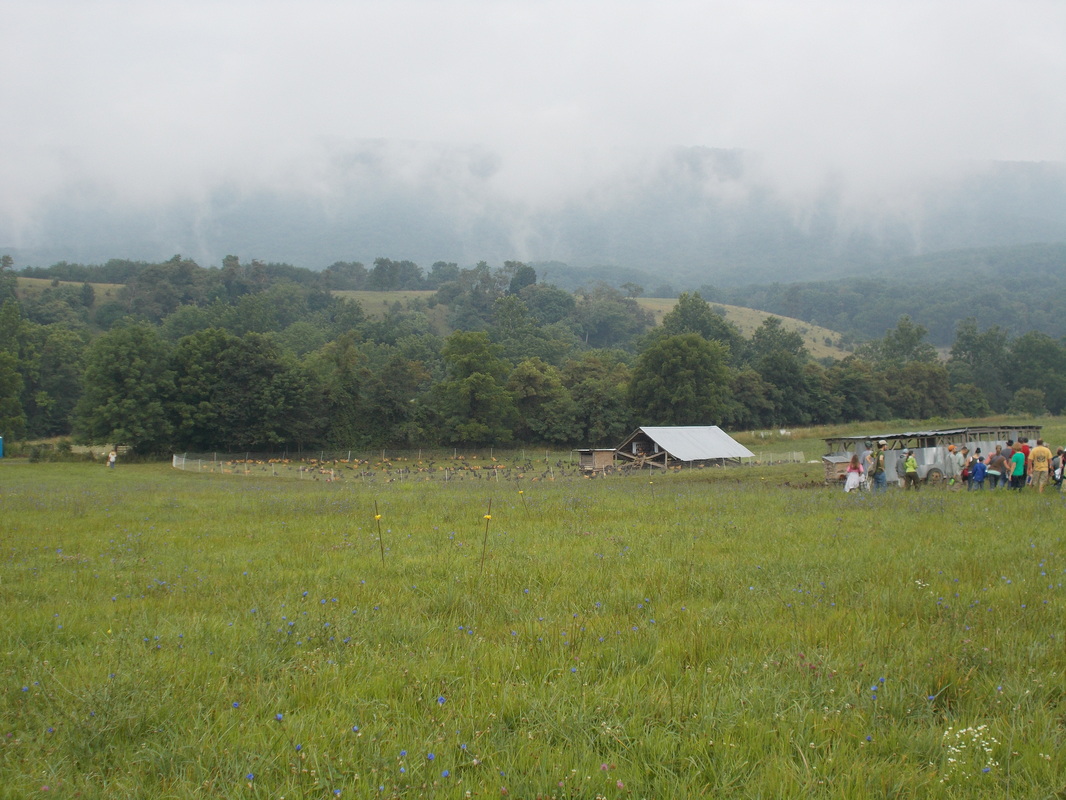
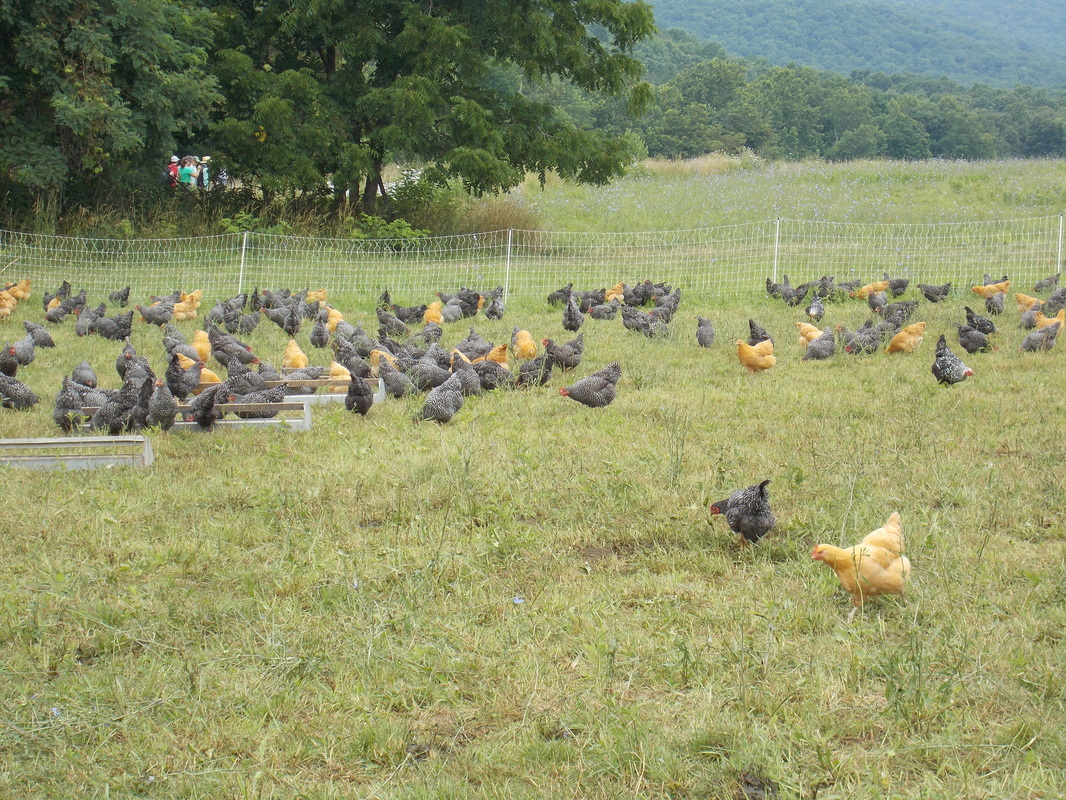
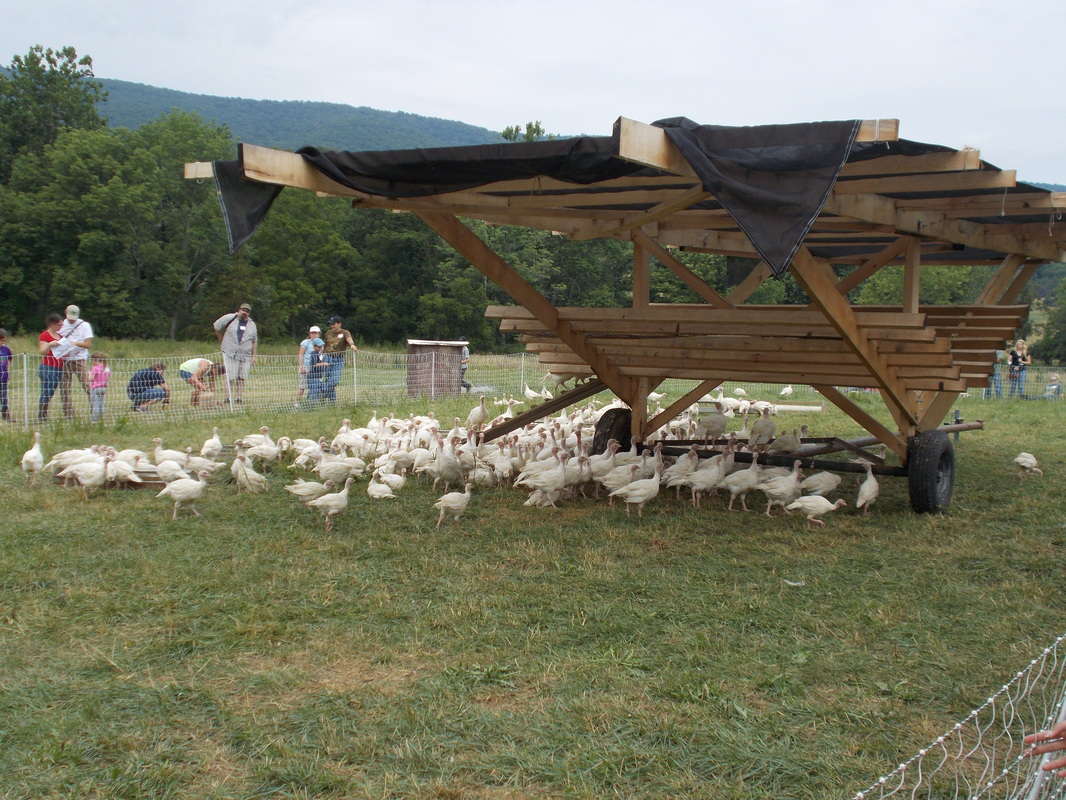
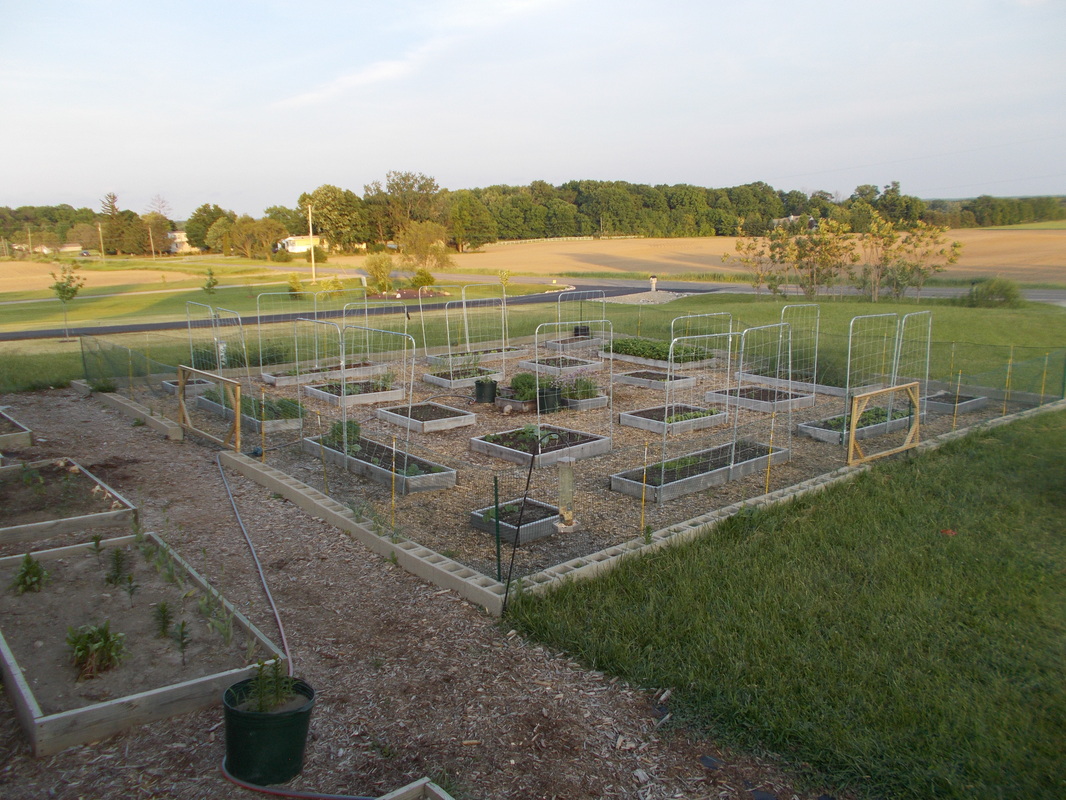
This picture is awesome, again from Darren Doherty. This is the primary 100 acres of Polyface Farms, give or take a few acres.  If we start at the pool in the middle area, that is the Salatin house. Directly left is their new store and chicken processing shed with the large pond behind it. The three grey rectangles are hoop houses where they over-winter their chickens and pigs. The four lines of white boxes are the broiler chicken shelters. Notice immediately behind them it's brown from chicken droppings, but if you follow it back you notice the tracks disappear and the grass gets greener. Another strip of chicken shelters is below them and to the left. In the lower left-hand corner is where we stopped to see the cows. The Eggmobiles and the Millennium Feathernet are all in that area. That grass looks different because of it being grazed. Turkeys were in the very bottom left corner and we continued the counterclockwise walk to the food tents. It looks like the tour was with the chickens at this time. The "parking lot" is usually a grazing area and the cows were in that area up until about two days prior to the event. This is why it is not as green, but I'm sure the 2000 people didn't help either.

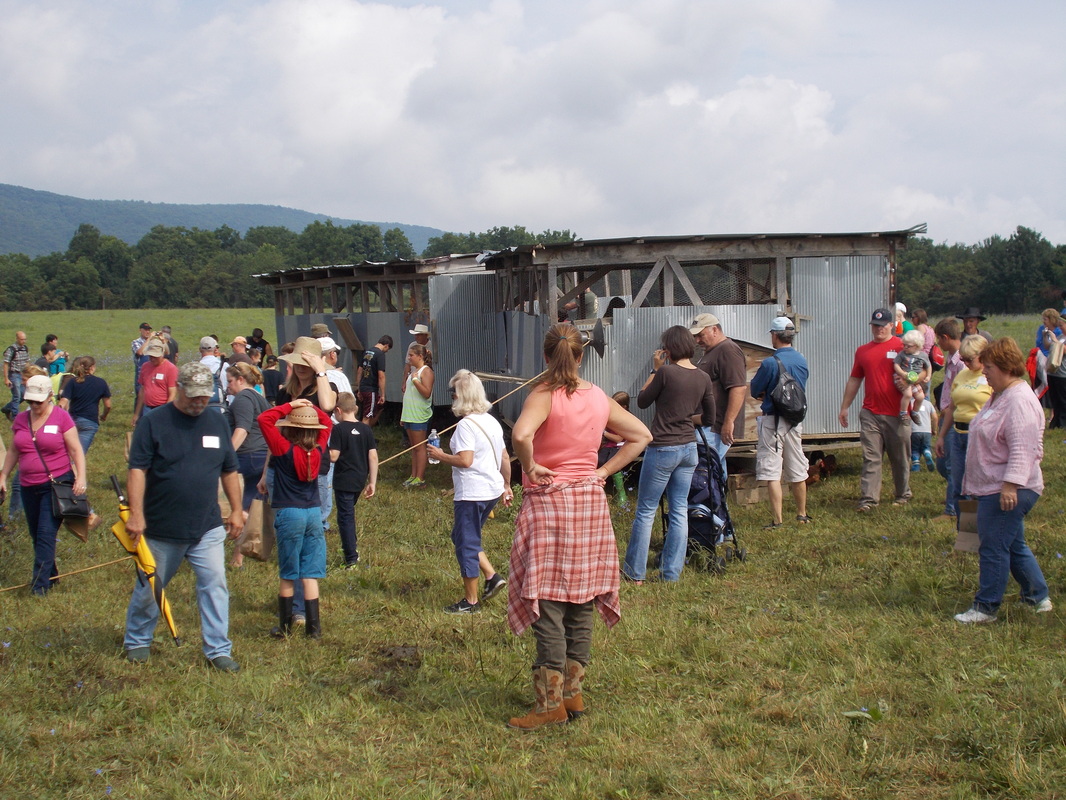
After lunch we had a protein coma and viewed some of the vendors that were there.  Not just any vendors, only Salatin approved vendors.  We noticed their "Carbon Shed" which is an area where they dump all of their chicken offal for composting with as much carbon (i.e. wood chips) as they can.  We walked by it and while there were a few flies, no odor was noticed.
Picture
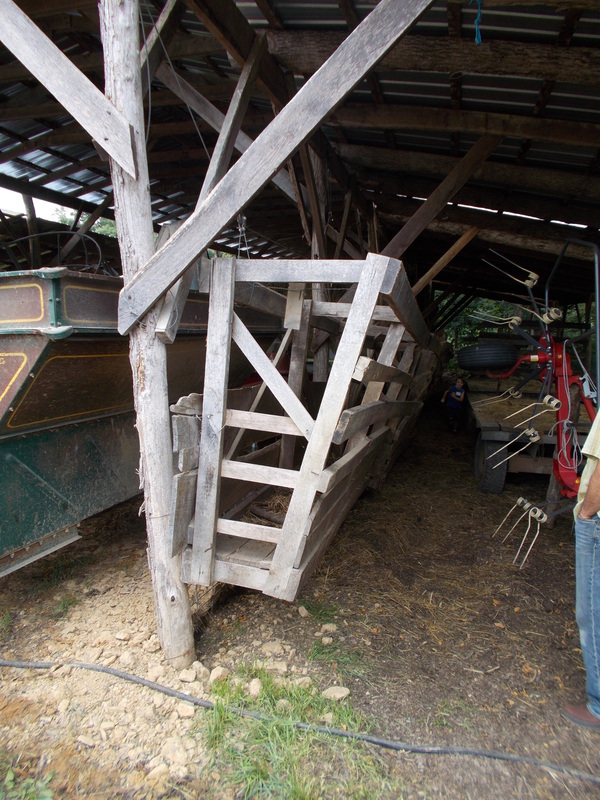
The afternoon started with Daniel Salatin talking about his experience with rabbits. Daniel has raised rabbits for meat since he was nine years old and all of his rabbits today are direct descendants of the ones he first received from some family friends. This is called line breeding and essentially, he "ruthlessly" culled rabbits in his first few years to select for the "best" rabbits. Many would think the "best" would be the larger rabbits with more meat, but that does you no good if they don't eat the "free" food (i.e. grass/pasture) and if they aren't hardy. So Daniel selected for ease of transition to pasture and healthy rabbits that had good litters. Good litters means more rabbits. Any rabbits that had teeth problems, sniffles, health issues, poor transition to pasture and a variety of other things were culled out. Now, he has rabbits that do not have teeth problems, do not have sniffles, eat grass the moment they can and have great litters.  

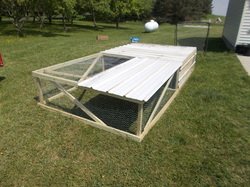
The rabbits are housed in cages that are installed several feet up off the floor in the Raken (rabbit/chicken) House. Chickens are kept at ground level for the purpose of utilizing their handy rakes (feet) to scratch the rabbit poo, which falls from the cages above, into the bedding. Therefore, there is no build-up of rabbit droppings and the bedding is aerated and easily transformed into usable compost.

What we did not know was that he had some breeding pairs for sale.  There was no way we could get some as we had a 12-hour drive home and weren't leaving for two days. However, it would have been fantastic to start our rabbit venture with Daniel's rabbits. 

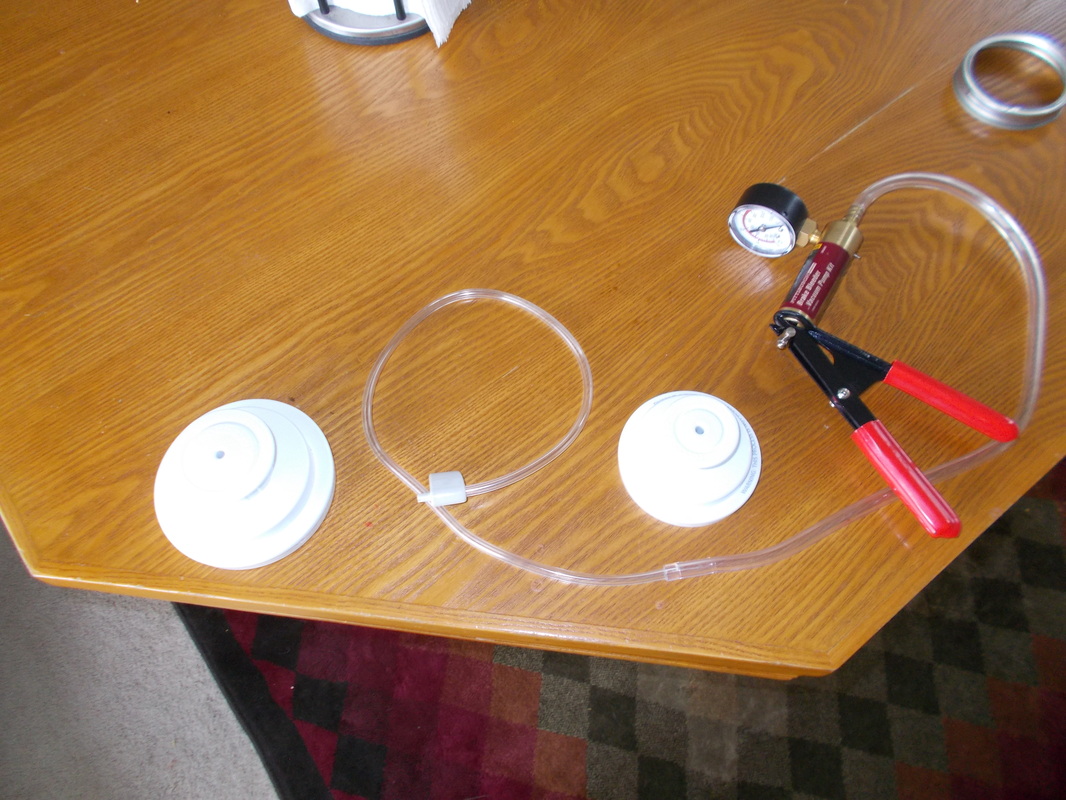
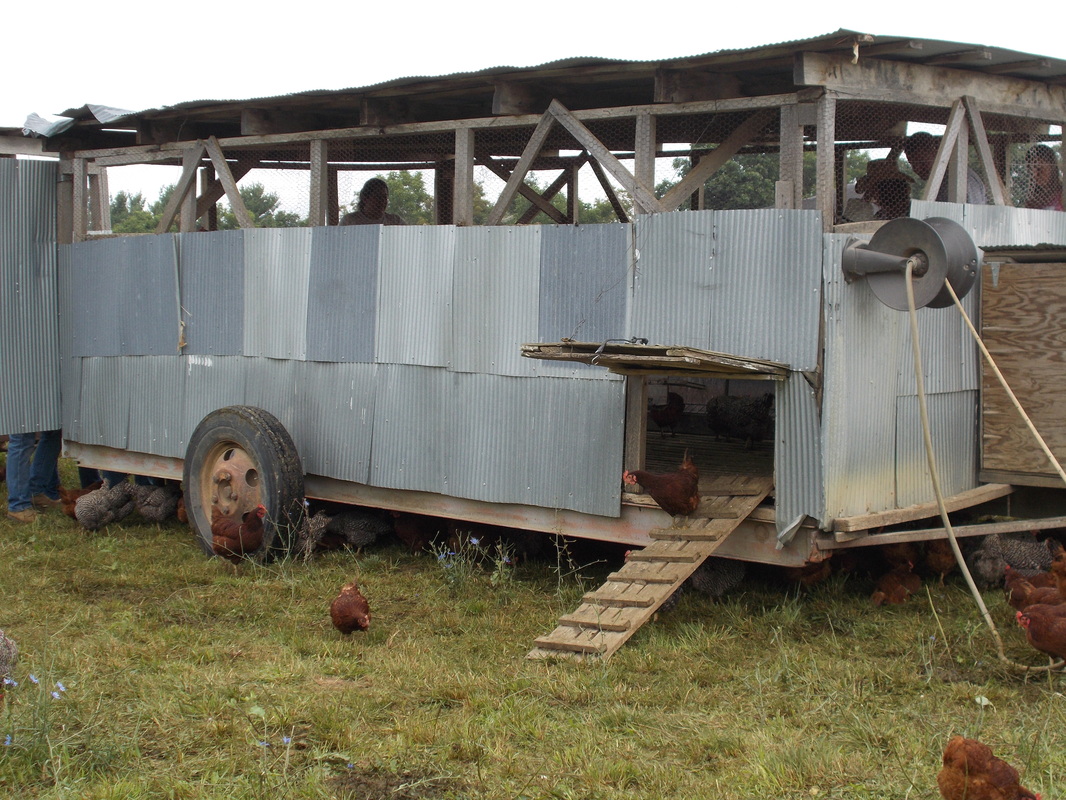
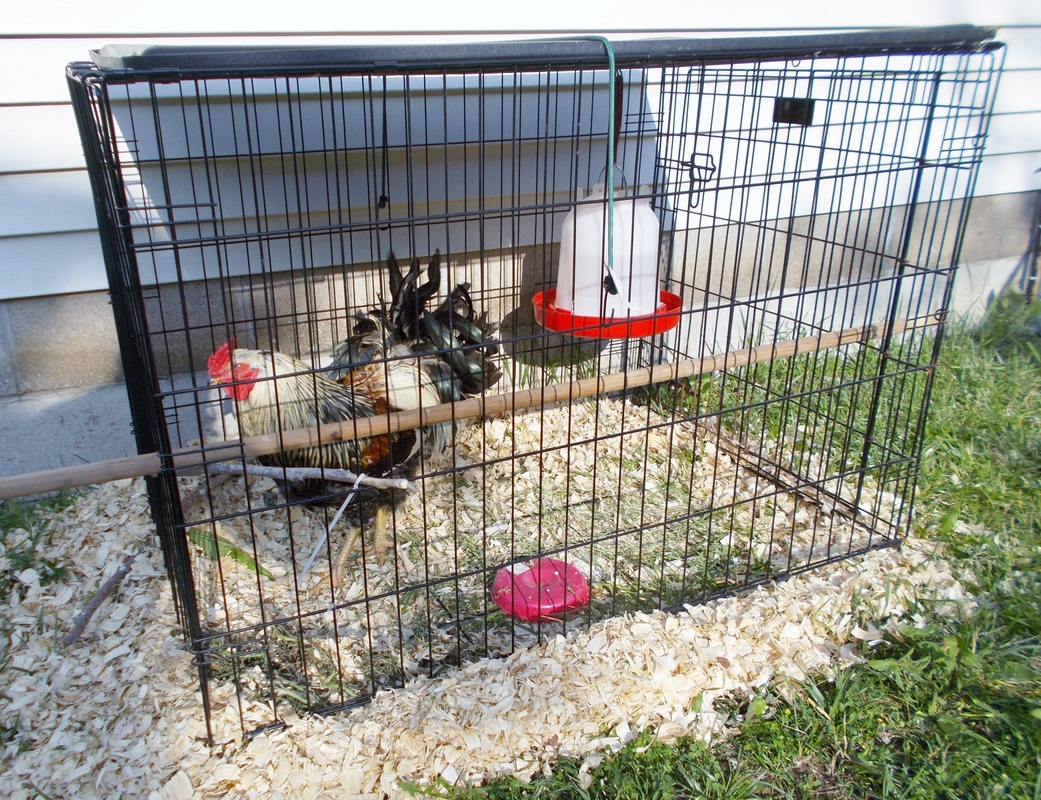
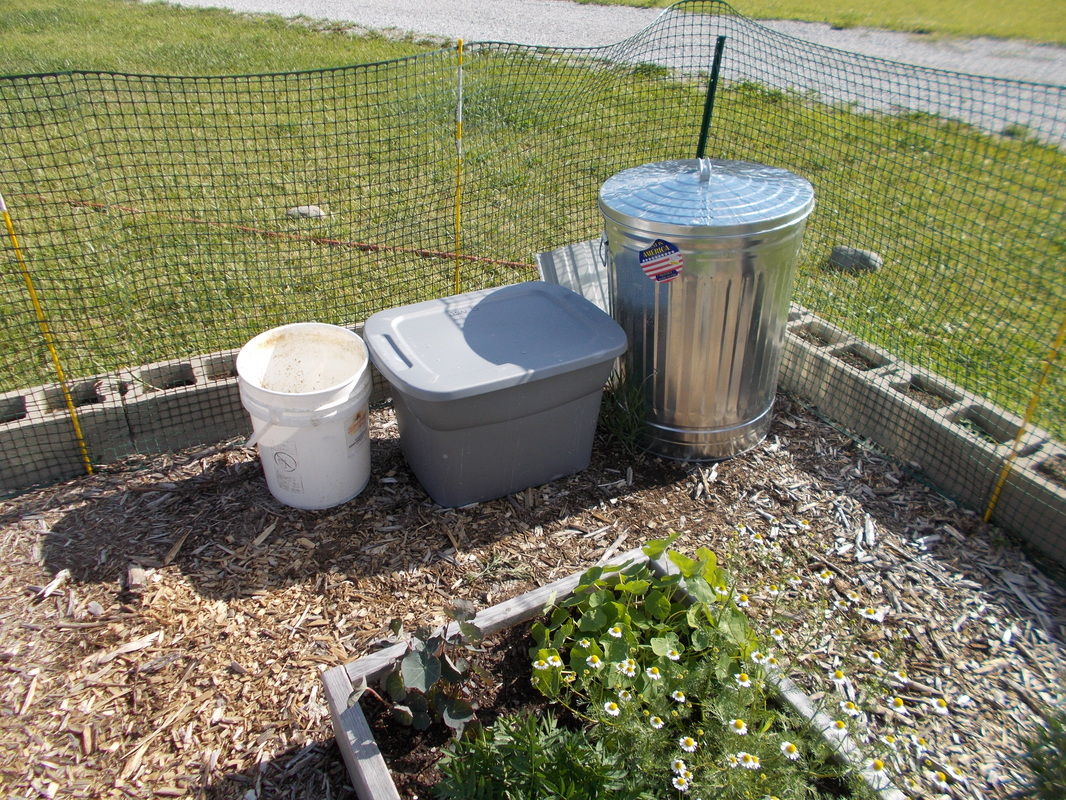
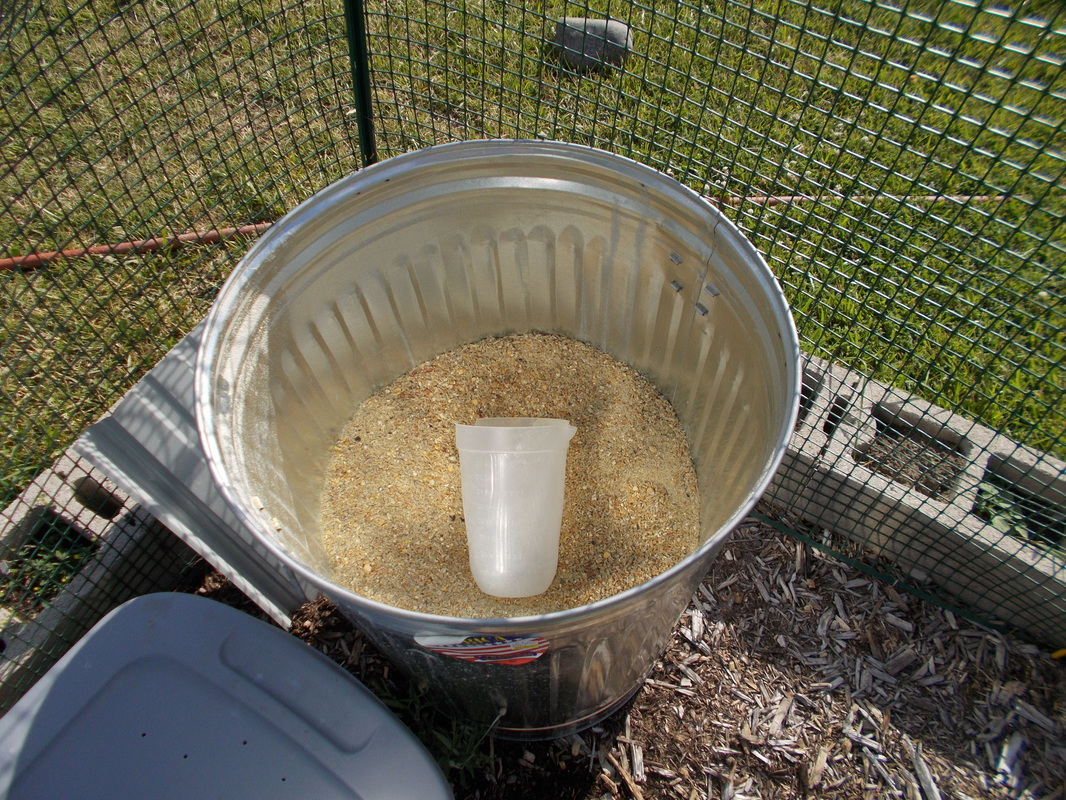
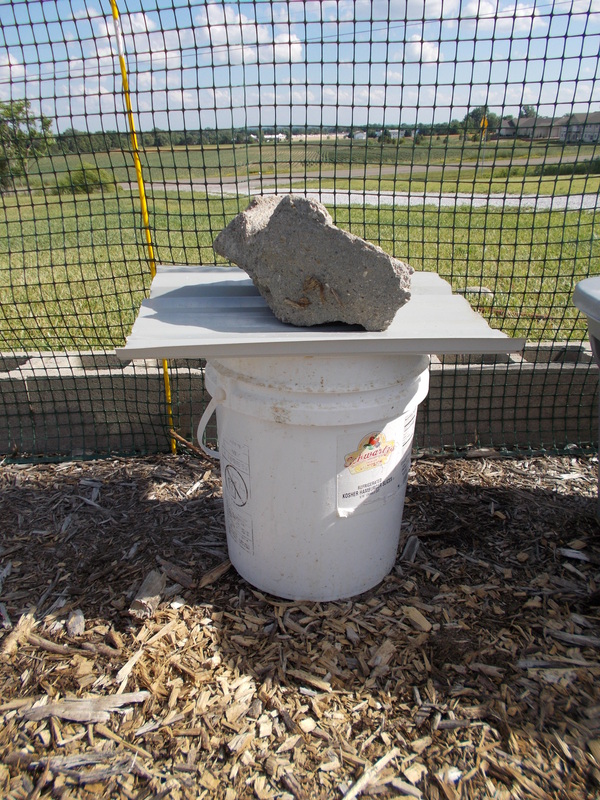
Diana attended a seminar on their chick brooding.  They have a giant shed that broods their chickens and the pictures show how they send feed on a pulley system and separate out the chickens into batches so as not to have too many together.  This avoids piling up and suffocation. She learned a few pointers from their brooding operation. First, she noticed that the wood shavings used for bedding were of a much finer grade than what we use. Even though the chicks pictured were only a couple days away from going to pasture, the bedding was still clean and there was very little odor, and no new shavings had been added. This led Diana to conclude that we needed to switch to fine-grade shavings for our brooder, since we were constantly having to add fresh bedding to our brooder. She also took note of the clean, convenient method of offering water to the chicks through the use of a nipple waterer and learned about a simple schedule to use for offering grit to the chickens.

Picture
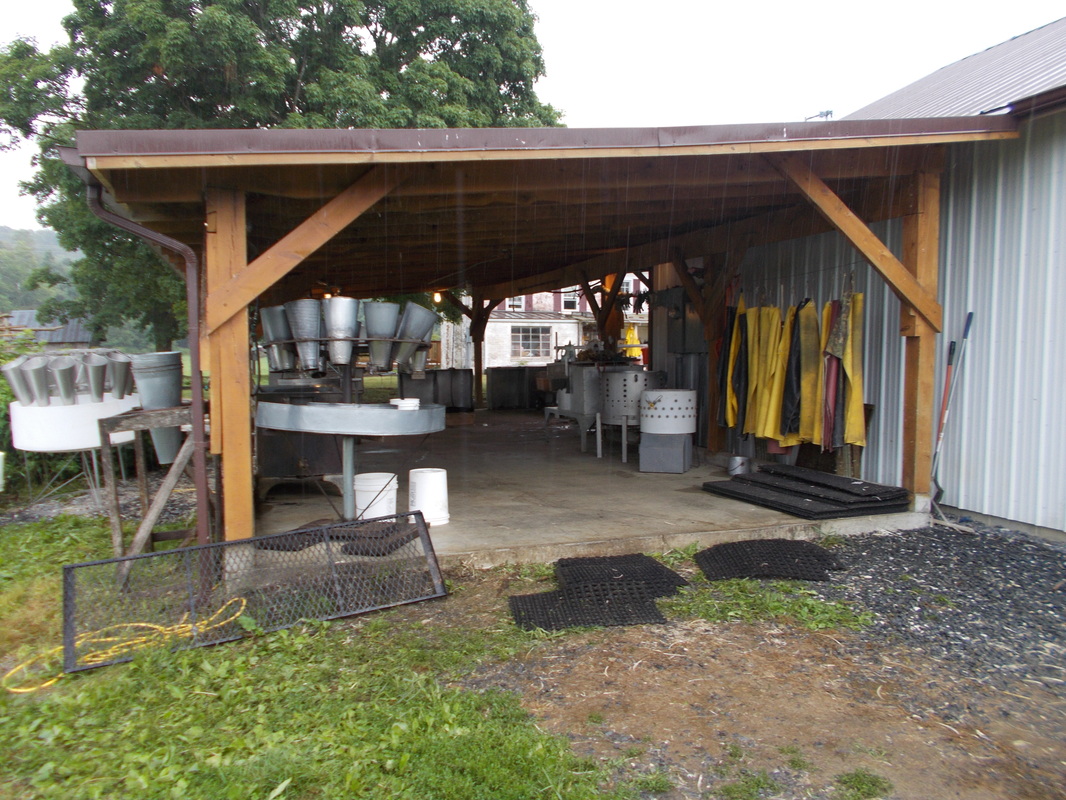
Poultry processing area
Picture
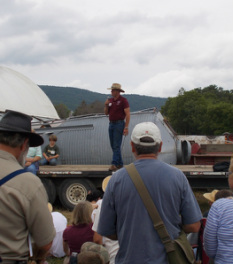
Q&A with Joel Salatin
We also received a tour of their chicken processing station. Past movies have shown the Salatins processing out in a field, but now they have an open air processing structure that is connected to the Polyface store. Not surprisingly, the processing area is well designed and when all interns and apprentices are there, they can process up to 500 chickens in 120-150 minutes. 

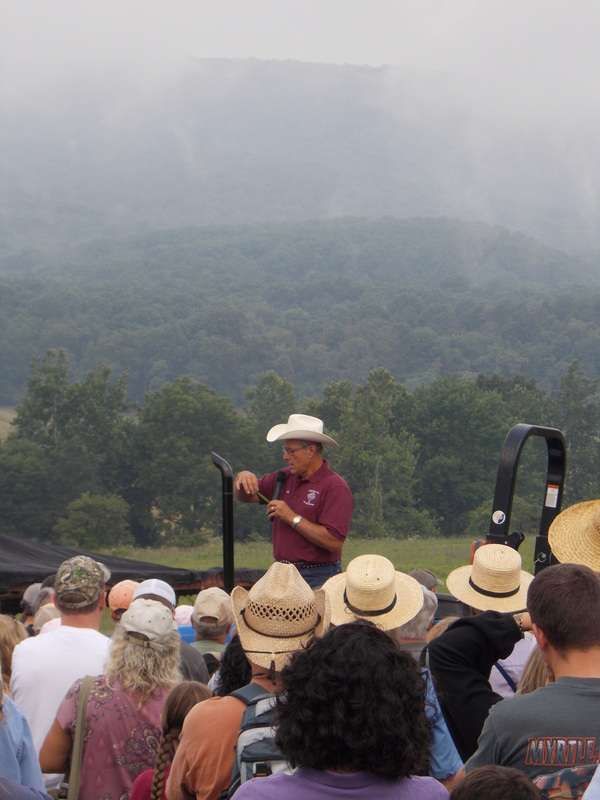
We also learned a bit about the use of their hoophouses throughout the year, follThen the day ended with a Q&A event with Joel Salatin, which was both informative and entertaining.

An exhausting day ended with us buying some Polyface bacon to go with the farm-fresh eggs at our rental house.  It was a fantastic day and one that I hope all of you can experience at some point. While the Field Days will not be offered again, Polyface Farms is open 24/7, 365 days a year to visitors.  As Joel states, he desires to be fully transparent and in order to do this, you have to be willing to see people whenever. We plan on going back to a smaller event or just to visit the farm again some day with the kids. 

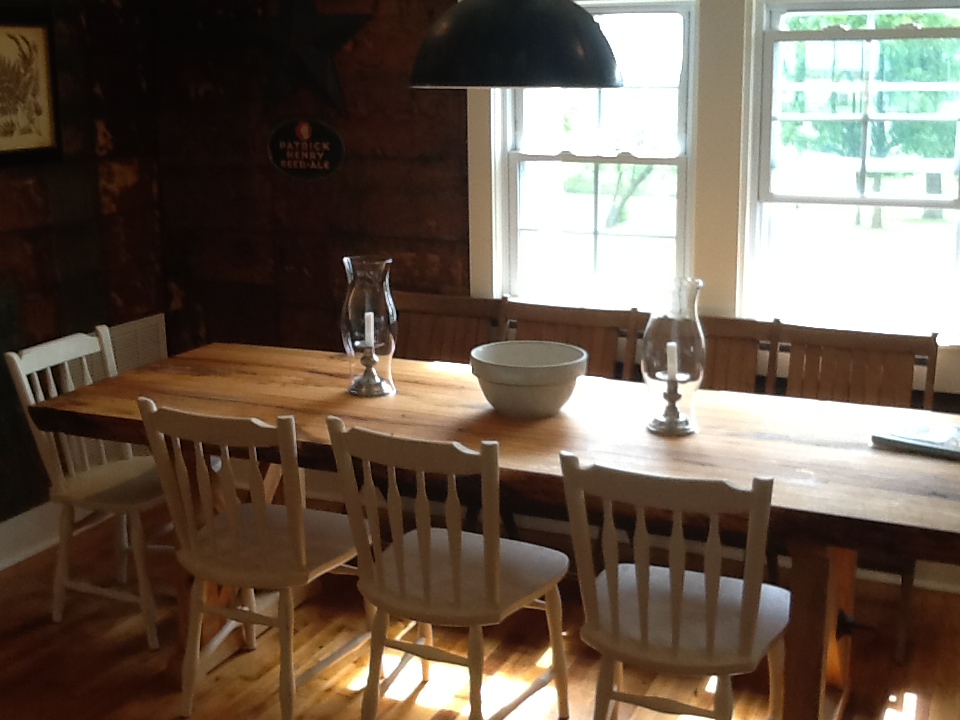
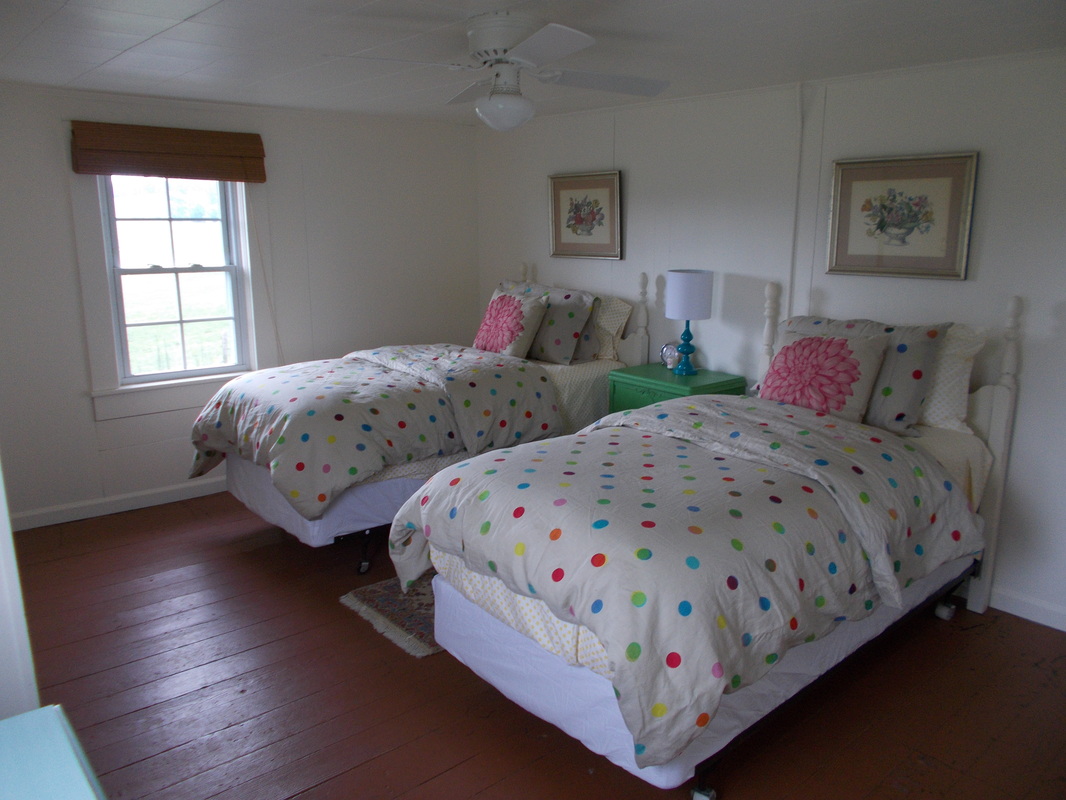
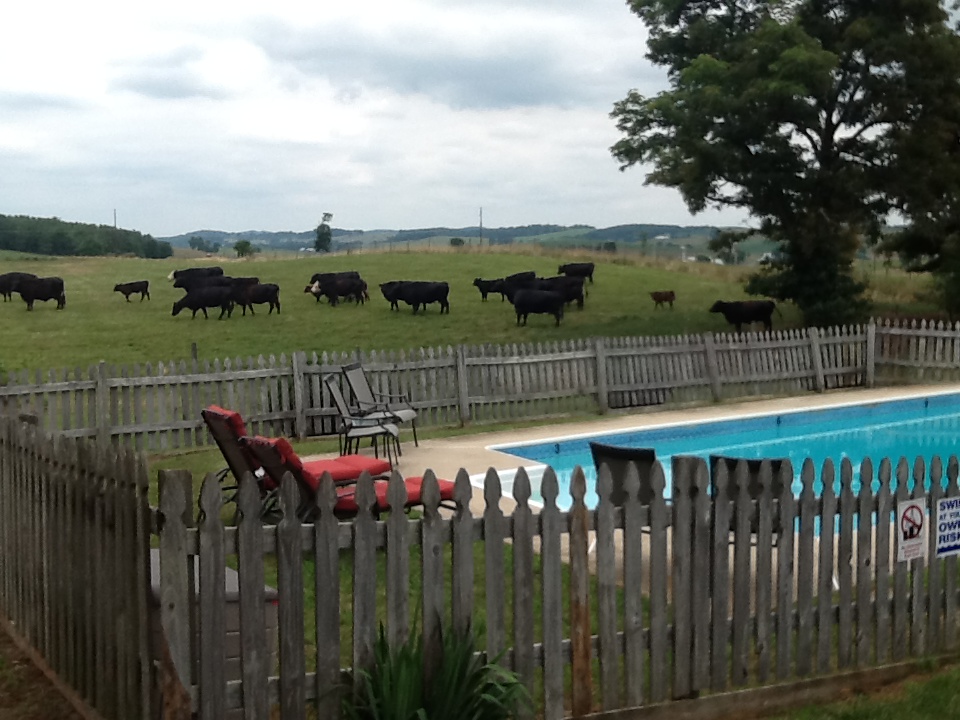
When we do, we plan on staying at the same rental house again. Breezy Hill was a fantastic place to stay and only a mile or so from Polyface Farms. We felt very lucky to be one of the first families to stay there and to be so close to the farm. 

I could go on longer about what it "felt" like to be at Polyface, or for the Shenandoah Valley for that matter. However, that becomes hard to explain when you talk about "good energy" and stuff.  Just experience it for yourself. While Polyface is a long way away (for us, at least), my guess is that you can get that feeling by visiting any farm that is focused on doing things the "right way" and working to maintain happy animals, happy people, and happy plants.

Trevor
+ Diana
Picture
4 Comments

Hand-held Vacuum Sealing

7/27/2014

3 Comments

 
Picture
One of the cooler things we have come across in our homesteading adventures is hand-held vacuum sealing. The current process for vacuum sealing usually involves a Food Saver or similar appliance. Almost all of these run on electricity and require plastic bags that are only single use. Pretty wasteful, but still good for keeping food fresh. However, this can be done with a reusable container and no electricity. The following video demonstrates our hand-held vacuum sealer as I use it to marinate jerky:
We found the idea on Youtube and while I explain it in the video, the necessary items are canning jars and lids as your reusable containers, a hand-held brake bleeder, Food Saver jar sealer attachments, and a Food Saver Accessory Hose. While these links direct you to the Food Saver site, go to eBay and buy a kit that has the regular mouth and wide mouth attachments and the accessory hose. We would have saved $5-$10 doing this. We bought the brake bleeder from Harbor Freight and I think we paid $25 for it. For the sake of saying it, I do think a new, in-package brake bleeder would be a good idea here.  Don't go digging in the toolbox for the greasy grimy one you used last year.  

After getting it, I attached the hose that came with the brake bleeder and then cut off an end of the Food Saver Accessory Hose. This cut end fit perfectly in the clear hose that came with the brake bleeder--no sealing necessary. If you do this, I hope it fits great for you too.
Notice that there are no bands on the sealed jars that I am holding in the last three pictures. For the Hershey bars or any already-wrapped packages, you will need to poke a hole in the wrapper. They are already sealed and that air will stay in there unless you poke that hole.

This video demonstrates how crunchy the cereal is after being stored for over ten months in the vacuum-sealed jar.  For some reason the kids were happy to help with this video.
If you have good canning jars with no cracks you can pressurize up to 20 PSI per my research. We try to shoot for over 15 PSI at least.  This will be easier and harder based upon what is in it. A jar of herbs will be almost all air so that will take longer than the same jar full of rice. By harder I mean more elbow and wrist grease to squeeze the brake bleeder.  Good exercise!

Words of warning.  The brake bleeder is not meant for this purpose so please use at your own risk. Some people have been concerned about the brass fittings at the end of the brake bleeder. Our logic is that the brake bleeder is only pulling the air out of the jars and not putting any air into it, so there should be no brass residue. Anyway, we are okay with it.

Also, please research what foods to use. Powders can be used (e.g. flour, dry milk), but keep the level lower in the jar so as not to suck up the powder in the hose. Use only dried materials. Even though the air is out, if there is water in the jar it will still work to cause food to spoil. Also, leave your recently-sealed jars close by for a week or so and check the seals. After a week, if it is still sealed, it will likely remain sealed. No promises though!  Some theories state that if you seal it well, it should stay good for a very long time, perhaps 5+ years as long as that lid is safely sealed on there.  

If there is a leak, the pressure will equalize and loosen the lid on the jar, so if the lid is solidly attached, then the jar is still sealed as the day you did it.

In regards to wasting, another great thing is finding a use for "spent" canning lids.  Since water bath and pressure cooker canning require tight seals, it is always recommended that you use new, unused lids.  For this process, as long as the lid is not bent and the seal is in good shape, it should work.  It's not using heat to melt the seal around the lid, it's sucking the lid onto the jar and this allows you to use "spent" lids as opposed to throwing them out.  

Finally, in case you are new to the world of food preservation and think that vacuum sealing is a substitute for water-bath canning or pressure canning, you are mistaken! Those foods need to be properly sealed through the appropriate canning method--not through the use of a vacuum sealer.

The only downside to this process is that the jars can be expensive. However, just buy all the ones you can find at garage sales (just not the ones we are going to) and start stocking up. Canning jars are invaluable items. Great for storage and canning (obviously), but can be used for any number of other uses, decorations and even for bee hives!  Email us if you need more information on this handy, no waste, electricity-free food storage device.

- Trevor
3 Comments

Polyface Farms Field Day: Part 1

7/23/2014

2 Comments

 
Picture
Originally, Trevor and I were planning to celebrate our 10-year anniversary in Las Vegas, but instead decided to take a short trip to Virginia and attend the 2014 Polyface Farms Field Day. Polyface Farms, a multi-generational farm run by the Salatin family, is a self-described "non-industrial food production oasis" that is known for its holistic animal husbandry practices and its use of perennial polycultures. Polyface Farms has been featured in documentaries such as Food, Inc., Farmageddon, and Fresh, the Movie. Joel Salatin has written nine books including The Sheer Ecstasy of Being a Lunatic Farmer and Folks, This Ain't Normal: A Farmer's Advice for Happier Hens, Healthier People, and a Better World.

We arrived at the farm at 6:30 a.m. prepared for a long day of touring and  workshops. Since none of the scheduled activities took place until 8:00 we had some time to wander around the farm and peek at the buildings, gardens, and animals. It took me all of 30 seconds to get cow poo smeared on my leg.


Picture
At 8:00 a.m. we started the walking tour with Joel Salatin and about 900 other guests.

First we visited the pastured broiler shelters. These shelters are also currently housing pullets that just started laying eggs and will soon be replacing old layers in the Eggmobile.

We have studied extensively the Polyface model of raising pastured poultry and were already very familiar with this operation, though it was interesting to witness the perfectly staggered pattern of all the shelters on pasture. We currently have one shelter that is nearly identical to those shown here, only 60% the size.
Picture
Picture
One helpful bit of information we gathered is that these shelters are held together by a wire that runs across the ground, halfway through the length of the shelter connecting the two sides. We use a 2'x2' for this same purpose but have had problems getting chicks stuck under the 2'x2' when we are trying to move the shelter. The wire also has the added benefit of cutting down on the overall weight of the structure.

The next stop on the walking tour was a scenic 15-minute hike across a walking bridge and up the hill to visit the cattle. The cattle are contained by 2 strands of electric wire in a long, narrow paddock. They are moved to a new paddock every day. It sounds like a fairly simple operation of moving the stakes, running the wires, moving the basic shade structure, and calling over the cattle (who are eager to move to a fresh "salad bar").

Joel Salatin considers himself to be a grass farmer. His goal at Polyface is to properly manage the pasture by introducing cattle to pasture when the length of the grass is in its "teenage" stage--not too short and not too long, and where grazing results in rapid regrowth. The paddock size should be just right so as to graze every bit of pasture once. If there are lots of areas that are left ungrazed, the paddock size is too large, and if there are areas that are grazed a second time and are too short, then the area is too small.
The "Eggmobile" always follows behind the cattle. Layers in this system are free-ranging birds that earn their keep on the farm by working as the pasture sanitation crew. They scratch out the cow patties to help even out the manure load on the pasture and they gobble up bugs, worms, and fly larvae (maggots). The Eggmobile is always three days behind the cattle specifically because fly larvae turn into flies in four days. Eggs from these birds are just a bonus.
For some reason it just really tickled me to watch the free-ranging layers out amongst us, scratching for bugs and totally oblivious to the 900 people standing around.
The Millennium Feathernet is a large structure at Polyface that houses chicken layers whose purpose is to produce eggs. The large structure is surrounded by a very large electric poultry net and the entire paddock is moved every three days. We use a scaled-down version of this same model for our layers.
Next, we visited the turkeys on pasture, which are raised in a similar system as the chicken layers. They have a very simple shelter for roosting and an electric poultry net for "free-ranging" that is moved every few days. We learned that turkeys are very sensitive and prone to illness and death while in the brooder during the first several weeks of life, but after seven weeks of age they are hardy birds that can tolerate a wide range of weather conditions on pasture.
Picture
Right next to the turkeys is the simple barn that houses cows in the winter and pigs in the spring. The barn is completely open on one side and has many open areas to allow great ventilation for the animals. The cattle are fed hay in the harshest winter months and are kept on a deep straw bedding. As the cattle add manure, more layers of straw and corn are added to the bedding. The deep carbon bedding keeps the cattle dry and healthy, and the corn slowly ferments in the anaerobic bedding. As soon as the cattle are put out to pasture in the spring, pigs are moved in. They root through the bedding digging for the fermented corn, aerating the litter in the process. The bedding is then turned into a nice compost which increases the farm's fertility. Polyface originally acquired pigs with the intention of using their "pigaerator" qualities. Pork was just a delicious bonus.
Pigs are also kept in wooded paddocks and are rotated every 5-10 days. In order to consistently monitor the amount of animal pressure on this land, the determination of when to move the pigs is simply based on when their feeder runs out.

As the pigs have rooted around in the paddocks they have cleared areas in the previously-forested land, which has naturally filled in with grasses, herbs, and weeds. Joel Salatin referred to this area as a pig savannah. What really impressed us was the complete lack of pig smell; it was a beautiful area that had no odor whatsoever.
Picture
The tour ended right before lunch. The rest of our day spent at the Polyface Farms Field Day will be included in Part 2.

- Diana
2 Comments

Meet Charlie--The Newest Member of the Flock

7/13/2014

1 Comment

 
Picture
We have been quite surprised that out of the 30 pullets we purchased as future laying hens, none of them have turned out to be roosters. Everyone told us to hold off getting a rooster because two or three of the "pullets" would wind up being cockerels, but that has not been the case. Either that, or we have a cockerel that has failed to display any rooster-type qualities yet. 

We were really hoping to have at least one rooster so that we could hatch our own eggs at some point. So, when we noticed a handsome young rooster listed for sale on Craigslist, we decided to snatch him up. The person selling Charlie (I decided to name him "Charlie" the moment I saw him) had only had him for three weeks but said that he was a year old. He also said that Charlie was a barnyard rooster (meaning he has a little bit of everything), but we think it looks like he does have some Brown Red Ameraucana in him. Either way, he is definitely a good-looking bird. It is hard to see in the pictures, but his tail feathers have a beautiful, iridescent blue-green sheen when the light hits them. 
Picture
We have been nervous about how bothersome the inevitable early-morning crowing would be, but honestly we cannot hear him at all from inside the house, and (hopefully) neither can the neighbors. On the contrary, we have actually enjoyed listening to the distant crowing while we are outside working. It really adds to the ambiance and it feels like we are out at a farm. Fingers are crossed that his crowing will continue to be a non-issue.

Currently Charlie is being housed in Baxter's dog cage. I took out the bottom of the cage and bungee-strapped it to the top to act like a roof. He will be in quarantine for four weeks until we can be sure that he is completely healthy and won't infect our otherwise happy and healthy flock of pullets. He can see the pullets from his cage alongside the garage, though, and as soon as I let them out of their coop in the morning he really starts crowing away. I am hoping to get the pullets used to him very gradually so that it will be a smooth transition for him to join the flock later on.
Picture
In the meantime, our older group of pullets are just over 18 weeks old, so we really hope to find our first egg in the next month or so. We can't wait!

- Diana
1 Comment

Update on Beehives and Ants

7/12/2014

0 Comments

 
Ants have started to take over the beehives. At first, we just left them alone because we had been told that bees could deal with ants on their own. Eventually, though, it appeared as if the ants had completely moved in to the west hive. There were ants completely covering a few of the top bars and you could see ant eggs everywhere as well, so we decided to do what we could to help.

First, we simply scraped out as many of the ants and eggs as we could.
Then, we sprinkled cinnamon between the top covers of the beehives and all over the table on which the hives are sitting. Apparently ants abhor cinnamon and will avoid it at all costs, yet it doesn't seem to bother the bees too much.

We also pulled away all the weeds around the hive so that any new ants are forced to enter the beehive by crawling up one of the table legs. We also sprinkled cinnamon on the ground around the legs of the hives and smeared petroleum jelly around each of the four legs of the beehives to trap the ants. Our hope is that we gave the honeybees enough of a head start to allow them to remove the rest (or at least most) of the ants on their own. 

UPDATE: I did not notice any ant activity during a cursory check of the outside of the hives a few days later. (We don't like to bother the bees by opening the hives any more than necessary.)

During the same hive inspection when we were removing ants, we confirmed that we did lose a swarm of bees from the east beehive. A week or so earlier we had seen swarm cells in that hive (capped queen cells that look like peanuts hanging off the edge of the comb). Even though we are still very new to this process, we knew that queen cells in the hive meant that the bees were preparing to swarm. The bees will start to raise a new queen, and before she hatches many bees will take off with the old queen in a swarm until they can find a new home. 

In order to allow the bees to follow their swarming instinct but still capture the bees, we needed to identify the existing queen bee and take her and several other bees to a new hive. Unfortunately, after several hours of searching, we were unable to locate the queen. 

Fast forward to the hive inspection where we removed ants, and it was very clear that the bees had swarmed. There were significantly fewer bees in the beehive and the queen cells were gone. We will give the new queen some time to mate and start laying new eggs before we bother that hive again to check on her progress.

In other news, we did happen to notice the queen bee while removing ants in the West hive, so it was very encouraging to know that we did have the ability to find a queen after all. Below is a picture of us pointing out the queen to our boys.

- Diana
Picture
0 Comments

Why We Ferment Our Chicken Feed

7/7/2014

0 Comments

 
About 2 weeks ago we started fermenting our chicken feed. In all honesty, the initial motivation was to cut down on feed costs without sacrificing nutrition. I remembered stumbling across Garden Betty's article, "Why And How to Ferment Your Chicken Feed" and decided to give it a try for myself. 

There are a lot of great resources that explain the benefits of fermented foods, but I won't go into detail here. Basically, fermented food contains Lactobacillus, which is a live, beneficial bacteria that aids in digestion, is rich in enzyme activity that helps us absorb more nutrients, and leads to a stronger immune system. For more info on the benefits of fermented foods, check out article "Fermented Foods Bubble With Helpful Benefits."

I couldn't find any definitive proof that fermenting the chicken feed cuts down on overall feed costs, but some sources claimed that chickens will eat about 50% less. With all the other benefits, I figured it was worth a try. Since this is our first time raising broilers, we don't have any data to compare, so it is difficult to say if they are eating less, and if so how much less. Also, most of the information available on fermenting chicken feed is directed at layers, not broilers. Since broilers are generally given access to food 24/7 and spend a good chunk of their waking hours eating, it has really been difficult trying to determine how much food to give them. The benefits of fermented food diminish quickly, so I have been feeding them fresh feed 5-6 times a day. Every day they just get a couple scoopfuls more than the day before.

If we end up with underweight birds at our processing day next week, then we will know that they weren't receiving enough food and will have to make adjustments next time. I have also decided to start feeding the chickens fermented feed only in the morning at night, and then go back to offering them their dry food free-choice throughout the day. First of all, it is too much work to feed them every couple of hours, and secondly, I believe everything is best in moderation, so feeding the chickens solely fermented food may not be the best choice. On the other hand, the choice to reduce fermented feed has nothing to do with observation, because the chickens look fuller and healthier than ever!
To start we just filled up the fermentation bin halfway or so with the dry chicken mash, then covered it with several inches of well water (it needs to be chlorine free), and stirred. The feed was already bubbling away 24 hours later. Now we just scoop out the feed with a slotted spoon and fill the 5-gallon bucket to take to the chickens. I put a few more scoops of dry feed in the bin, cover it with more water, stir again, and cover. I am constantly subtracting and adding to the same bin so that it is never empty. That way the bacteria will stay alive and happy--as long as it is stirred regularly and kept covered with water.

- Diana
0 Comments

Baby Chicks and Meal Worms

6/8/2014

0 Comments

 
Who wouldn't want to watch baby chicks fighting over meal worm treats?  If you were a chick who found the cache of meal worms, wouldn't you quietly eat them all up instead of alarming the rest of them? 

- Trevor
0 Comments

If You Build It . . . It's Usually Cheaper!

6/8/2014

0 Comments

 
As we endeavored on this farm, one of our goals was to utilize scraps and repurpose random things into the items that we needed.  This hasn't always been the case as some things were needed "right now" and a trip to TSC worked better than trying to build chick feeders at that particular time.  However, looking around there are a number of interesting builds on the property that have come at almost no cost, minimal cost, or at a cost far less than what one could have purchased the originals.  Perhaps some of this post is pride, but also a chance to help others move past their commercial addictions and use their creativity to "MacGyver" things with the items one has at hand.  When you succeed, its quite a sense of accomplishment.
Bee projects were a combination of scrap and new melded together in a good way.  Hives built by myself and my dad this winter.  Bee feeder thrown together with scrap by me.  Tables by me.  Overall, not bad considering bee feeders are $25 and top bar bee hives are much much more!  We love Christy's bees, but we can build the rest!
The above pics are associated with the chicken tractor and the hens/pullets.  A lot of new, but a lot of repurposed and invented things.  Chicken tractor is mostly based upon the plans of Harvey Ussery.  With the brooder, we also repurposed a broken baby gate for a lid and the other lid was a divider from a dog kennel.  Not pictured, but I just made a chicken feeder with a "found" bucket that I drilled holes in the bottom and then glued that to the bottom of a cheap laundry basket with the top 3/4 cut off.  It looks similar to this, just without a garbage bucket, but a standard five gallon bucket.
More chicken stuff thrown together at the last minute . . . the best way!
Broiler pen and accessories.  Pen frame was all new, treated wood and new screws.  Some pics of construction.  Most of it was 1" 2x6s that were ripped.  Found some plans online for Salatin-style pens and made it 6' x 12' instead of 10' x 12'.  Framing was pretty much to plan.  Chicken wire was scraps and a roll found in under the work bench at my dads.  Steel was leftover from a building and was free!  Used leftover screws to connect it together, so that was good.  I have this pickle jar full of extra screws that finally came in handy.  Small changes is the framing under the door for stability and added another stabilizer beam on the back to make the steel sturdier.  Salatin-style pens sit flush on the ground and require a dolly to move.  These are often made of steel tubing like this.  While I'm sure his is very sturdy, why not repurpose a seed rack.  HUH?  Well, we took a leftover seed rack, cut off one set of legs on back, found a steel rod that went through some old lawnmower deck wheels and wired that on for now.  Then, we smashed the remaining feet flat for ease of sliding and added buffers to keep the pen off the wheels.  Frankly, we didn't think it would be sturdy enough.  WRONG!  It works like a charm.  This was definitely a Trent Grice creation.  The last pic is our broiler feeder.  We cut some scrap tile and nailed it to a leftover, weathered deck board, added scrap for a handle.  It needs stabilizer feet, which I was going to do before my foot exploded.  However, what do you use for end caps?  Why empty worm dishes of course.  They fit perfectly in the tile and slid nicely into the groove.  This a cool build for sure.
Picture
This looks like a pile of rocks, which it is.  However, I'm excited for this one.  This is the foundation for our future shed.  The stones are the limestone strippings from my father-in-law's driveway after he had it flattened in preparation for his asphalt driveway.  I also got three other loads on my driveway to help some trouble spots.  While this is cool, I'm more excited for the shed that will be built.  Walls are expected to be old plant display tables, siding will be leftover steel siding/roofing, base beams are treated 4x6's that are laying around my dad's place. We will try to use other "found" stuff as well as we search for leftover windows, doors, etc.  The plans are in my head, but hopefully on this foundation by the end of the year.  The shed in the back was just saved from my brother-in-law's place as he almost tore it apart for scrap.  Not sure what we'll do with it yet, but it's still good and sturdy.  I guess it's like 40 years old.  It was pretty easy getting it on the trailer.  I sat in the hammock and watched my dad and brother-in-law do it.  I had to keep my foot up.  What did it cost?  Sounds like it may cost us some chickens.

Picture
I have a post on the "hugel" mound, but this is also one of the cool builds on the property.  I was going to dig this by hand, so I'm glad I used the tractor when it was here.  The woody material is brush and tree branches we had for free.  Top soil was originally in the previous owner's raised bed garden that I forgot about and the mulch top layer is free wood chips from tree trimmers.

While this is a small breakdown of some of the stuff that we are doing on the farm, I also shared this to show that if you look around, most anybody can get started on projects.  We don't need to go and buy everything.  Sure, not everybody has a bunch of tools or woodworking know how, but the worst thing you can do is not try to build it.  You learn a lot during the process.  I look forward to "MacGyvering" more stuff as we go along

- Trevor
0 Comments

Chickens Chickens Everywhere

6/8/2014

0 Comments

 
Picture
Most of you have been introduced to our first fifteen egg-laying ladies.  No eggs yet and not expected for another 6 weeks or so.  They are enjoying their time out on pasture, enjoying their chicken tractor and love being in the compost area.  We do throw some food on the pile, but they will spend a lot of their time on this pile getting bugs and other delicacies.  We will be putting them to work soon as we have decided not to utilize our second garden spot as the soil was too low in nitrogen and rock hard clay.  We sowed a number of seeds on the plot (i.e. buckwheat, mangles, clover, field peas, "soil buster" radishes and others) to work on breaking up the soil and adding nitrogen.  We then covered it in mulch, which will hopefully break down a bit and add some topsoil to the mix.  In a couple of weeks, the pullets will be in paddocks on the garden and they will get to work eating the seeds and greens and dropping their own nitrogen all over the place.  If all goes well, we will have much better soil ready to go for next year.

Because we are crazy, we felt this was not enough.  The chicken tractor has enough roost space for over thirty, so why not?  We decided that in addition to getting 50 or so meat birds, let's get a few more pullets.  So we have added fifteen more ladies to the bunch for a total of thirty.  They were already 5 weeks old, so we saved on brooder time and feed and only kept them in for a week before we tested them out in Baxter's dog kennel.  We then moved that kennel in with the original fifteen pullets to help with them getting acclimated before letting them out.  They were small and they would go in and out of the electronet fencing.  Not to mention, they continuously get bullied by the older pullets.  That's what they call it a "pecking order."  Due to age differences, we only got Black Star/Black Sex Links and Araucanas/Easter Egg Layers.  The Silver-Laced Wyandottes at the hatchery were much younger than the other two breeds.
Like I said before, we also got 55 meat or broiler chicks.  The hope was to get 50+ Cornish Cross birds, but Duck 'N' Coop Hatchery, where we get them from, did not have enough.  So some of these chicks are also Freedom Rangers (they are the more brown looking chicks).  
We have lost four of these chicks through the process of brooding.  Expected losses should have been more like two, so we are analyzing what we may have been doing wrong.  One thing that has helped is Diana found an excellent organic feed from Raub-Rae Farms in Brown City, MI.  This feed just smells good and the chicks loved it when we gave it to them.  Prior to this, we were feeding them Nutrena feed from TSC.  It was the best we could find that did not have antibiotics in it. We will be raising these chicks in a Salatin-style manner following their brood time.  Joel Salatin has revolutionized pastured poultry by putting his meat birds on pasture, with food supplements, and raising them up to butcher weight in only 6-8 weeks.  His process calls for 80-90 birds in a 10' x 12' pen.  
Picture
We decided to do a "half-size" Salatin pen of 6' x 12' to start off.  We got the chicks in there yesterday and despite their initial fear of sunshine, they eventually wandered over to their food and water.  Check out the forthcoming "builds" blog post as I go through the construction of this pen and how it works.  We placed the pen on our front lawn as the lawn there is good for now, but will burn up as the summer heat commences. By that time these guys will be in the freezer, or pretty close and we will put the next batch on a better stretch of lawn.  If you would like to snatch up some of these birds, just give us a call.  We are not keeping all fifty and would be happy to bring in our first dividends for the farm.

Final total, 15 older pullets, 15 younger pullets (all thirty out on pasture) and 52 broiler/meat chicks means chickens chickens everywhere!    

- Trevor
0 Comments

Gardens:  Time to Eat!

6/8/2014

0 Comments

 
I just had a salad for dinner today.  It was delicious and it had everything to do with the fresh greens from the garden.  Lettuce and spinach are doing well and we are harvesting whenever possible.  Here is a pic of our front raised bed garden, which was established last year.
Picture
This was our second raised bed garden as the first one was constructed with leftover treated wood and was on the site of what we are now calling the "back garden."  We are reworking this area for next year.  I built these boxes last spring with untreated wood and followed the methods of "Square Foot Gardening" by Mel Bartholomew.  We did make some "Mel's Mix," from amendments purchased from Will's Greenhouse in Vassar, MI.  One-third compost, one-third vermiculite, one-third peat moss.  We had a good year last year and "freshened up" the boxes this spring.  The silver trellises are electrical conduit I bent and connected together.  Diana tied on the nylon trellis netting and they stand with the help of half buried reinforcement bars (rebar) that fit perfectly in the conduit.  Cinder blocks were used to make a usable boundary, but this has not been overly successful as we had hoped to grow onions and garlic in them.  We are still trying and won't give up on it yet.  Some flowers have done well in them.  The boxes to the left are leftover treated boxes from the back garden.  They have normal soil in them and will only be used for flowers.  

Changes this year include a three foot polyfence as the rabbits ate our beets last year and had already started on some of our greens.  Corners are secured on four foot medium grade fence posts and the yellow poles are fiberglass driveway markers that are woven through the fence for stability.  I made the gates out of ripped 2x4s that were left over from the chicken tractor.  No hinges, just attached with some wire that was repurposed from the old garden boxes.  The gates sit on the cinder blocks and have polyfence hanging down to keep out the rascally rabbits.  One problem: the entire garden sits on weed block.  Not a problem last year and did work as it was a lush front lawn that we killed with vinegar and dish soap.  However, if we were to do it again, we would use the "lasagna" method.  I have seen people use soaked cardboard and newspaper, which I think would have worked and created a natural, organic solution to the weed block.  Oh well, I'm not going to rip it out until those boxes rot out.  


Below are more pics of the plants, most of which have been either direct sown right into the soil, or started briefly indoors and in our small greenhouse.  This made a huge difference this year with our starters as they did not get leggy, as they have the past two years when starting them in front of a window.
Picture
In this picture you can see white flags in the middle of a lawn (well, it was a lawn and hopefully will morph into something more in the coming years).  Each flag is a small fruit or nut tree.  Peaches, nectarines, plums, plumcots, apricots, chestnuts, hazelnuts, and walnuts are there, just to name a few.  Some currants and elderberries are in there as well.  We will be continuing to add more to this "food forest" as we go and transition this from an annoying yard to mow, to a low upkeep production area.  As the trees grow, we will guild other plants with them so they will grow in symbiosis.  Until then, mowing this annoying lawn actually got a whole lot harder . . . for now.

As we ventured around and learned about the plants on the property, we found a number of rogue volunteer plants that ended up becoming surprises.  After clearing the front overgrown area, we found wild raspberries growing in there.  I guess this makes it a good place to plant berries, so that is what we did.  We cleared the back property of all scrub brush/autumn olives so we could pasture chickens and almost pulled out a hidden apple tree.  Thankfully we noticed and it got to live and was trimmed this spring to start growing in a beneficial manner.
Picture
Finally, we have this year's project--next year's garden.  As noted in another post, we had hoped to plant this area for our market garden.  Upon further investigation, we decided to wait and improve it.  It was low in nitrogen and high in hardpan clay.  So we sowed seeds to break up the soil and add nitrogen and also plants that chickens love.  In a few weeks they will be on sections of this garden adding their "nitrogen" to the mix.  Asparagus in the middle has been doing very well and the black color is actually organic hardwood mulch from Grice's Tree Farm and Nursery. Here is to next year and all the bounty this garden may produce.  Our plan is to approach this garden in a format similar to Jean-Martin Fortier, who wrote "The Market Gardener."

There is a lot going on regarding gardens, not to mention the "hugel" mound.  Perhaps we have bit off more than we can chew at times, but it's all getting done and for sure we are avoiding the moniker "analysis paralysis" as we are "doing" a lot and are willing to learn (make mistakes) along the way.

- Trevor
0 Comments
<<Previous
Forward>>
    Picture

    ABOUT

    Dandelion Hills is a family-owned farm in Caro, Michigan, established to provide beyond-organic food to its owners and the local community while improving the soil quality.

    Categories

    All
    Bees
    Chickens
    Continuing Ed.
    DIY
    Ducks
    Food
    Gardening
    Geese
    Homesteading Tips
    Maple Syrup
    Our Stories
    Preserving Food
    Quail
    Trees
    Turkeys
    Weeds

    Dandelion Hills

    Archives

    May 2016
    February 2016
    January 2016
    July 2015
    June 2015
    May 2015
    February 2015
    January 2015
    December 2014
    September 2014
    July 2014
    June 2014
    May 2014
    April 2014
    March 2014

    TAGS

    Dandelions Hills Farm Caro Michigan Local Permaculture Sustainable Ecological Natural Beyond Organic Biodiiversity Regenerative Family Farm Mini-farm Farmstead Homestead Pastured Eggs Chicks Chickens Poultry Gardening Honey Bees Flowers Herbs Ducks Turkeys Geese Quail Market Garden
Powered by Create your own unique website with customizable templates.